Skalp Studio User Guide for SketchUp 2027
Last reviewed: 29 October 2026. Language: English.
Turn your SketchUp model into section drawings with hatches, line weights and annotations, then send your drawings to LayOut or export them for CAD.
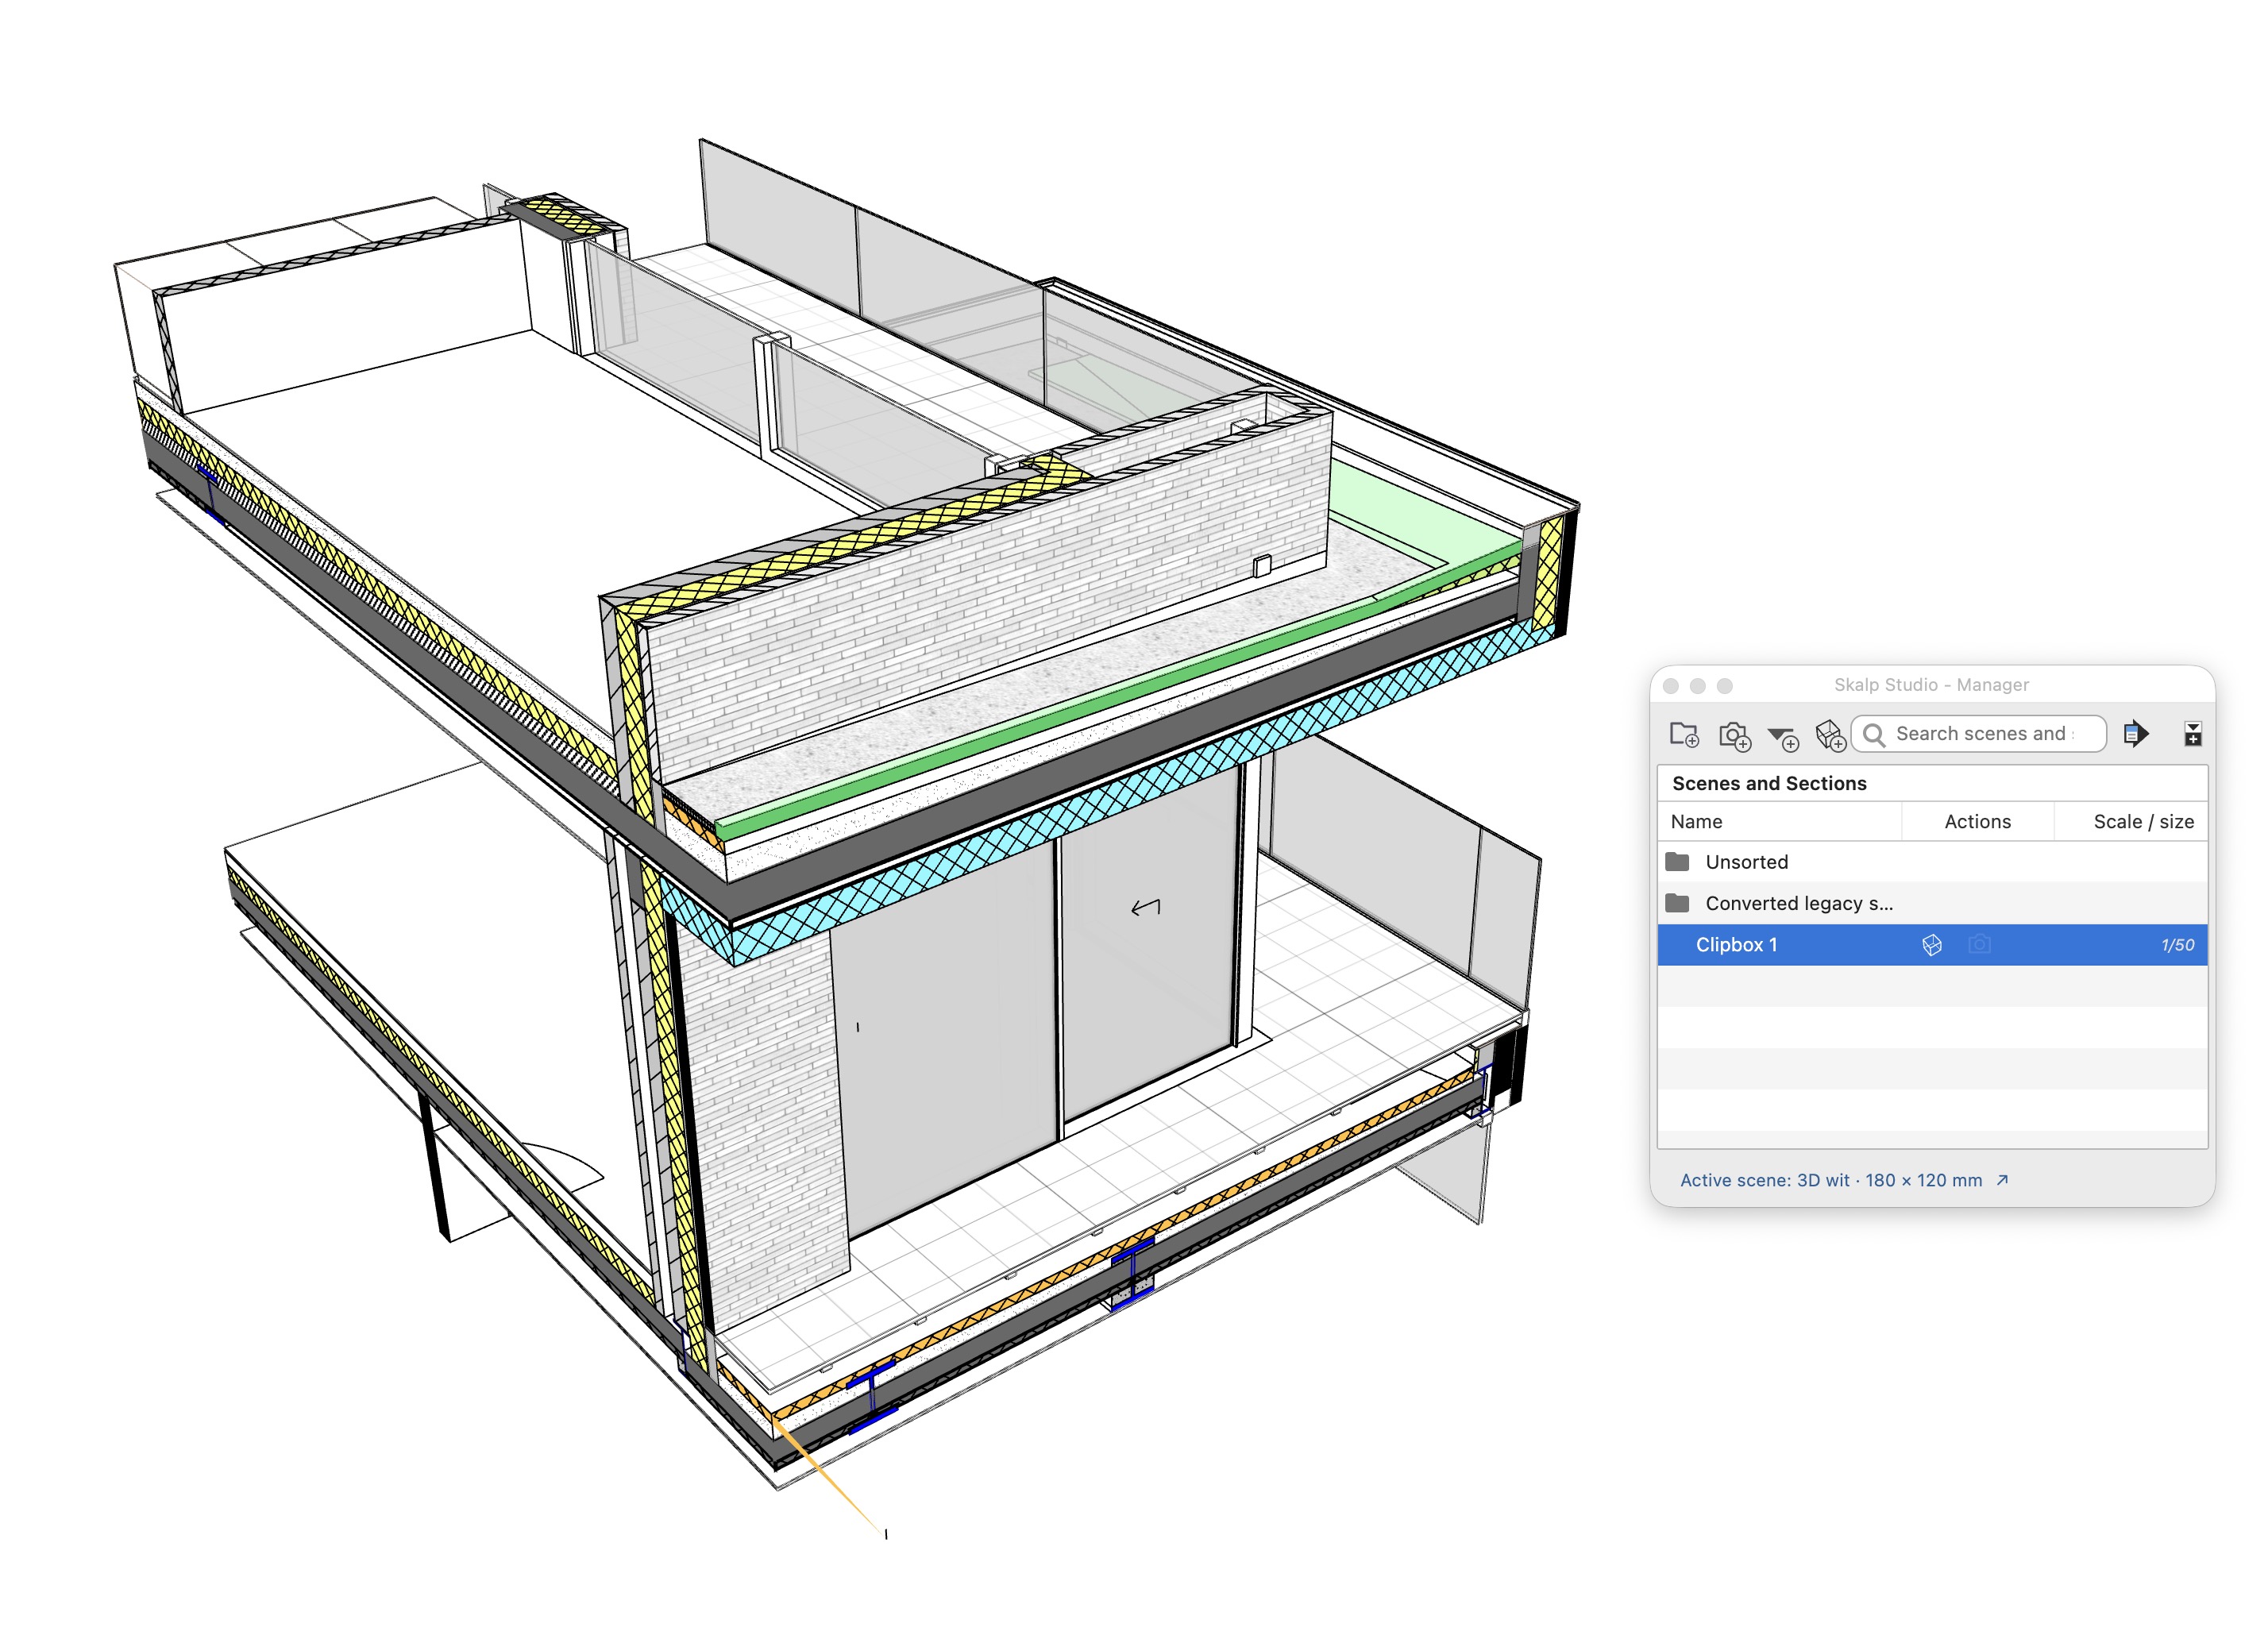
New to Skalp? Start with your first section drawing. Follow the steps with a small model, then continue to send that drawing to LayOut.
Already using Skalp? Use the contents below to find a task. Installation, licences and preferences have their own reference chapter.
Release status: The first Skalp Studio 2027 release is still in preparation. This guide describes implemented behavior in the current source; it does not announce a released package or certify every workflow. Check supported platforms and current limits, especially for Windows. Problems corrected during development are not listed as problems in a released version.
Contents
| What do you want to do? | Start here |
|---|---|
| Create a first drawing | Getting started |
| Manage saved views | Scenes and sections |
| Change linework or hatch appearance | Appearance · Materials |
| Add notes or measurements | 2D drawing and annotations |
| Put drawings on sheets | Publishing · Synchronization |
| Export files | CAD · PDF |
| Use a model set up with an older Skalp version | Existing Skalp models |
| Resolve a problem | Troubleshooting · Skalp Support |
Section → Scene → Scale → Materials → LayOut
All chapters
- Getting started — your first section drawing
- Your first drawing — send it to LayOut
- Installation, licences and preferences
- Scenes and sections
- Drawing appearance and scale
- Skalp materials
- Skalp Studio - Solid Tools
- Crop and publication settings
- Section indications
- 2D drawing and annotations
- Publishing to LayOut
- Synchronizing with LayOut
- DXF and DWG export
- Existing Skalp models
- Skalp Support
- Troubleshooting and current limits
Getting started
Goal Create one saved section drawing, choose its scale and apply a hatch. You can complete this first workflow entirely in SketchUp.
Before you begin
- Install the Skalp package for your operating system through SketchUp's Extension Manager, then restart SketchUp. This package requires SketchUp 2027. See installation and supported platforms if Skalp is not installed yet.
- Open a small model containing a solid group or component that a section plane can cut. Save the model before starting.
- Locate the Skalp Studio - Main toolbar. Hover over its buttons to see the command names used in the steps below.
If a command opens Skalp Studio - License, activate with your emailed code and run the command again. See activation for trial and installation details.

Place a section through your model
In Skalp Manager, choose Add section, the third toolbar button (the section symbol with a circled plus). The command returns focus to the model window, so your first click in the model places the plane without a separate activation click. Move the pointer into the model and click to place the plane using SketchUp's native Section Plane tool. You can also start that tool directly from SketchUp. Place and activate the plane through the group or component. If 2D Drawing Mode is active, Add section exits it before starting placement. Starting the tool alone does not create a section or a scene.
Check You can see the model cut open at the plane.
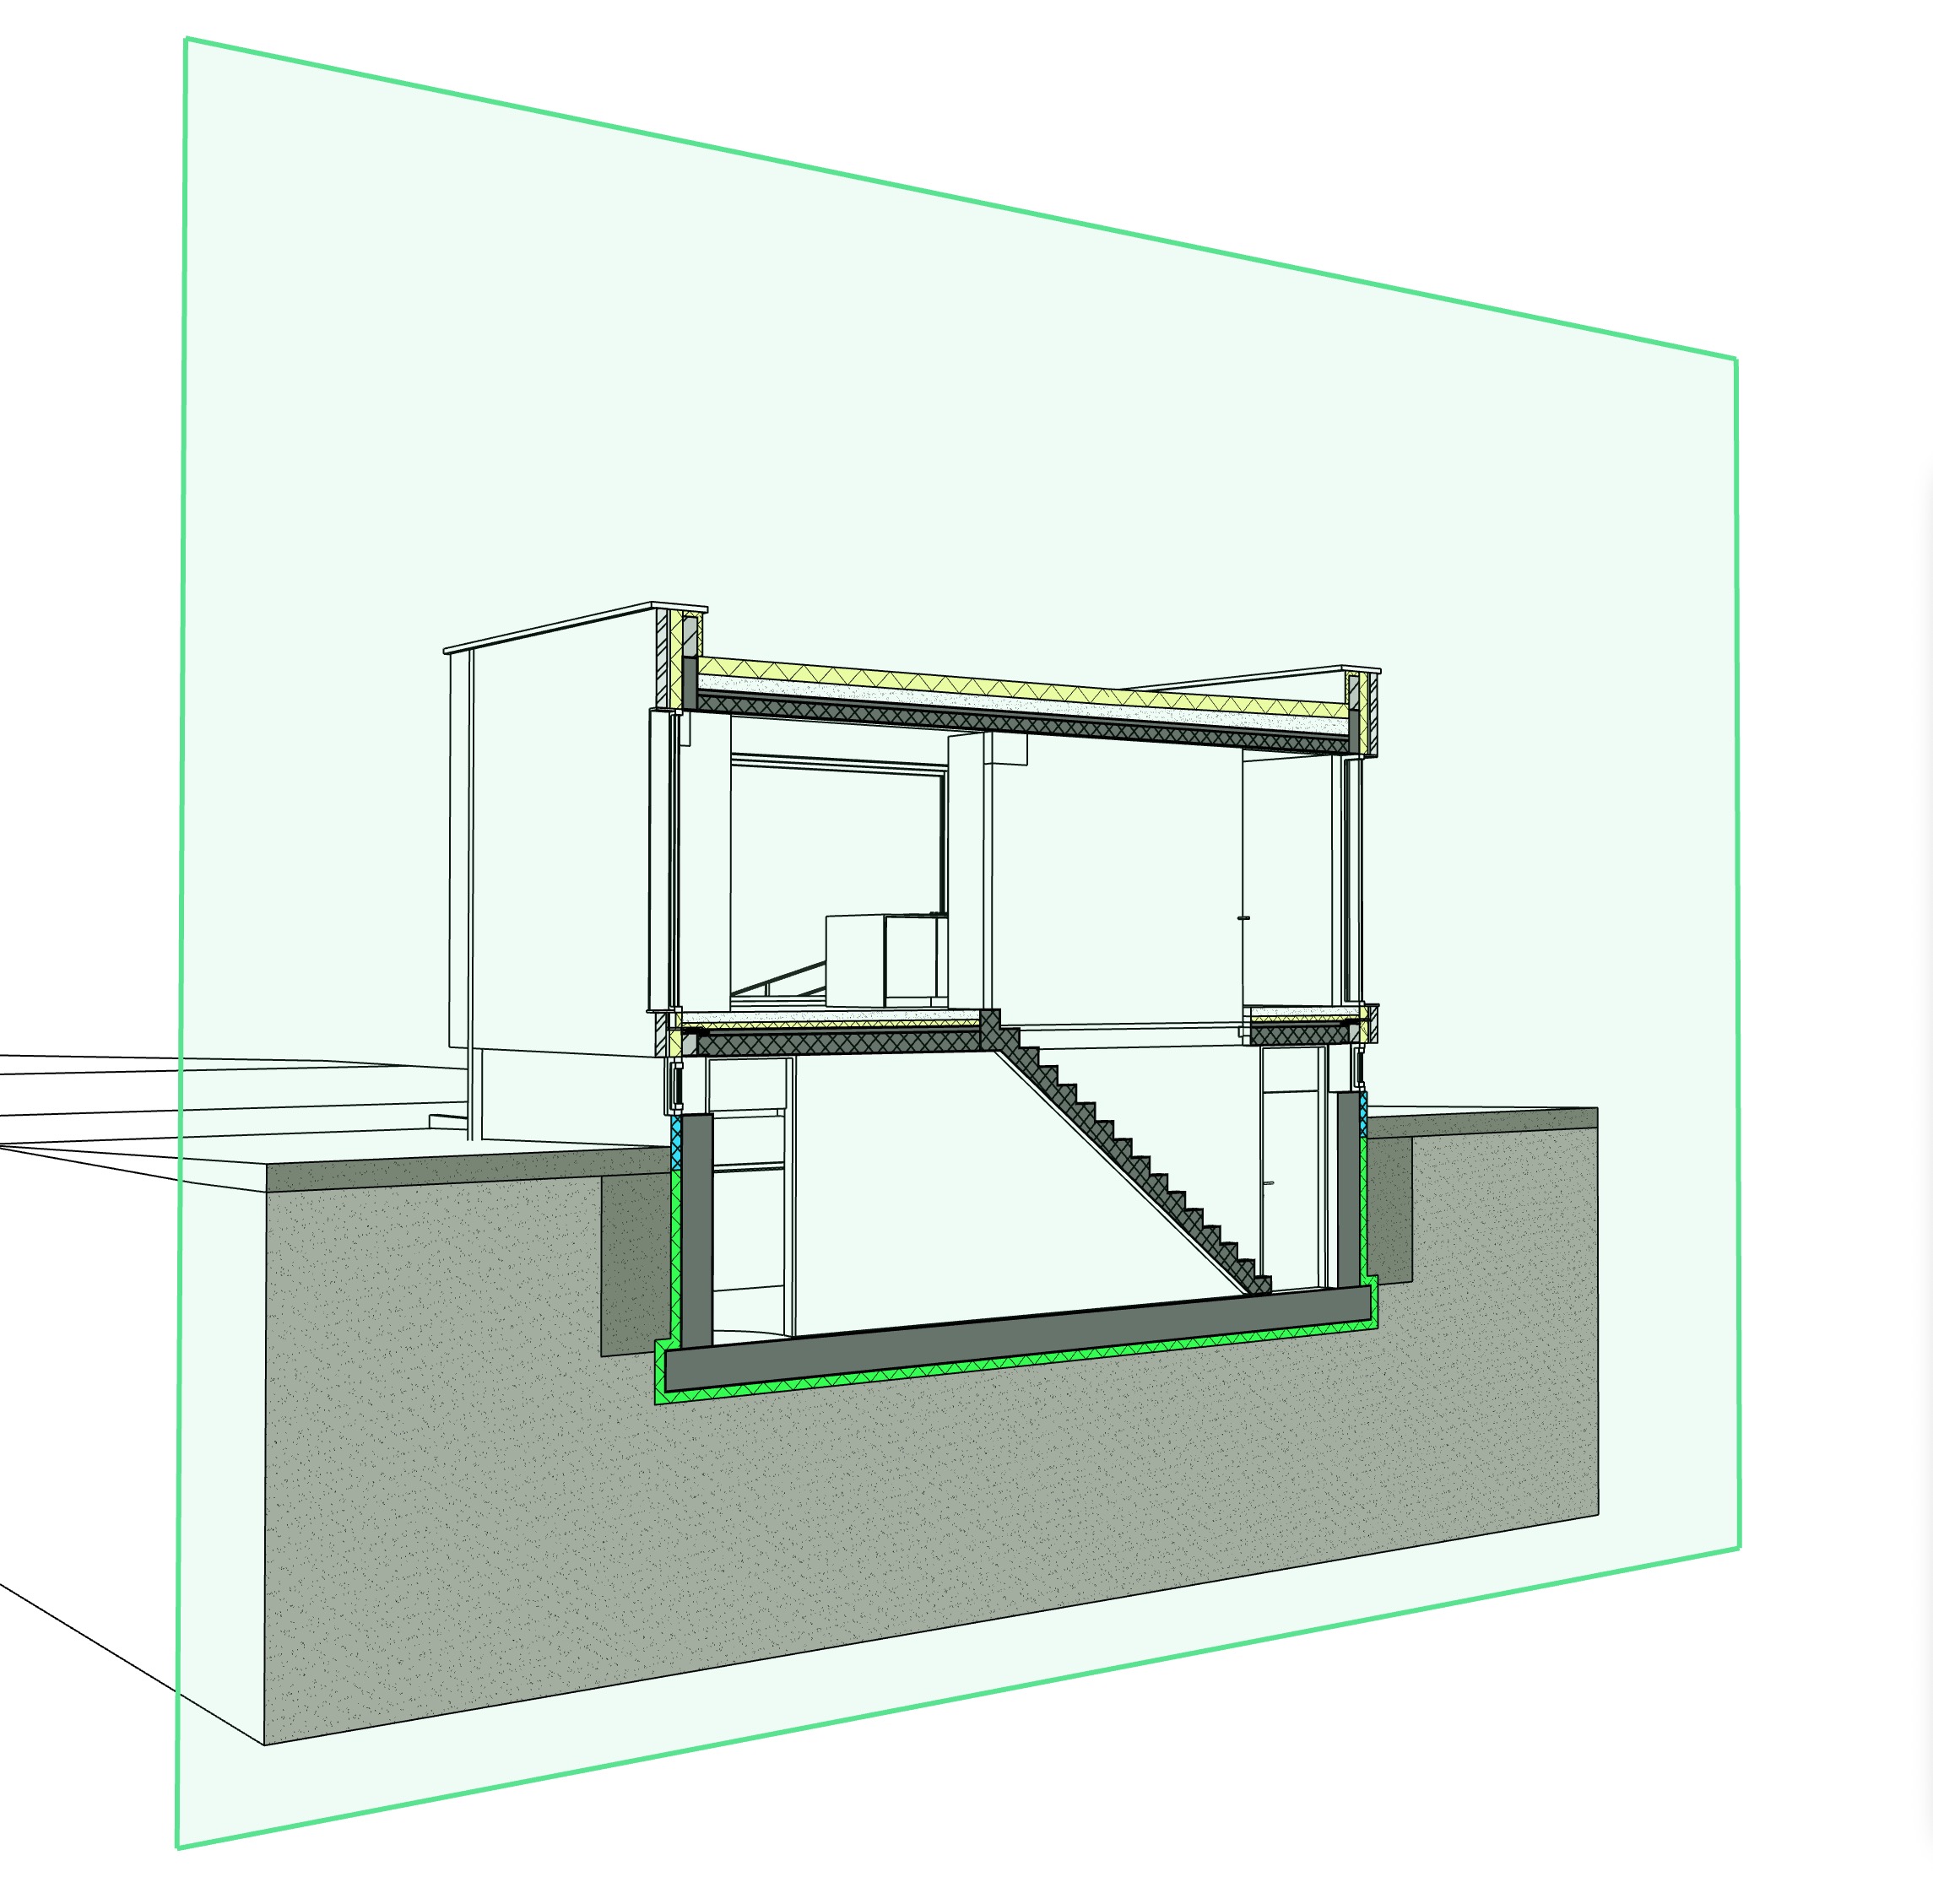
Look straight at the section
Choose Align Section View on the Skalp toolbar. This aligns the camera with the active plane and switches to parallel projection.
Check You see a flat section view. If it faces the wrong way, use Reverse Active Section Plane, then align the view again.
Tip: You can adjust the cut later with Section Plane Slider. For this first drawing, keep the plane where it is.
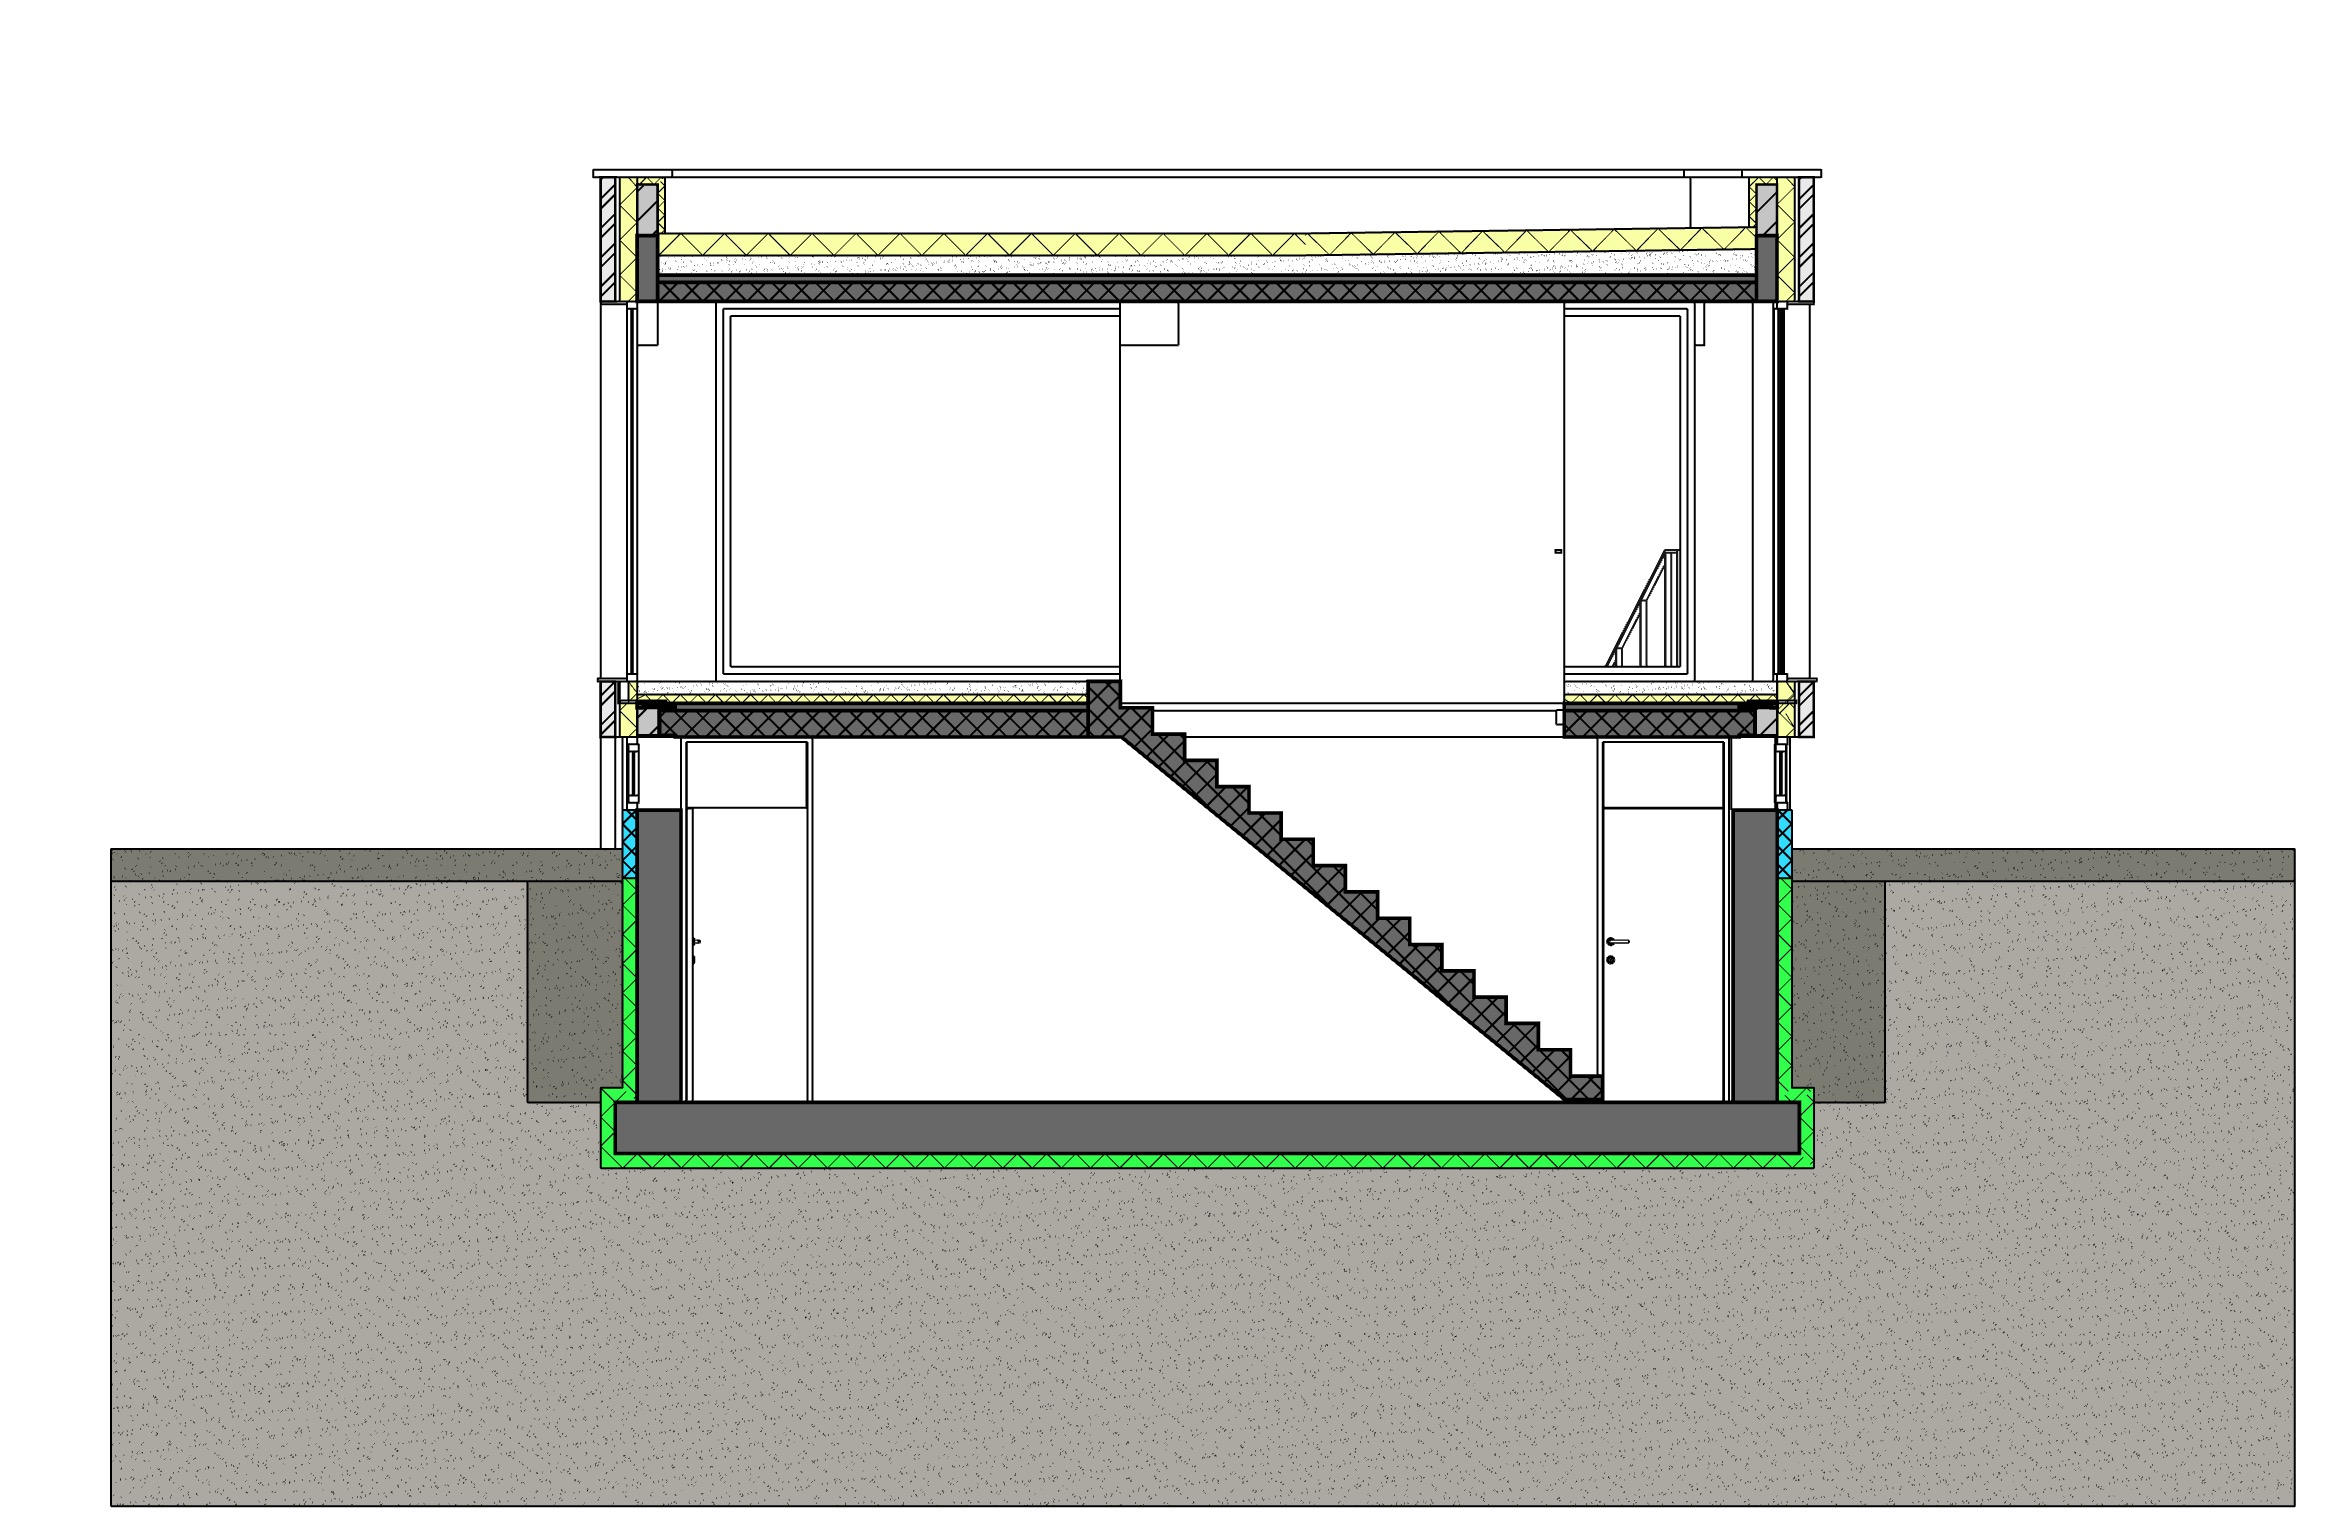
Save the view as a scene
Open Skalp Manager and choose New scene. Give it a recognizable name,
such as Ground floor section.
Check Your named scene appears in the Manager tree.
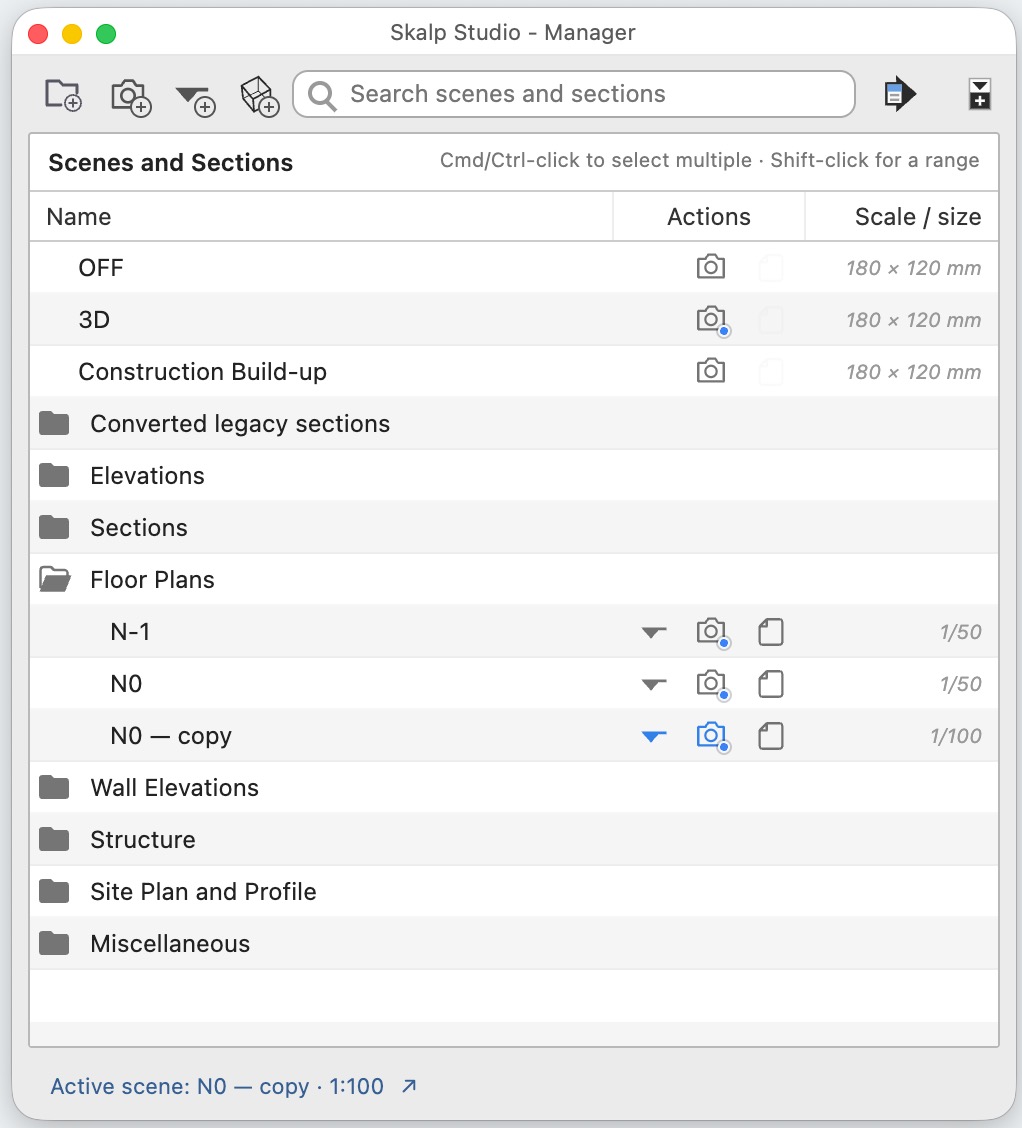
Choose the drawing scale
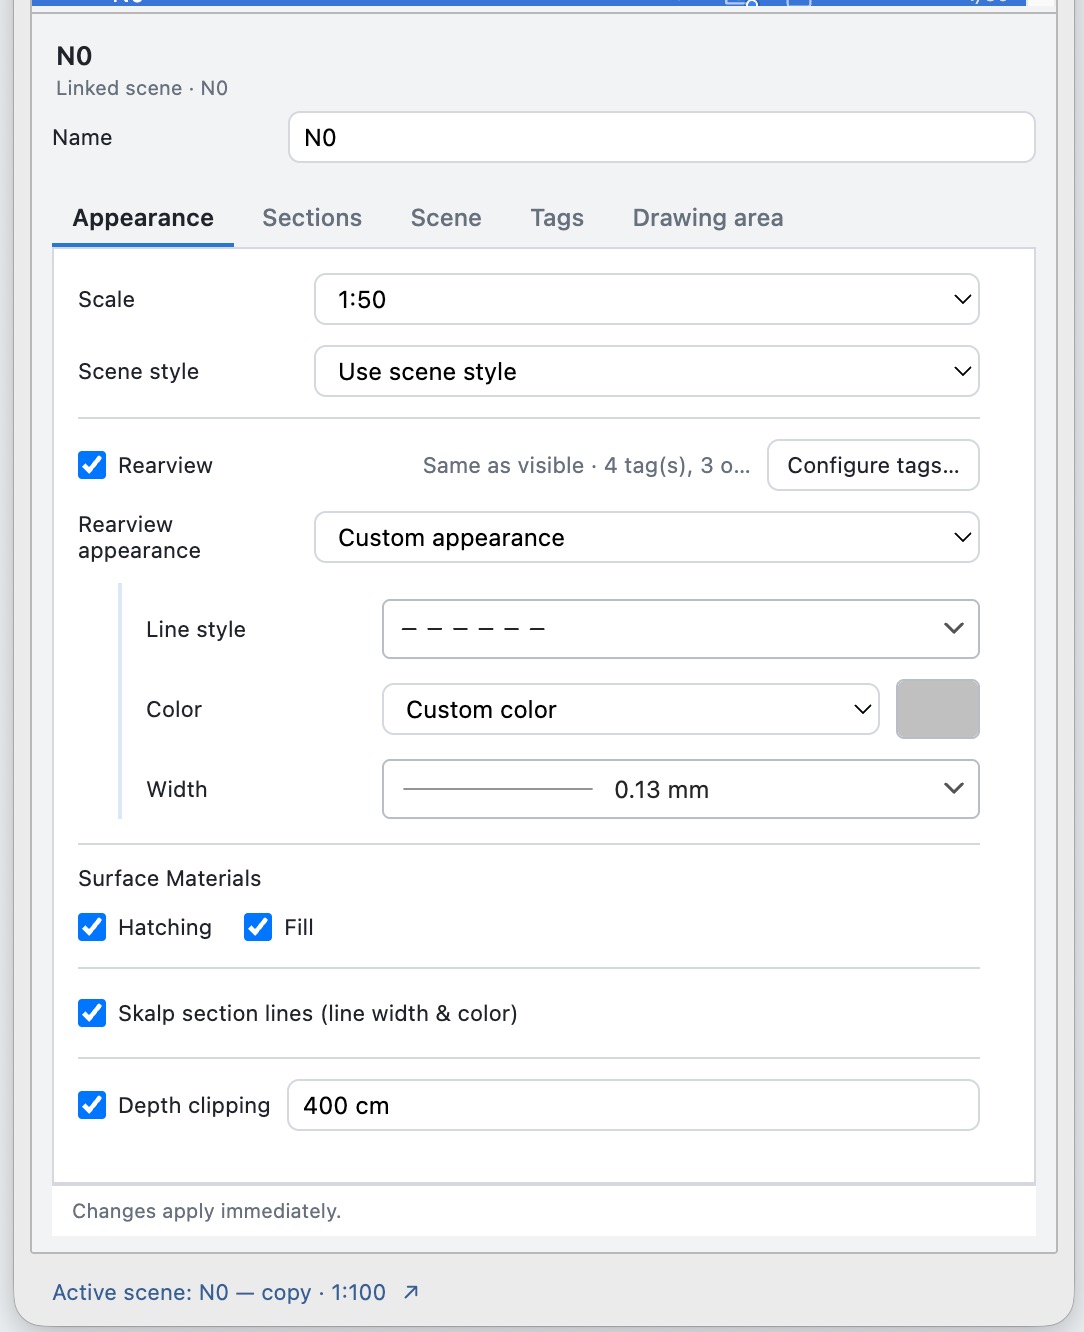
Select your scene's row. On the Appearance tab, set Scale to the scale you intend to use on paper, for example 1:50.
Check The selected drawing shows your chosen scale. Keep the other appearance settings at their current values for this first pass.
Apply a section material
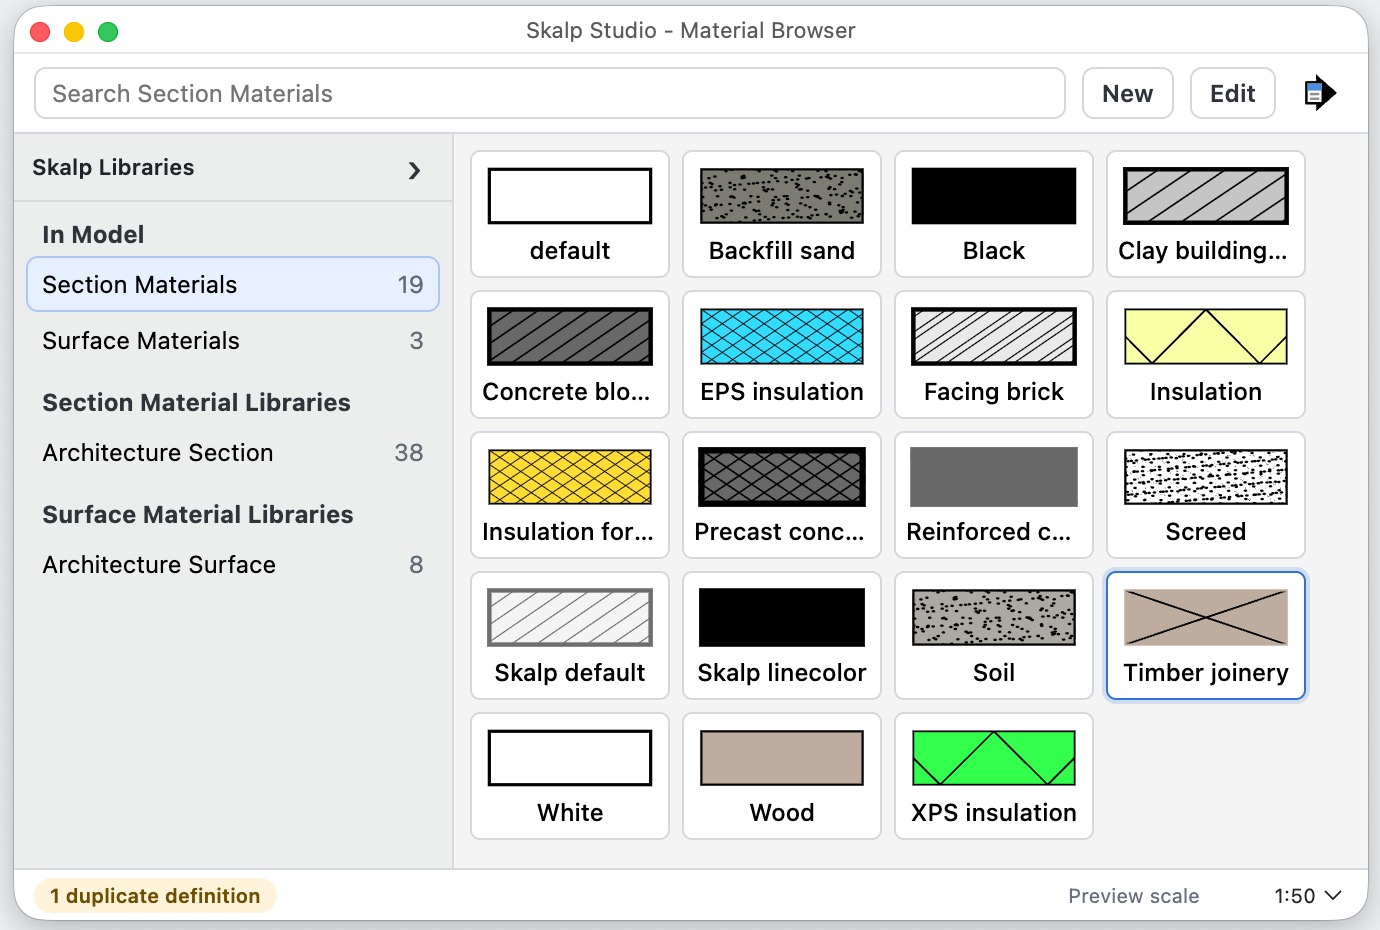
Choose Paint Skalp Materials. In the Material Browser, select a Section Material library and double-click the material you want to use. Click the cut object in the model to assign that Section Material, then press Esc to stop painting.
Check The object's section uses the selected material's fill and hatch. A material without hatch lines can show only a fill; choose a patterned Section Material if you want to see hatching.
Save and check your drawing
Save your SketchUp model. Switch to another view, then double-click your scene in the Manager to return to the section drawing.
Check Your scene returns to its saved view, with the drawing scale and material assignment ready for further work. Skalp stores scene settings and annotations in the source model; most preview linework and authored 2D content appear as overlays rather than loose SketchUp edges and faces.
You now have your first section drawing. Continue with sending it to LayOut, or use Drawing appearance and scale to refine its lines. For repeatable assignments across a larger model, see Editing and assigning materials.
If something does not look right
| What you see | What to check first |
|---|---|
| The model is not cut open | Make sure a native section plane is active and intersects the intended object. |
| The section looks tilted | Choose Align Section View with the intended plane active. |
| Clicking a Manager row does not change the view | Double-click the row to activate the saved scene; a single click only inspects it. |
| Paint opens Surface Materials | To paint sections, activate your section plane, select a Section Material library in the sidebar and double-click the material. Paint remembers your last material family. |
| The expected hatch is missing | Choose a patterned Section Material and assign it to the cut object. See Skalp materials for assignment overrides. |
For other symptoms, see Troubleshooting and current limits or open Skalp Support.
Your first drawing
Goal Place the section drawing you just created on a LayOut page at its chosen scale.
Before you begin: Complete your first section drawing. You need the matching LayOut 2027 integration and a saved LayOut document. These steps apply to the matching macOS and Windows integrations. The shared illustrations use macOS English controls; see supported platforms for verification limits.
Define the drawing area
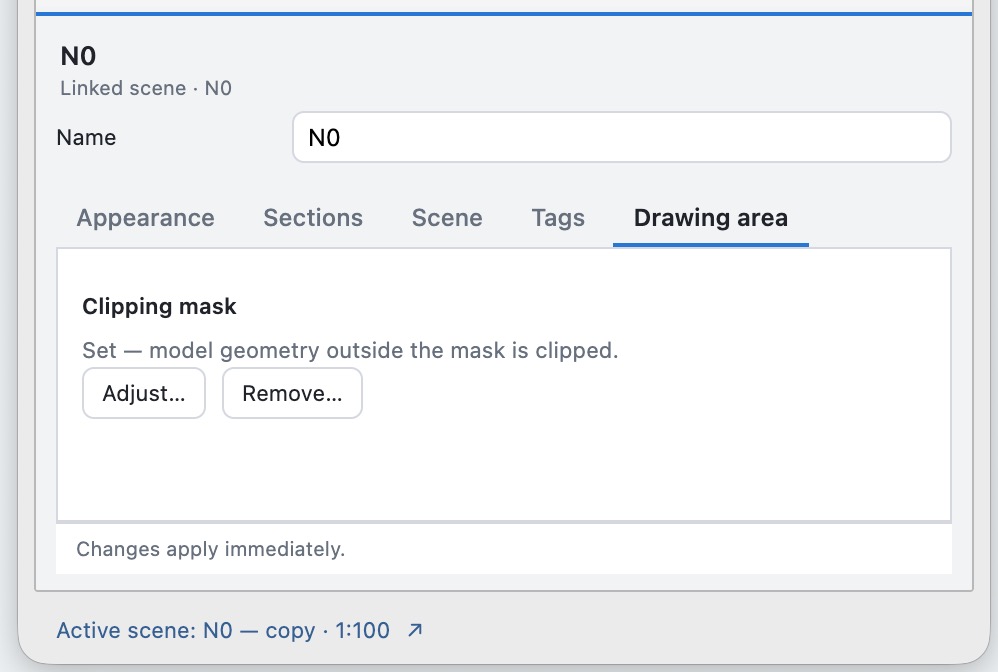
Activate your section scene. In the Manager's Drawing area tab, choose Set… to create its clipping mask. Adjust the corners or edges, then press Enter to save.
Check The mask encloses the part of the section you want on the page. The initial draft is centered at 75% of the current model viewport.
Capture the view
With the intended model view active, choose Capture current view for LayOut. The saved clipping mask defines this scene as a plan; there is no separate publication-inclusion setting.
Check You have captured the view you intend to place in LayOut.
Place it on a LayOut page
Open and save your destination LayOut document. Activate its target page and a non-shared layer. In SketchUp, choose Send to LayOut.
Check Skalp places the active saved view at its configured scale and selects the new placement. Review the page, then save both documents.
Next: add annotations and synchronize
Return to the plan scene in SketchUp, enter 2D Drawing Mode and add your annotations. Choose Sync Drawing with LayOut on the Drawing - Basic toolbar, review the result and save both documents.
Continue with 2D drawing and annotations, Publishing to LayOut and Synchronizing with LayOut for the full workflows.
Installation, licences and preferences
Goal Install the matching build, activate access and choose office defaults.
- Install the macOS or Windows x64 RBZ through SketchUp's Extension Manager.
- Restart SketchUp; install/restart the matching LayOut integration when required.
- In the welcome window, review the licence agreement and activate your licence or request a trial.
- Open Extensions > Skalp Studio > Preferences… for language and defaults.
Check The Skalp Studio - Main toolbar is available. Defaults for new drawings do not generally rewrite existing drawings; global Rearview appearance is an exception for drawings set to follow it.
Find a task: Install · Update · Activate · Manage seats · Preferences
Installation and supported platforms
Choose the matching package
Install the RBZ matching your operating system:
| Platform | Package | LayOut status |
|---|---|---|
| macOS | skalp_studio_2027_macos.rbz |
Matching LayOut 2027 integration is installed when Skalp starts; restart LayOut afterwards. Live acceptance varies by workflow. |
| Windows x64 | skalp_studio_2027_windows_x64.rbz |
The matching companion provides direct publication, drawing layers and explicit Send/Sync by default. The native camera adapter and PDF helper are included. The ordinary installed workflow has passed Send, changed/unchanged Sync, annotation retention, save/reopen, PDF and normal host exit without a development opt-in. Legacy document conversion remains disabled. Broader Windows feature and release acceptance remain separate. |
Power Tools, Tag Tools and Skalp Studio - Solid Tools are integral parts of Skalp. They load with Skalp from its own installation and do not require a separate extension, RBZ or AW-prefixed folder. Update the matching Skalp RBZ and restart SketchUp to update these tools too. If you previously installed the separate Power Tools extension, uninstall that old extension in Extension Manager and restart SketchUp to avoid duplicate toolbars.
Save your documents and restart LayOut after updating its Windows companion. The ordinary Windows Send/Sync workflow has passed on the installed development package without a special environment setting. A representative workflow does not establish full Windows feature parity or production-release approval. The English controls in the macOS illustrations remain the reference for the shared workflow. Windows palette captions have AI-drafted translations with an English fallback; native error details may still appear in English. Unsupported legacy conversion remains unavailable.
This build accepts SketchUp 2027 only. Older/newer SketchUp versions, wrong-platform packages and incomplete manifests are rejected. Install through SketchUp's Extension Manager. You do not need Homebrew or a separate Ruby installation.
Replace Skalp manually with a supplied RBZ
Save your work in SketchUp and LayOut. In SketchUp, choose Extensions > Extension Manager > Install Extension, select the matching RBZ and complete any host confirmation. After replacing an already loaded Skalp installation, fully quit SketchUp (⌘Q on macOS; File > Exit on Windows), then reopen it. Restart LayOut to load its matching companion. Check the Skalp version in Extension Manager after restarting. An old version shown before restarting can still be the version loaded in memory.
In 27.0.019, a manual replacement can finish without a Skalp confirmation. In 27.0.020, manual replacement adds a reminder: The Skalp Studio installation has changed. Restart SketchUp to finish: save your work, quit SketchUp completely, then open it again. It keeps the running version in place until you quit; the reminder does not close SketchUp, save documents or restart automatically. It reports changed installation files, rather than certifying a complete or valid package. This reminder is not included in the immutable .019 download.
In 27.0.020, Skalp restores its toolbars before the LayOut companion installation step, so an error at that step does not leave them absent when SketchUp saves its workspace. After automatic rollback in a fresh process, the restored version is loaded through the normal verification path before the recovery reminder. Its native toolbar identities, positions and hidden states can therefore remain registered. The recovery reminder can still request a restart; save work before quitting. Automated lifecycle checks cover these paths; full update/recovery and toolbar-position acceptance on the affected Mac and on Windows remains pending. These changes are not included in 27.0.019.
Updating Skalp
Use the matching Skalp package supplied for your development build. Skalp checks its own signed release service shortly after SketchUp starts. When a newer compatible version is available, Skalp Studio Update shows the installed and available versions together with the release notes. The installed version's bundled What's new notes also appear at first start after an update, including installation from an RBZ. Choose Continue after reviewing them; closing the window leaves this reminder pending. A changed agreement requires a separate explicit acceptance. Choose Download update, then Install and restart SketchUp after verification. Skalp closes SketchUp, replaces the complete extension outside the running host process and starts SketchUp again; you do not uninstall Skalp or use Install Extension yourself. Save work in every open SketchUp window before choosing the restart action.
If an update reports The Skalp Studio update could not be installed. The previous version remains available., check the installed version after restarting. In released builds through 27.0.020, automatic updates can retry the same failed version on the next start. In Skalp Studio Update, clear Download and install future updates automatically and choose Skip this version before quitting. Remind me later alone does not prevent installation on quit. Keep using the previous version and contact Support; the message alone does not identify the installation cause. See repeated failed updates.
The current development source remembers failed installation versions and excludes them from automatic download and installation, while allowing newer versions. Opening Check for Updates… still allows an explicit retry using Download update followed by Install and restart SketchUp. This protection is not in the immutable 27.0.020 download and has not yet passed affected-Mac or Windows host acceptance.
With automatic updates enabled, the download may already be running when the window opens. In early builds 27.0.006, 27.0.007 and Windows 27.0.008, a window initialization problem can hide the progress and leave Download update looking inactive. Do not repeatedly click or close SketchUp while a download is running. Wait for The update is ready to install. before choosing the restart action. If the status stays blank, contact Support to confirm the download state before retrying; see the progress-display problem. The officially signed 27.0.015 packages include the window-state correction and are offered by the production updater. The old installed updater controls the transfer until that update is installed; the offer alone does not change its window behavior. Complete installed-host acceptance remains separate.
In 27.0.011, with automatic updates disabled, the first Download update action can also schedule installation and restart immediately after verification. Save all work before that action in the existing build. The correction in 27.0.015 restores the separate Install and restart SketchUp action and is available through the production updater. Automated coverage and official package checks pass; complete installed update/restart acceptance remains pending owner testing. See manual update restart.
The updater in 27.0.006 and 27.0.007 can also download much more slowly on macOS than a browser on the same connection. This is a separate client transfer problem, not evidence that the package is still installing. A source correction has passed a live macOS development transfer comparison and is included in the official 27.0.015 packages. The old installed client still performs the first transfer; complete receiving-host update acceptance remains pending. Keep an active transfer open and contact Support if the delay prevents updating; see slow updater downloads.
Current public download
27.0.016 is offered for macOS and Windows on the download page and through the production updater. It includes the macOS worker-authorization correction, copyable calculation errors, automatic current-default hatching and top-of-root Manager insertion. Official package and automated checks pass; receiving-Mac preview and complete installed update/restart acceptance remain pending testing. The old installed updater still controls the first transfer.
27.0.018 is available through the production updater for Alpha and Beta update groups on macOS only. It includes the earlier LayOut bridge startup corrections and a further correction for the native palette exiting before its window appears. Normal-access macOS users, the website downloads and all Windows update groups remain on 27.0.016. Save your work before updating and restart LayOut after the matching SketchUp extension is installed. Official signing, Apple notarization, automated startup and server/download checks pass; palette display on the originally affected Mac remains unverified. See missing palette after a working transfer.
First public beta
The first public build was numbered 27.0.001, with a 30-day full-function beta trial. It is a beta: keep backups and check generated drawings before relying on them. “Beta” on the website describes the current state of completion. It does not identify a separate kind of package. Existing account update access is preserved.
This policy is implemented in the current source. The matching licensing service and updated agreement must be deployed in the documented order before the trial offer is available. Historical alpha installations and issued trials retain their original status and terms. A website beta label does not establish macOS/Windows, LayOut, store or release acceptance.
Version numbers
Versions use 27.minor.build, starting with 27.0.001. Every new build receives the next build number. The build counter continues across minor releases and access stages; it does not reset when a build becomes available to more users. For example, 27.0.002 may first be available to testers and later to everyone without changing its package or number. A newer build might be 27.0.003 or 27.1.004. The same source build has the same number on macOS and Windows. Alpha, beta and normal describe update access, not different builds.
If you have an earlier development alpha numbered 2027.0.0-alpha.*, install a supplied 27.x build manually through SketchUp's Extension Manager. Those older identifiers sort above the new 27.x series, so their automatic updater does not offer this numbering transition. Use the complete signed package for your platform.
Update access and personal tests
Skalp always offers the newest compatible build that your account may receive. The server manages access: alpha users can receive alpha-, beta- and normal-access updates; beta users can receive beta- and normal-access updates; normal users can receive normal-access updates. These categories do not change the package or licence duration. A newer generally available build is also offered to testers, even when their last test build was older.
In the private administration portal, an owner or administrator can open Licences, find the user, and open a Skalp Studio licence. Under Update group, choose Alpha, Beta or Normal user, enter an Audit reason, and choose Review update group. Check the account and group, confirm the change, then choose Save update group. The setting applies to all Skalp Studio licences for that account. A change preserves disabled update access and existing personal offers; it does not change licence rights, billing or trial dates. Analysts can view the group. This administration workflow is deployed on staging and production and has automated HTTP/database coverage. Acceptance in an administrator’s browser remains a separate check.
The owner can make a build available to one test account before a wider rollout. That personal offer does not change anyone else's group or give other users access. The same package can later be made available more widely. A withdrawn offer is no longer available to download. Save work before installing any update.
The server selection and personal-offer policy is deployed. It has automated
server/database and client interaction coverage; a complete installation and restart on a receiving computer is a separate
acceptance check. An older 2027.0.0-alpha.* installation still needs the one-time
manual installation described above before a numeric-build updater test.
Install the matching supplied RBZ through SketchUp's Extension Manager, then activate with your own licence code after accepting the licence agreement. Skalp uses this computer's valid licence certificate to identify your server-assigned update group; no separate ZIP installer or update-token file is required. Afterwards use Check for Updates… or automatic updates. Keep activation codes private.
For an existing installation, prefer Skalp's updater. After installing a complete Windows RBZ through Extension Manager, close every SketchUp and LayOut process and restart SketchUp. If Windows retained the older geometry library while it was loaded, this package can complete that replacement at fresh startup from its verified recovery payload. The complete installation must still pass validation. A Windows development-package check has verified this loaded-library update and automatic recovery through Extension Manager and a normal restart. Broader update and release acceptance remain separate.
If installation validation still fails, disable Skalp Studio in Extension Manager, close all SketchUp and LayOut processes, then reopen SketchUp with Skalp still disabled and reinstall the complete matching RBZ. Enable Skalp and restart SketchUp. Disabling the extension without exiting the host does not release its native libraries. Do not replace individual DLLs or disable package validation. The provider retains build history and manages update access separately for each supported platform/CPU/SketchUp target. Your local recovery backup is separate.
Automatic updates and reminders
Download and install future updates automatically is enabled by default. It downloads and verifies a compatible update in the background; when SketchUp is closed normally, the external updater installs the prepared version so it is active at the next start. Clear the checkbox to keep future downloads manual. Skip this version suppresses that version during later automatic checks; Remind me later closes only the current notice. Use Extensions > Skalp Studio > Check for Updates… for a manual check, including after skipping.
Install and restart SketchUp waits for the external updater to confirm that it is watching this SketchUp process before requesting quit. Installation begins only after that process exits. If SketchUp remains open, the updater keeps waiting. Keep other SketchUp and LayOut processes closed during replacement. Package verification remains required for the complete archive. A recovery marker from a different package stops automatic rollback and preserves the recovery backup; it does not make a mixed installation usable. After a complete replacement passes verification and finishes starting, Skalp retains the older recovery files separately so they do not block future updates.
Update verification: Server-side group selection and signed update publication are configured separately from production-release acceptance. Confirm installation, restart and recovery on the receiving Mac; Windows update acceptance is separate.
Owner-supplied personal activation codes are case-sensitive and work only after Skalp has registered them. An unlimited licence still refreshes its device certificate regularly; unlimited access does not disable licence checks.
Selected Classic Skalp activation codes can also be registered for a Skalp Studio grant. A Classic code does not automatically grant Studio access. Once registered, enter your existing code in the activation window; letter case does not matter for these Classic codes. The grant has its own end date and does not change your Classic licence or start automatic billing.
An explicitly selected Skalp 2026 compensation grant provides twelve months of Studio access from the first successful activation using a Studio build that the server has made generally available. Claim it within six months of that first general availability using your registered Classic code. Private test offers alone do not open this window or start the compensation year. The website’s “beta” wording does not determine these dates. The retained seats share the same start and end dates; moving a seat to another computer does not restart the year. This grant does not renew automatically or change your Classic licence.
Activation and package verification
Install the complete package matching your platform and SketchUp version. After installation, restart SketchUp so Skalp can install its matching LayOut integration; restart LayOut afterwards. Activation, store fulfilment and release approval are separate checks.
First start, agreement and release notes
Welcome to Skalp Studio opens shortly after SketchUp starts when activation, acceptance of the current agreement or acknowledgement of this installed version's release notes is needed. The window uses the Skalp Studio logo and provides Activate, Request a free trial and What's new tabs.
Expand Third-party software, beside Licence agreement, to read the bundled software acknowledgements and licence texts offline. Opening these notices does not accept the Skalp licence agreement. The original legal texts remain in English.
Expand Licence agreement to read the complete English agreement and its version. The interface follows your language setting; the agreement itself remains in English. The licence is provided by Architectuurburo Wydouw bv, Hoevensebaan 238, 2950 Kapellen, Belgium, VAT BE0866608589. The agreement explains named-user seats, one active computer per seat, annual subscriptions, the trial, offline authorization, privacy, updates, refunds and mandatory legal rights. Acceptance is separate from marketing consent and does not waive statutory consumer rights.
Select I have read and accept the Skalp Studio End User Licence Agreement. The checkbox starts unticked. Skalp requires explicit acceptance before activation or a trial request, and the licensing service checks the exact agreement version and document digest. Closing the window does not accept it. Protected Skalp commands remain unavailable until a valid licence and the current agreement are confirmed; your documents are preserved.
An already activated installation does not need its activation code again just to accept an updated agreement: review it and choose Continue. Internet access is required to confirm this acceptance. Later starts reuse the confirmed agreement until its text changes. A new installed software version shows What's new again; review its release notes and choose Continue. Reading notes does not itself accept a different agreement.
If activation or Continue fails a licence check, the window returns to Activate and shows the error. Resolve the reported problem before retrying.
Internal development builds explicitly identify a local-only agreement acknowledgement. It applies only to that development build and does not create a commercial licence or server acceptance. A production build still requires normal server confirmation.
The full trial and paid licences include all Skalp Studio features, including CAD export and LayOut publishing. Permanent SketchUp reviewer licences include the same features. No separate export or publishing licence is required. Platform and external-converter requirements still apply.
Activate or request a trial
When Skalp Studio - License opens:
- Review and accept the current agreement if requested.
- Enter your activation code and choose Activate.
- After activation, review What's new and choose Continue.
- Run the original command again if a command opened the window.
For a trial, select Request a free trial, enter your name and email, and choose your country by name from the Country list. Country names follow the interface language; Skalp sends the matching two-letter country code automatically. The first public beta is configured for a full 30-day trial from first activation, without payment details. The activation email confirms your trial duration. The standard trial is 15 days; changing the offer later does not shorten a trial code already issued. Existing trials retain their original term. A trial never automatically becomes a paid subscription. An earlier Classic Skalp trial does not consume your Studio trial. Importing your Classic contact details or recording you for a future announcement does not request or activate a Studio trial. Internet access is required. The email address and computer must not have used a Studio trial before; its code is bound to the requesting computer and installation. The agreement and acceptance checkbox appear above Send trial request. The checkbox becomes available once the agreement has loaded; explicitly accept it to enable the request button.
After Send trial request, check your email and enter the trial activation code on the Activate tab. A submitted request does not itself activate Skalp. Choose Manage activations to open the customer portal when moving a licence from another computer. Choose Buy Skalp Studio to open the public website, subject to sales availability.
The licence window has a fixed size. Scroll the window or the agreement text when its contents exceed the available space.
If the native licensing component is unavailable, follow the repair instruction in the licence window. Reinstall the matching package and restart SketchUp before trying your activation code again.
If startup reports This Skalp Studio installation is incomplete or has an invalid package manifest, save your work and reinstall the complete matching RBZ through Extension Manager, then restart SketchUp. If installation or validation still fails, contact Skalp Support with the exact message. Do not replace individual native files or disable package verification.
Install and restart the integrations
Use the separate SketchUp 2027 macOS or SketchUp 2027 Windows x64 .rbz for
your operating system. Do not install this build into an older or newer SketchUp
release. The loader rejects a package built for another SketchUp major version or
platform. Install it through SketchUp's Extension Manager. Skalp registers as Skalp
Studio and leaves application loading to Extension Manager. Restart after enabling,
disabling or replacing native components.
The packages include their required libraries; no separate library or Ruby installation is needed. On macOS and Windows, Skalp installs its bundled LayOut companion for the current user when SketchUp starts, including the companion's required runtime libraries. An incomplete companion package is rejected before its files are installed. Restart LayOut after installing or updating Skalp. Windows publication and synchronization remain subject to the platform limits in this guide; this build is not a fully verified Windows release.
Availability: Activation, trials and sales depend on the configured service. Production checkout and the complete subscription lifecycle still require release acceptance; development packages are not release packages.
Licences, seats, activations and multi-seat pricing
Skalp Studio uses an annual named-user subscription. The standard first-seat price is EUR 99 (or USD 99 / GBP 89) per year, excluding applicable taxes. Use requires an active paid subscription; stopping renewal does not create a permanent right to use an older version. A normal individual subscription has one seat; a multi-seat subscription groups several seats under one purchaser, invoice and renewal date. A seat belongs to one natural person. It is not a floating or concurrent pool and may not be shared by several people. The purchaser can assign seats to themselves and other named users, and each assigned user receives a separate activation code. Standard subscription activation codes are not shared across a team.
A registered Classic multi-seat conversion can retain one existing code for its approved seats. That code activates up to the granted number of computers, with one active computer per seat. Assign each seat to one person. When all seats are active, deactivate an existing computer through Manage activations before activating another. This exception does not increase the approved seat count.
Users and activated computers
The customer portal shows the stored computer allowance for each licence. A permanent licence without an end date shows No expiry date. Revoked rights are omitted from the customer overview; their history remains available to the administrator. Separate current cards represent separate rights or named-user seats, not repeated activation attempts.
Skalp Studio may be installed on as many computers as the named user needs. Each seat can have only one active computer at a time. To switch computers, deactivate the current activation online, then activate the other computer online using the same activation code. There is no lifetime installation limit, reset quota, cooldown or artificial waiting period. A three-seat subscription permits three separately assigned users with one active computer each; a five-seat subscription permits five.
You do not have to be at the old computer to deactivate it. From Skalp Studio - License, choose Manage activations to open the customer console directly. Sign in with the licence email and its one-time code if requested, identify the active computer and choose Deactivate computer. Return to the licence window and choose Activate with your existing code. Opening the console preserves the code you entered. You can also reach the same console through Skalp Support > Client admin console. A surviving device identity can sign you in directly; a new computer uses the email-code sign-in when required.
The old computer does not need to be online for this portal action. Deactivation requires authenticated account access; entering an activation code alone does not authorize remotely deactivating someone else's computer. Manage activations opens your account; it does not deactivate a computer without your action in the console. The direct button and conflict/retry flow are covered by automated tests; live SketchUp window/browser acceptance remains pending for the updated package.
Each activated computer has its own signed, device-bound certificate. Internet access is required for activation and deactivation, including switching computers. Skalp checks the licence service in the background shortly after SketchUp starts and approximately every five minutes while it is running. These checks do not wait for the certificate's one-day refresh advisory. If a connection attempt fails, Skalp retries approximately every minute, so reconnecting an offline computer is detected without restarting Skalp. Checks resume when SketchUp resumes processing timers after sleep.
When the service confirms that this activation or its licence is inactive, Skalp invalidates this computer's cached authorization and opens the licence window. Further protected commands require activation again. Your model and saved work are preserved. A connection failure, service outage or unconfirmed error does not deactivate the computer and never extends its offline allowance. A successful authorization permits no more than 14 days of disconnected use from that successful check. After that expiry, connect to refresh or reactivate before continuing.
Deactivating an offline computer through the portal cannot erase its already-issued certificate remotely. That computer may retain offline access until the certificate expires or a subsequent online check confirms deactivation. The service permits only one active registration per seat; remote shutdown of disconnected use is not immediate.
The one-active-computer policy and background checks are implemented and covered by local Ruby and service/database tests. Existing deployments require the updated extension, the matching licence-service response and the single-computer migration. These tests do not establish live SketchUp or production acceptance.
Pricing and first-term offers
The annual multi-seat total is calculated as:
first-seat price + (number of additional seats × 50% of the first-seat price)
The 50% rule always follows the first-seat price that applies to that purchase, including an eligible introductory or legacy first-term offer. These are the approved annual base prices and exact multi-seat calculations:
| Applicable first-term price | First seat | Each additional seat | Two seats | Three seats |
|---|---|---|---|---|
| Standard EUR or USD | EUR 99 / USD 99 | EUR 49.50 / USD 49.50 | EUR 148.50 / USD 148.50 | EUR 198 / USD 198 |
| Standard GBP | GBP 89 | GBP 44.50 | GBP 133.50 | GBP 178 |
| Public introduction or eligible legacy-trial offer, EUR or USD | EUR 79 / USD 79 | EUR 39.50 / USD 39.50 | EUR 118.50 / USD 118.50 | EUR 158 / USD 158 |
| Public introduction or eligible legacy-trial offer, GBP | GBP 69 | GBP 34.50 | GBP 103.50 | GBP 138 |
| Eligible recent legacy paid customer, EUR or USD | EUR 49 / USD 49 | EUR 24.50 / USD 24.50 | EUR 73.50 / USD 73.50 | EUR 98 / USD 98 |
| Eligible recent legacy paid customer, GBP | GBP 45 | GBP 22.50 | GBP 67.50 | GBP 90 |
| Eligible earlier legacy paid customer, EUR or USD | EUR 59 / USD 59 | EUR 29.50 / USD 29.50 | EUR 88.50 / USD 88.50 | EUR 118 / USD 118 |
| Eligible earlier legacy paid customer, GBP | GBP 55 | GBP 27.50 | GBP 82.50 | GBP 110 |
The public introductory price applies during the first two calendar months after release. A paid legacy purchase from 1 January 2025, or a legacy annual renewal whose stored maintenance end is at least 1 January 2026, qualifies for the recent legacy first-term price; remaining paid maintenance time after release is added to that first term. Other eligible earlier paid customers use the earlier legacy price. A personal legacy-trial offer is email-bound and expires 30 days after it is sent. Offers do not stack.
After a promotional first term, the subscription renews at the then-applicable standard annual price: currently EUR 99, USD 99 or GBP 89 for the first seat and 50% of that price for every additional seat, unless the checkout explicitly states a different future price. FastSpring is the billing authority for checkout currency, tax, rounding and the final amount shown before payment.
Adding or removing seats
Adding a seat during an active paid term does not start a separate subscription. FastSpring calculates the charge for the remaining part of the current term; the new seat becomes available only after that prorated payment succeeds and then shares the existing renewal date. If FastSpring cannot complete the proration, unpaid immediate access is not granted and the increase can instead wait for the next renewal. A requested reduction also takes effect only at renewal. The already-paid seats remain usable until then, with no automatic mid-term credit. Unassigned seats are removed first; if too many seats are still assigned, the purchaser must choose which named users end before the lower quantity is applied.
Renewal and cancellation
The subscription renews automatically each year until cancelled. Cancellation stops future renewal; access continues until the already-paid period ends. If renewal payment does not succeed, access stops at the paid deadline. An older installed Skalp Studio version does not retain a permanent use right. The signed device certificate can never extend beyond the subscription deadline, even when its normal disconnected-use allowance would last longer.
The licence-service owner can grant an individual extension or unlimited access as an administrative exception. This does not create a separate permanent product for sale. The private administration licence record provides Extend access, Valid through, Unlimited access and a required audit reason, followed by review and confirmation. An entered end date includes that entire UTC calendar day.
For a linked FastSpring subscription, an extension moves the next charge date for the entire subscription, including every seat. Automatic renewal continues on that new schedule. FastSpring may notify the purchaser about the extra time; payment reminders follow the revised billing schedule. Unlimited access cancels future FastSpring billing and grants continuing local licence rights for every seat. It still requires online activation and periodically refreshed certificates; it does not provide unlimited disconnected use.
The administration applies linked access changes only after FastSpring confirms the billing change and its date is read back. A synchronization failure is shown as FastSpring synchronization pending; access has not changed and the old provider billing schedule may still apply. The owner can use Retry synchronization after the connection or configuration is repaired. A provider change that already succeeded is checked again before retrying, rather than submitted twice.
These owner controls and subscription boundaries have automated local coverage. Actual-store schedule changes, notifications, cancellation and renewal after an extension still require provider acceptance and deployment. They are not yet verified production workflows.
These commercial rules, prices, activation limits and seat-change calculations are represented and tested in the current licence-service source. They are not yet a live sales promise. The Contextual test checkout and its initial multi-seat purchase/activation mapping are verified, but production checkout, purchaser-driven seat assignment and the remaining renewal, seat-change and revocation mappings are still pending. Until those release gates pass, Skalp Support can explain the policy and calculations but must not claim that a customer can already buy, assign or change a multi-seat subscription.
Product labels and messages use Skalp Studio. Development settings use Skalp Studio storage folders.
Recover or renew after reinstalling
Skalp performs one licence-recovery check shortly after SketchUp starts. When the
protected local certificate is expired or was removed by reinstalling Skalp or SketchUp,
Skalp sends its one-way computer identifier, public device key and pseudonymous
installation identifier to the licence service. When that computer has an expired
commercial subscription, the Skalp Studio - License window opens automatically and
shows Renew license. Server confirmation prevents an expired short-lived device
certificate for otherwise-paid access from being mistaken for an expired subscription.
The discovery response is only renew or none; it contains no name, email address,
entitlement identifier or expiry details and does not sign the customer in.
Open the renewal portal
Choose Renew license to open the customer licence portal. When the original protected device key and certificate survived, Skalp signs the request and opens the portal directly. Otherwise the portal asks for the licence email address and one-time email code before showing account details. The computer identifier is not a password and cannot by itself restore active access. After a confirmed renewal, the intended FastSpring webhook reconciliation extends the existing Skalp entitlement instead of creating a second licence; the final store-product, checkout-tag and webhook mapping still requires verified fixtures from the live store and is not yet production-ready.
Recover after a system or hardware change
A normal Skalp RBZ reinstall or SketchUp reinstall does not normally remove the macOS Keychain item or Windows per-user protected licence files. Install the matching Skalp package, restart SketchUp and use the automatic prompt. After a complete operating-system reinstall, a replaced motherboard, a different OS user account, a cleared Keychain or removed application-data folder, the protected device key may no longer be available. If Skalp still recognizes the physical computer it offers renewal but requires email verification; if the computer identifier also changed, open Skalp Support… and use Client admin console or contact [email protected]. Never purchase a second licence only to repair a missing local activation.
On macOS, a locked login Keychain or denied access to Skalp's protected licence item can prevent licence verification. Do not delete the item, reset the Keychain or change its access controls to resolve a repeated password prompt. Contact [email protected] if that prompt keeps returning; include the name of the requesting process, but never send a password or licence token.
Finding the main commands
Open Skalp Manager from the Skalp Studio - Main toolbar, which gives access to the main commands. Extensions > Skalp Studio contains Convert Legacy Skalp Model as a manual fallback, Check for Updates… and Preferences…; toolbar commands are not otherwise duplicated in that submenu.
| Icon | Main command | Use it to |
|---|---|---|
 |
Skalp Support… | Find guidance and troubleshooting. |
 |
Skalp Manager | Manage scenes, sections and drawing settings. |
 |
Align Section View | Look straight at the active cut. |
 |
Reverse Active Section Plane | Reverse the cut direction. |
 |
Section Plane Slider | Move the section precisely. |
 |
Go to Section | Navigate using section indications. |
 |
Skalp Materials | Choose Section or Surface Materials. |
 |
Paint Skalp Materials | Apply the active Skalp material. |
 |
Skalp Materials by SU Material | Assign Skalp appearances through SketchUp materials. |
 |
Skalp Materials by Tag | Assign appearances through tags. |
 |
45° Shadows Left | Cast architectural shadows to the left. |
 |
45° Shadows Right | Cast architectural shadows to the right. |
 |
Export Section | Export section drawings for CAD. |
 |
Send Drawing to LayOut | Publish drawing geometry and annotations. |
 |
Send to LayOut | Place the captured model view. |
 |
Sync Active LayOut | Synchronize the active LayOut document. |
 |
2D Drawing Mode | Enter or leave section-plane drawing. |
In the material group, Skalp Materials is followed immediately by Paint Skalp Materials, then Skalp Materials by SU Material and Skalp Materials by Tag. This keeps the Material Browser beside the tool that applies its active material.
Opening the Manager and browsing rows does not by itself activate Skalp in a plain model. Applying section settings, creating Manager content or assigning Skalp materials does. Existing Skalp models resume their settings automatically.
Dialog visibility when switching applications (macOS)
Skalp remembers whether SketchUp or LayOut was last active. When switching to SketchUp, the LayOut inspector, including its Publish panel, is hidden. When switching to LayOut, Skalp's SketchUp dialogs are hidden. Returning restores only windows that were open, without closing them, reloading their contents or taking focus. Clicking a Skalp dialog or switching to another application retains the last SketchUp/LayOut context. SketchUp checks focus every 0.2 seconds; LayOut responds to application activation and its regular palette refresh.
This feature is implemented for macOS only. Restart LayOut after a Skalp update to load the matching palette.
Preferences
Choose a Preferences category
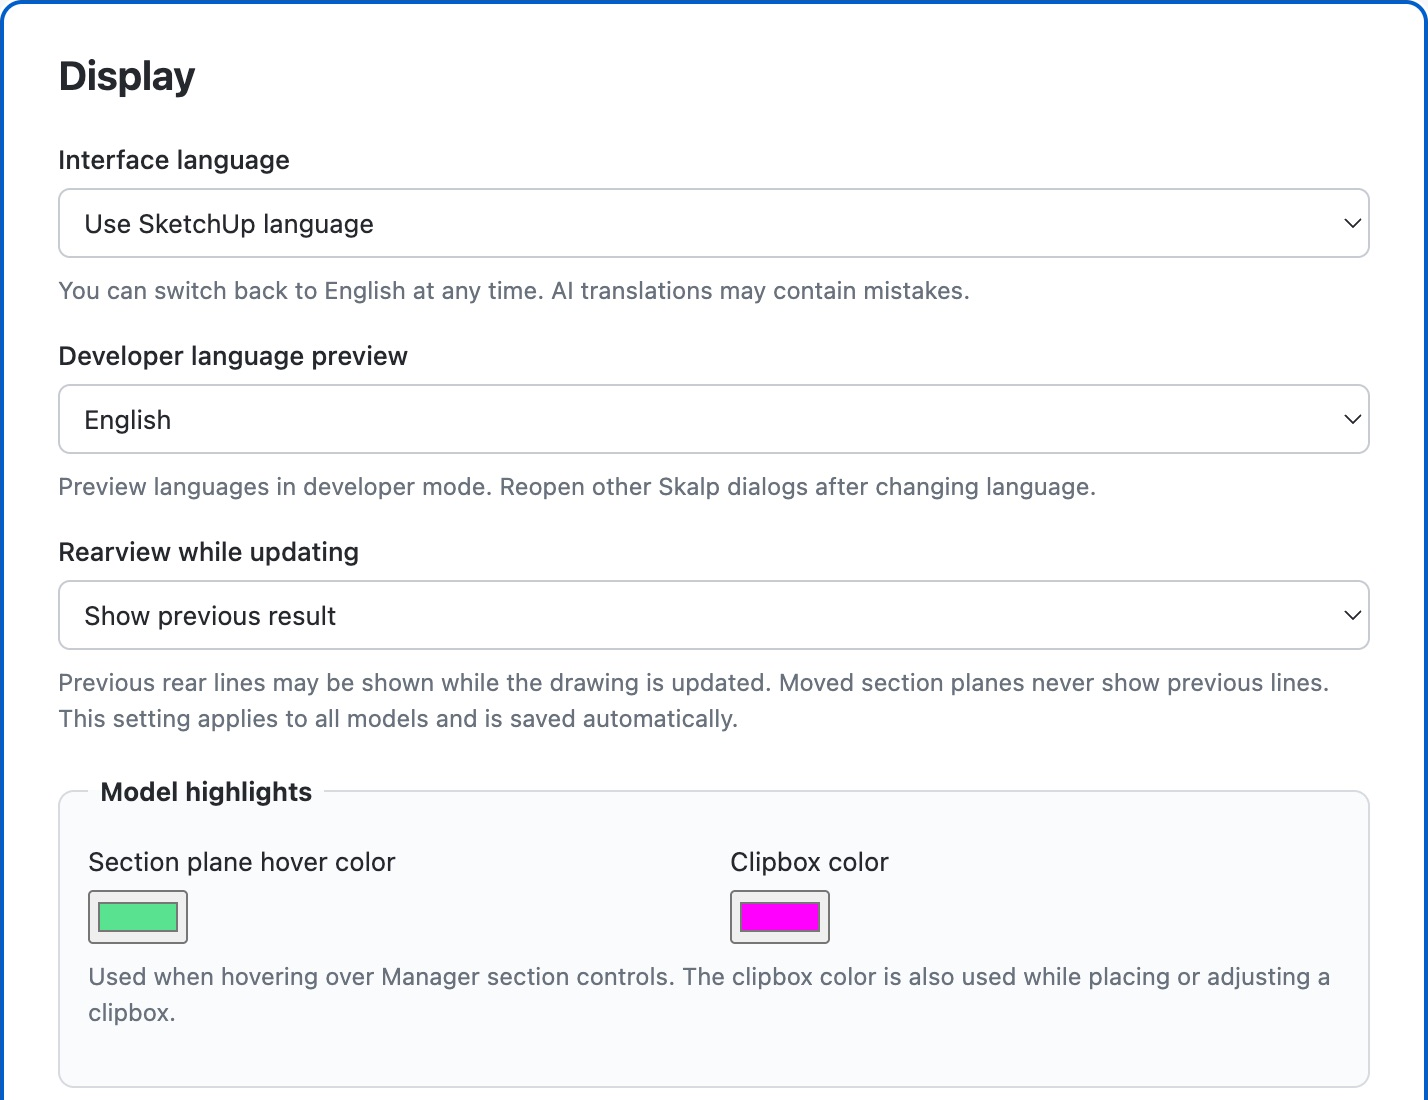
Open Extensions > Skalp Studio > Preferences…. The Skalp Studio - Preferences window contains Display, Drawing defaults, CAD export and LayOut defaults as tabs in its category sidebar. One category is shown at a time; use the sidebar or its arrow keys to move between categories. Under Interface language, choose Use SketchUp language (default) or English. This choice is saved for the current user and applies to all models. Changing it updates the Preferences window and Skalp toolbar command text; English can be selected again at any time. Other open dialogs may need to be reopened to reflect a language change.
Choose what remains visible during updates
Under Rearview while updating choose:
- Show previous result (default): temporarily show the chosen drawing's previous complete Skalp overlay during geometry recalculation in the same view, then replace section widths and procedural hatches as soon as the cut is ready. Old rear lines remain visible until their current replacement arrives, even if temporarily inconsistent with the edited geometry.
- Show only current result: hide rear lines until the current result is ready.
Neither shows previous rear lines from a moved section plane. Changes save automatically in the user's SketchUp preferences, apply to all models and persist across sessions. Changing this preference refreshes the active preview.
Choose whether to confirm reversed-face repairs
Under Drawing defaults, Ask before repairing reversed cut faces is on by default. Skalp asks when a displayed section contains diagnosed reversed faces, including while the Manager is closed. Select Automatically repair from now on; do not ask again, then choose Yes to enable automatic repair. The choice is saved for the current user, applies to all models and persists across sessions. No, Esc or closing the question never enables automatic repair.
Turn Ask before repairing reversed cut faces back on to show the question again. When it is off, Skalp repairs the diagnosed cut faces after the section result becomes available and SketchUp is ready for background changes. Successful automatic repairs do not show a result message; skipped objects are reported.
Choose model-highlight colors
Under Model highlights, choose the section-plane hover color and clipbox color with graphical color controls. Hovering or keyboard-focusing the section control in a Manager row temporarily fills and outlines that section plane across the model bounds. The translucent fill and outline remain complete when the plane crosses the camera's near clipping boundary, and remain aligned with the visible viewport when zooming through the model-sized highlight. A section plane parallel to the current view is not highlighted.
The clipbox control similarly shows all six faces of its stored box. This feedback does not select geometry, activate a scene or create an undo step. The clipbox color is also used while placing or adjusting the clipbox. Live SketchUp 2027 visual acceptance remains pending.
Set defaults for new drawings
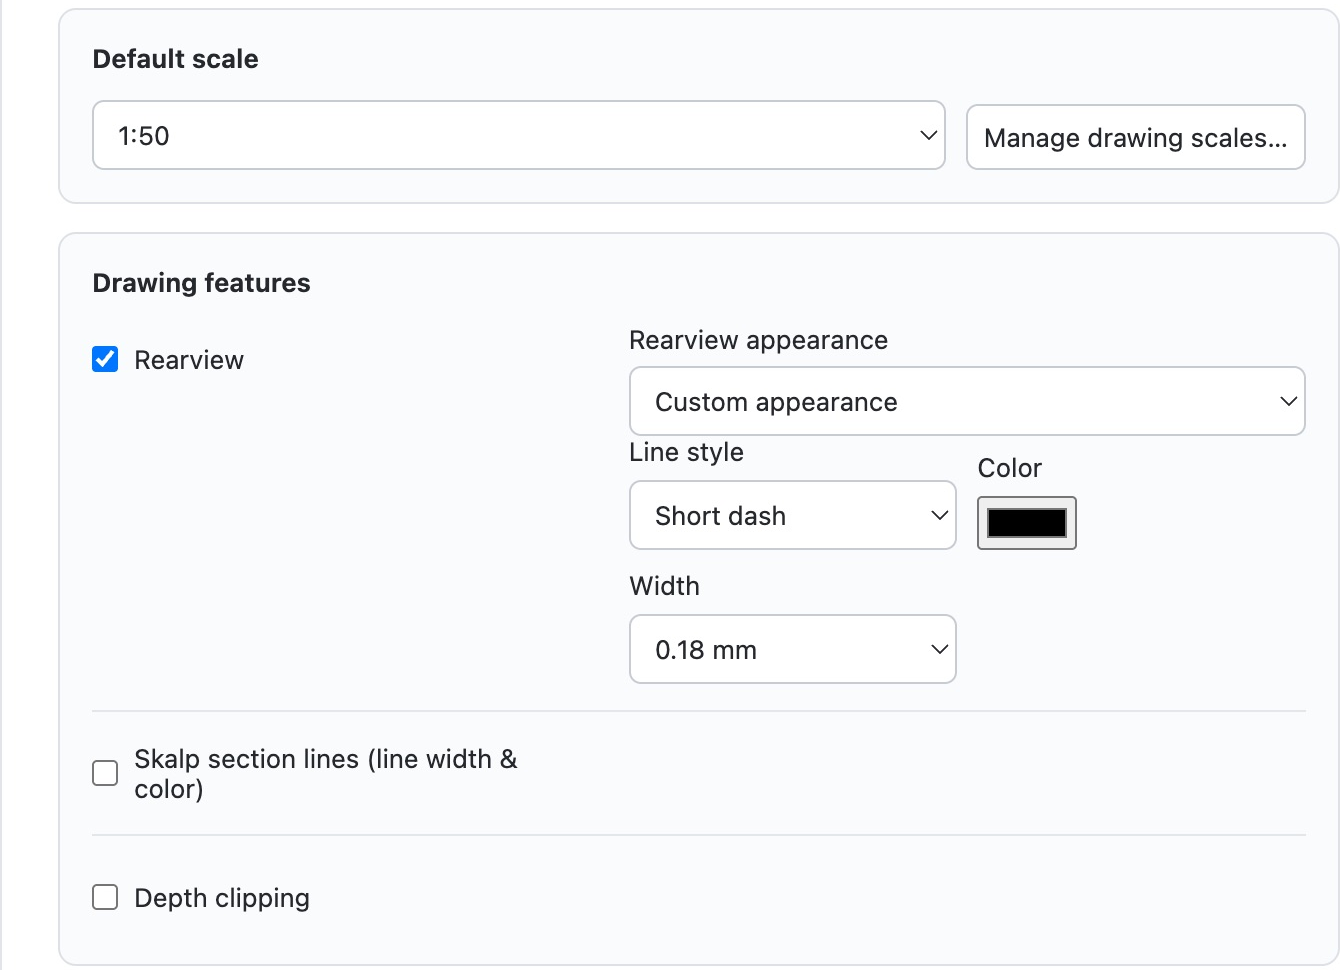
Under Drawing defaults, the scale, Drawing features, SketchUp-style and shared-tag cards group the office defaults by purpose. Choose the starting Scale, Rearview, Skalp section lines (line width & color) and Depth clipping for new drawings. Skalp section lines is enabled by default for new installations and adds Skalp's material-specific section outlines, including their configured colors and line widths, instead of referring only to SketchUp's native section-cut line. Set the normal Rearview appearance once for the office.
That appearance is global: changes also update existing drawings that use Use global appearance. A drawing can opt out on its Manager Appearance tab. Manage the available drawing scales here. SketchUp Style sets the style behavior for new linked drawings; Manage style from Skalp is enabled by default. Other drawing defaults apply only to new drawings. Also choose how a newly created tag preset handles tags added later.
Measurement-symbol choices are edited in Drawing Properties while the Elevation Mark, Plan Elevation Mark or Area Measurement tool is active, rather than in Preferences. All built-in symbols are installed with Skalp and work in a new, unconfigured model: Elevation Mark uses live text above an outlined triangle whose lower point is the measurement hotspot; its text remains centred over the triangle in either section-view direction. Plan Elevation Mark centres the live value in a circle at the plan location.
Area Measurement contains only the formatted area value, including the area unit selected in SketchUp. Expand Section indication style within Drawing defaults to show the live preview and the Lines, Symbols, Labels and Styles pages for the active section scene. Its Default for new models action stores the office standard. These choices are not repeated in each scene's properties.
Measurement appearance is edited in Drawing Properties while a measurement tool is active or a measurement is selected. See measurement formatting and custom measurement symbols.
Set LayOut and CAD defaults
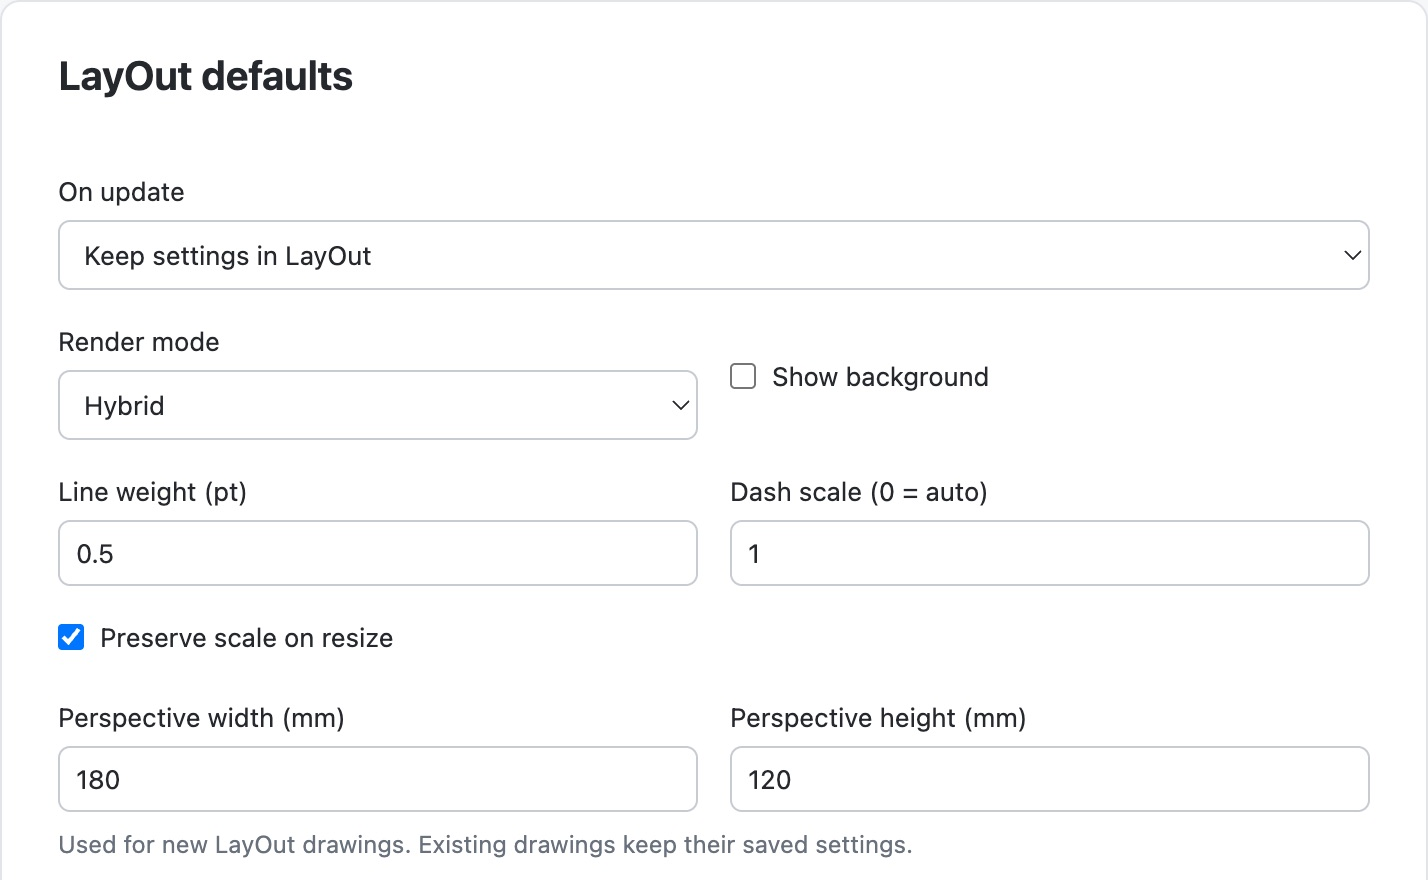
Under LayOut defaults, choose viewport ownership, render mode, background, line weight, dash scale, scale preservation and the initial perspective image size. These user preferences seed new LayOut drawings. Existing drawings retain their saved settings. The Manager's Drawing area tab contains the per-scene clipping mask or perspective image size. Viewport defaults are edited in Preferences.
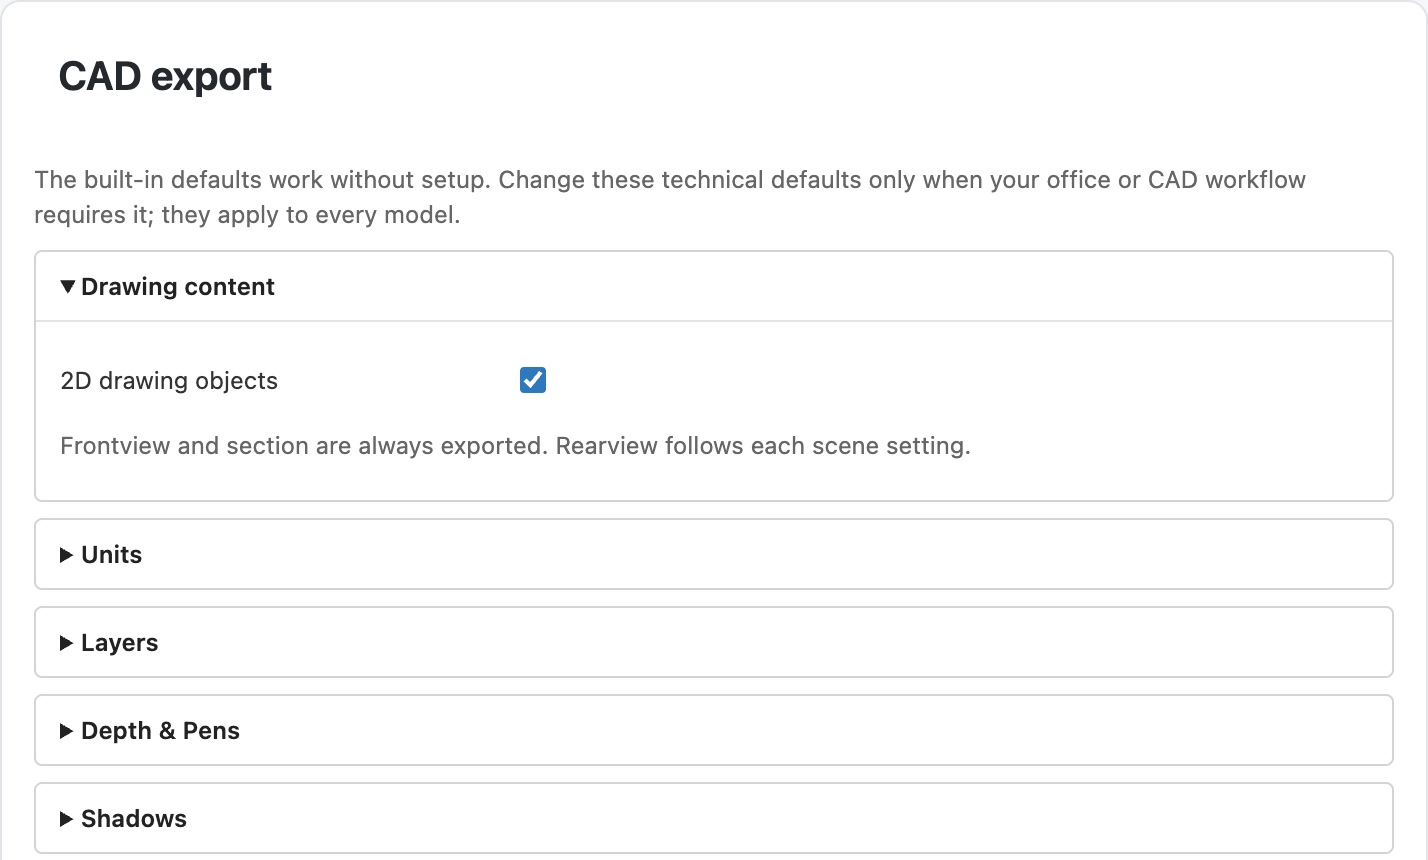
Under CAD export, expand the technical settings only when an office or CAD workflow needs different layer naming, Surface Material transparency, depth pens, shadows, units or annotation behavior. The settings editor is part of the Preferences window; it does not open a second dialog. The built-in values are ready to use; ordinary users do not need to configure them. Saving writes one user preference that applies to every model and later SketchUp session. CAD defaults are stored per user, rather than per project or drawing. Save is greyed out when the displayed values match the saved settings. Changing a value activates the blue Save button; successful saving greys it out again. Restore defaults immediately saves the built-in values and greys out Save. If saving fails, the error remains visible and Save stays available.
Build status and interface language
This English guide is the canonical manual. AI-drafted guides for SketchUp's 12 other languages are requested but are not yet available; their progress is recorded in the manual translation status. Website translation will follow later, after its design is developed further.
Window and command names
The main window titles are Skalp Studio - Manager, Skalp Studio - Material Browser, Skalp Studio - Material Editor, Skalp Studio - Surface Material Editor, Skalp Studio - Drawing Properties and Skalp Studio - Preferences. The assignment windows are titled Skalp Materials by Tag and Skalp Materials by SU Material. Menu and toolbar command names remain as documented below.
Interface translation coverage
Skalp detects SketchUp's interface language and loads the corresponding catalog for its 13 supported languages. Missing translations appear in English, and the English override remains available in Preferences.
The Preferences, Skalp Materials by Tag, Skalp Materials by SU Material, Section Plane Slider and scrapbook browser windows' fixed UI strings, Paint Skalp modes and instructions, the Manager's Tags and Drawing area tabs, the clipping-mask tool, the one-time translation notice, licence/Welcome controls, support controls, the CAD settings catalog and the Solid Tools command names and prompts have AI draft translations in every supplied non-English catalog. The Solid Tools translations follow SketchUp 2026's installed wording. LayOut commands, conversion controls and Windows palette captions also have translated strings. Catalog completeness does not mean every dialog is fully wired to it: some Material Editor controls, other dialog text and native diagnostic details still appear in English.
This build therefore does not yet provide a fully translated interface. Model, material, tag and drawing names remain as entered. Translation coverage is tracked in localization development notes. Translated controls that refer to SketchUp tags, materials, section planes and Extensions now use the terms shown by the locally installed SketchUp 2027 interface in each language. Where SketchUp's help text differs from its panel wording, Skalp follows the panel. The first non-English Skalp launch shows a one-time AI-translation notice with [email protected] for reporting corrections.
The notice is suppressed when the user has selected English and is remembered in the user's SketchUp preferences after it has been shown.
27.0.020 is the current public beta for macOS and Windows, available from the download page and automatic updates. Its matching release notes describe the packaged changes. Full installed-update and receiving-host acceptance remain pending; publication is not a certification that all beta workflows are verified.
This guide describes the current Skalp Studio development source for SketchUp 2027. The extension appears under Extensions > Skalp Studio; its main toolbar is Skalp Studio - Main. Some features still require live acceptance testing; this document is not a production-release or platform-certification statement. Your installed build must contain the corresponding changes to offer the behavior described here.
Scenes and sections
Goal Save, organize and restore the views that own your drawings.
- Open Skalp Manager and select a scene or section item.
- Double-click a scene row to activate its saved view; single-click only inspects it.
- Change the appropriate settings tab. Changes apply immediately.
- Use Update scene from model when you deliberately want to capture model state.
Check The footer identifies the active scene and scale. Editing an inactive item stores its settings without switching the working view.
Find a task: Select or activate · Organize scenes · Settings tabs · Tag visibility presets · Clipboxes · Move a section
The Manager combines native scenes and section items in a folder tree. A scene can have a main section, nested sections, or no section. Multiple scenes can use the same main section plane with different saved settings.
The open Manager follows the active SketchUp model. Switching model windows or closing the previous model replaces its rows, selection and settings with those of the current model, including while a drawing tool is selected. Background changes to the model wait until you return to SketchUp's Select tool. Preview and hover feedback from the closed model are cleared before showing the current model.
Make more room for the model
When you manage saved views in Skalp Manager, you can hide SketchUp's native scene-tab row to free vertical space for the model. On macOS, choose View > Scene Tabs to turn the row off. Choose the same command again to show it. This hides the tabs without deleting scenes or changing their saved settings; you can still activate scenes by double-clicking their Manager rows. Skalp also works with the native scene tabs visible. Hiding them is an optional workspace preference, useful for compact screens and tutorial recordings.
Select or activate a Manager item
Selecting a row inspects it. Double-click the row or press Enter to activate its full native scene. For an item without a scene, this applies its section state; for a clipbox, it toggles the clipbox. Missing/disabled targets cannot activate. Space selects the focused row; double-click or Enter expands/collapses folders. The section button still applies section state and the scene button still activates the native scene independently. Applying a section automatically enables SketchUp's Section Fill, including when the current 3D view has it disabled.
The section button preserves the current camera; there is no need to activate a flat section scene to show native hatches. Skalp also enables Section Fill after activating a scene with active section planes. This changes the current view without rewriting saved styles or scenes.
Check cut face orientation
Skalp automatically checks cut-face orientation while preparing the active section. In the next development build, a native active section with Section Cuts displayed starts this calculation even before your first Skalp command and with the Manager closed. You do not need to create a Skalp scene or assign a material first. Background calculation and repair begin after returning to the Select tool; the existing confirmation preference still controls whether Skalp asks first. A model without prior Skalp use stops this calculation when its active section is removed or Section Cuts are hidden. You do not need to select objects or run a separate menu command. If the check finds reversed faces crossing the displayed section, an orange warning button appears beside that section's name in the Manager. Hover it to see the number of affected objects. The button belongs to the currently applied section; saved sections are checked when their drawing is prepared.
By default, Skalp shows a repair question when these problems are detected, even when the Manager is closed. An orange-red wireframe box marks each affected occurrence, including nested components; the box remains visible through other geometry. The reported reversed faces receive a translucent orange-red highlight. Choose No to keep the highlight for inspection without repairing anything; press Esc or switch tools to clear it. The camera and selection stay unchanged. The highlight is withheld when its geometry, instance transform or section context becomes outdated. The confirmation explains that SketchUp does not support reversed faces on a section boundary when creating section fill and hatches, and that Skalp offers a repair for this SketchUp limitation.
Choose Yes to repair. To allow subsequent repairs without a question, select Automatically repair from now on; do not ask again before choosing Yes. Skalp then automatically repairs diagnosed cut faces in calculated sections, including with a closed Manager. No, Esc and closing the dialog do not save this permission. Restore the question under Preferences > Drawing defaults > Ask before repairing reversed cut faces. The orange warning button remains available to explicitly inspect or retry unresolved problems. A declined or skipped diagnostic set is not repeatedly prompted or retried until another model edit or an explicit warning-button click. Undo, Redo and an aborted operation suspend automatic repair until the next ordinary model edit or explicit retry. Live SketchUp 2027 acceptance remains pending.
The check reports only reversed faces that contribute to this cut, including an entirely inward-facing shell. Reversed faces elsewhere in the object are left unchanged. Mirrored occurrences retain their native front-side meaning.
Repair reverses the reported faces in one Undo operation. Native materials, positioned UV coordinates, texture projection and explicit Skalp Surface Material assignments transfer to the opposite face side so they remain on their original physical sides. Every instance of a shared component definition is affected, including instances in other views. The result reports repaired definitions and skipped objects. For each skipped object, it lists the object or component name when available, its persistent ID and the reason: an unavailable instance path, a locked object or parent, unsupported shell geometry, changed reported faces, unsafe texture capture, or failed face/material/texture verification. Names are shown as entered or imported. Objects reported by several section planes are counted once. A component definition can represent several reported objects; if that definition cannot be repaired safely, all its reported objects are listed as skipped. A reported locked occurrence also prevents changing its shared definition through another occurrence.
Locked targets, changed or unavailable geometry and objects whose texture mapping cannot be captured or verified safely are skipped without changing that object. If host verification fails during repair, that attempt is rolled back and the remaining objects are retried; the completed repair still has one Undo entry. For a lock reason, check the object and its containing groups/components. For changed faces or an unavailable path, recalculate the section before retrying. For geometry or texture reasons, inspect the object manually; Skalp does not force a repair when it cannot preserve the physical face sides safely. Detection supports one closed, connected shell per object; open objects, disconnected shells and separate internal cavity shells are not automatically diagnosed. It does not validate self-intersections or identify every possible cause of missing section fill. A missing warning is not a complete model-health check.
The warning is refreshed with calculated section results and withheld when geometry or section context is outdated. Automated native, worker, Ruby and browser tests cover the source implementation. Live SketchUp 2027 displayed fill/hatch recovery, native texture transfer and Manager inspection overlay and repair/Undo acceptance remain pending; Windows remains unverified. Automatic model changes require the remembered permission or an explicit change to the confirmation preference.
Activate a section directly in SketchUp
When you activate another native section plane in a model already using Skalp, Skalp keeps the active scene's drawing settings, including scale, section lineweights, Rearview and depth clipping, and applies them to the new cut. The current camera and saved scene section planes are preserved. Use Update scene from model only when you want to save the changed section state.
The Active scene footer still identifies the scene supplying those settings. The section-action indicator is active only when the current section state matches the saved state; the scene indicator can remain active while the section indicator is inactive. Activating a native plane does not select a different Manager row or choose another scene that uses that plane.
Without an active scene, native section activation follows Show lineweights, Show rearview lines, Show Surface Hatches and Show Surface Fills in the Display toolbar, using the general drawing defaults for other settings. The lineweight and Rearview switches can enable those layers directly in this view. With an active scene, the display switches still hide/show layers permitted by that scene's settings. Explicitly applying a standalone Manager section or a clipbox retains that item's settings until the section state changes.
Opening the Manager or activating a native section in a model that has never used Skalp does not enable Skalp automatically.
Select a cut object through its hatch
With SketchUp's Select tool, clicking inside a visible section hatch selects the cut group or component that produced that hatch instead of selecting the section plane and highlighting the complete section fill. Existing selected objects remain selected when SketchUp performs an additive selection. In an open group or component, Skalp selects the immediate child in the current editing context. Double-click the same hatch to open that selected group or component; as with SketchUp's native Select behavior, each double-click enters one nesting level. Clicking a section plane where there is no cut object continues to select the plane normally.
What to expect while a drawing updates
The upper-right status shows a green dot and Ready when no calculation is running, or an amber dot and the current update stage while working.
- Scene switching clears the preceding overlay before restoring the selected drawing.
- With Show previous result, geometry edits in the same view retain previous rear lines until their replacement is ready. Section lines can update first.
- With Show only current result, old rear lines are hidden during recalculation.
- Moving a section or changing visibility clears incompatible results.
Wait for the view to rebuild. If a stopped worker leaves the drawing unavailable, close and reopen that drawing. Install the worker and extension from the same build and restart SketchUp if the native connection fails. Responsiveness on large models still requires live acceptance; Ready does not establish a measured screen-paint time.
Editing inside a group or component
With SketchUp's Hide Rest of Model enabled, the overlay shows only the edited instance and its nested objects. Leaving that editing context or turning off Hide Rest of Model restores the complete drawing, including Surface Hatches.
Opening or closing a group also refreshes the section overlay when Hide Rest of Model is off. Ready means no calculation is running; if an expected pattern is absent, check the drawing settings and report persistent display problems.
Identify the active scene
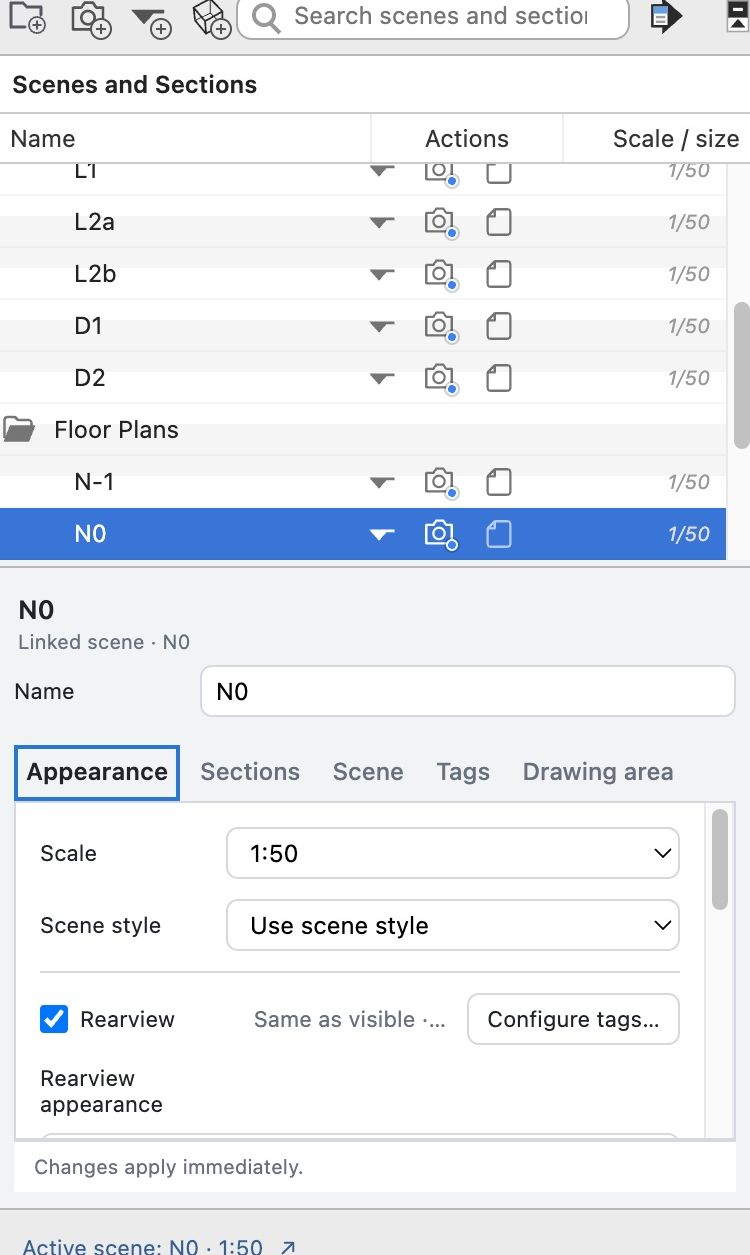
Separate indicators show the applied Skalp settings and selected native scene. The footer identifies the active scene and its scale. Click it to reveal that scene's settings without activating a different scene.
Organize and duplicate scenes
Choose New scene to save the current model view at the top of the tree root, regardless of the selected folder. From 27.0.016, newly discovered native SketchUp scenes and section planes also appear at the top of the root, outside folders. The Manager selects and reveals the new scene and clears any search filter. Previously organized scenes keep their folder locations.
Use New folder and the search field to organize and find items. Large-model startup still includes the initial model scan; live timing of these optimizations remains to be measured. Right-click an item for available actions, including Rename and Duplicate. Choose Rename to edit a folder, scene or clipbox name directly in its row. The existing name is selected. Press Enter or click outside the field to save; press Escape to cancel. Blank or unchanged names make no change. This changes only the Manager name, preserving the linked scene and section plane names and symbols. Automated browser and Ruby checks cover this interaction; live SketchUp 2027 acceptance remains pending.
Right-click a folder and choose Explode Folder to remove only that folder. Its immediate contents move to the parent folder, or the tree root, at the same position and in the same order. Nested folders remain intact. Scenes, section planes, clipboxes and their settings are preserved, including an active clipbox. No deletion confirmation is needed because no contained element is deleted.
Duplicating a linked scene or plan creates a new SketchUp scene with the same saved camera, section planes, style, tag visibility, hidden-state, shadow, axes and environment choices, and copies all of the item's Skalp settings. The duplicate is selected and can then be renamed or adjusted without changing the original scene or drawing settings. Duplicating a standalone section item copies its section association and Skalp settings; use Create scene afterward when that copy also needs a native SketchUp scene.
When Delete would remove both linked scenes and their last-linked section planes, the confirmation asks whether to delete scenes only. Choose Yes to remove the scenes while keeping the listed section planes, No to remove both, or Cancel to keep everything. Retained planes remain available as standalone section items in Manager. Folder actions use Explode Folder and never delete their contents. Section planes still linked to items outside the deletion are always kept; nested section planes are not deleted. Deleting a standalone section item retains the normal Yes/No confirmation. This behavior has automated callback coverage; live SketchUp acceptance is pending.
Section context actions
Right-click a section or linked scene with an available section plane:
- Modify opens that item's properties panel. It does not move the plane.
- Move by Slider… applies the item's section state and opens the existing Section Plane Slider for its plane.
- Align View applies the item's section state, looks straight at its plane and switches the camera to parallel projection.
- Reverse Section applies the item's section state and reverses its cut direction. Use Align View afterward if you also want to turn the camera.
These actions do not activate the linked scene's saved camera. They are unavailable for clipboxes or missing section planes; use the clipbox's bounds controls instead. Opening the properties with an ordinary row click does not activate another cut.
Manager settings tabs
The property tabs use underlined active states and consistent compact controls. The item header remains visible across tabs. With one item selected, edit Name directly in the properties panel. Press Enter or leave the field to save; Escape cancels an unfinished edit. The item name is its Manager name, separate from the linked SketchUp scene's name and the native section plane's name. On Sections, the Main section group contains Section name and Section symbol for the selected item's available native section plane. These fields edit that plane without renaming the Manager item or its linked scene. The symbol accepts at most three characters. Press Enter or leave either field to save; Escape cancels an unfinished edit. Changes also affect other scenes that share the same plane, and the main-section selector reflects the updated plane name. These fields are hidden for clipboxes, items without a plane and multiple selections. The context menu's Rename edits only the Manager name directly in its list row. Drag the horizontal divider above the properties to give the item list or the properties panel more room. The Manager remembers the chosen panel height.
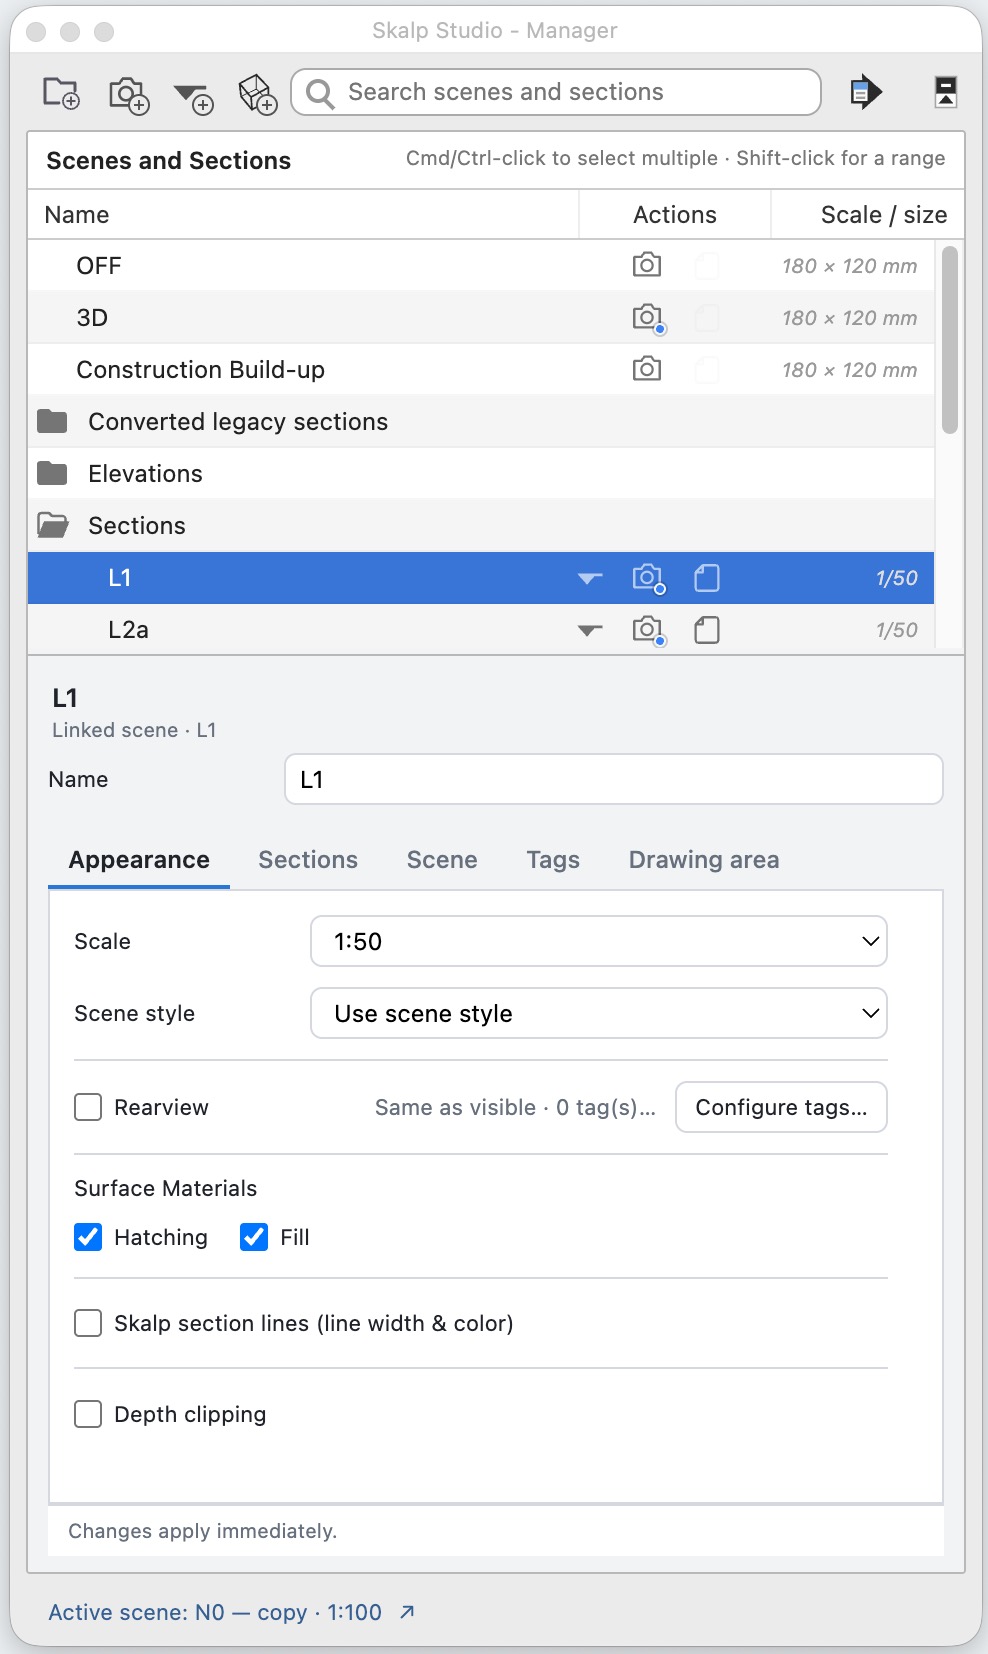
Resize the settings area
When the divider has keyboard focus, use Up or Down to move it in small steps, Shift+Up or Shift+Down for larger steps, and Home or End for the maximum or minimum properties height. The Appearance view contains Scale, Scene style, Rearview, Surface Materials, Skalp section lines (line width & color) and Depth clipping: choices an architect may change for a particular drawing. Depth clipping reveals an inline distance field when enabled; the field has no separate visible label.
A typed metric or imperial letter unit is displayed with a separating space, so 5cm
becomes 5 cm. Switching a feature off preserves its stored values. Rearview style,
color and width are configured globally under Preferences > Drawing defaults, while
the scale catalogue and other office defaults apply to new drawings. When Rearview is
on, choose Use global appearance to follow later global changes, Use material
appearance to follow the materials, or Custom appearance to expose a line style,
color and width for that drawing.
Switching back to the global choice keeps the drawing's stored override values available for later reuse.
Standalone sections without a linked scene also have the Rearview switch and appearance choices. Enable Rearview in Appearance to show their generated rear lines. The tag-source summary and Configure tags… shortcut appear only for linked scenes. This Manager behavior has automated browser coverage; live SketchUp 2027 verification remains pending.
Choose the scene style
Scene style defaults to Use scene style, which retains the style saved with the linked SketchUp scene. Choose White vector plan style for a white monochrome base beneath its Surface Materials. Surface fills retain their configured Fill opacity, so the drawing can include transparent vector fills. Skalp preserves the original style and assigns a managed variant to that scene; model materials, textures, colors, UV coordinates and transparency are not edited. Changing back to Use scene style reconnects the drawing to a variant of its original scene style while retaining the configured Skalp section and profile widths. This also restores the original scene style's Color by Tag state. A drawing without a linked scene cannot use this override.
In parallel projection, White vector plan style uses a live vector drawing preview. It replaces the native model image in the view so translucent Surface Materials reveal the geometry behind them and can receive vector shadows, including on glass. It does not change model materials or saved hidden flags. Leaving white plan style, entering perspective or editing inside an object returns to the native model display. Surface Paint and Surface Hatch positioning use the native working view while their tools are active.
For this white plan style, orthographic LayOut publication uses native vector drawing objects from the shared CAD drawing calculation. This avoids a SketchUp viewport covering the transparent areas. Other scene styles retain the chosen publication mode. The live preview and white-plan publication have automated boundary coverage; displayed SketchUp 2027/macOS and Windows acceptance remains pending.
Set vector shadows
Under Appearance, choose White vector plan style to enable the Vector shadows checkbox for the selected drawing. With Use scene style, the checkbox and shadow appearance controls are disabled; switching styles retains the saved shadow choice and values. Set Shadow grey value and Shadow transparency (%) with the sliders. These per-drawing values control the live white-plan preview, LayOut publication and CAD export together. Turning the switch off retains both appearance values.
Save the linked SketchUp scene with its shadow properties and Display Shadows enabled. Skalp uses that scene's saved sun direction. Native SketchUp's treatment of shadows on glass does not control the vector result: translucent Surface Materials can receive vector shadows while retaining their transparency. Live vector display requires White vector plan style and parallel projection.
Control Surface Material visibility per drawing
Surface Materials has separate Hatching and Fill switches. Use either layer by itself or enable both; these saved drawing choices control the live preview and explicit LayOut/CAD publication for that drawing. A linked SketchUp scene and its Skalp drawing form one saved presentation. Activating the scene restores these Appearance choices. The Display toolbar provides independent global visibility switches.
A live layer is visible only when both its saved Appearance switch and its global Display switch are on. The toolbar can temporarily hide a layer but cannot reveal one disabled in Appearance. Scene activation preserves the global switches, and Update scene from model leaves both saved Appearance choices unchanged, including when the scene saves Style and fog. Create another scene and drawing when a second saved combination is required.
Perspective scenes retain Scale as an appearance scale for hatch detail and line weights in the model, even though perspective publication does not have a uniform model-to-paper scale. When a perspective scene has a linked section, Rearview and Skalp section lines remain available as well. Depth clipping's native distance fade still requires a matching parallel view. Nested sections, scene details and saved properties can be expanded as needed. When section indications are enabled, related sections are selected automatically.
Use Change… only for exceptions, then Adjust positions… when their handles need manual placement. LayOut shows an automatic drawing area based on the saved scene camera until a custom boundary is adjusted. Crop controls require one parallel scene; perspective scenes show image dimensions. Viewport and CAD export standards are kept in Preferences. With multiple items selected, Appearance and Scene edit the focused item, while Tags and Drawing area apply to selected eligible scenes and display differing values as Mixed.
Changing Scale opens Updating drawing scale, with a progress bar and an explanation of the current step. During the hatch update, Hatch objects processed: 120 of 300 shows completed objects out of the eligible cached objects in that update; it counts objects, not distinct material patterns. Locked or deleted objects are excluded from the starting total. Progress follows completed objects and steps, not estimated remaining time. A single complex hatch can take longer than others. Wait for the window to close automatically before continuing. A failure keeps the window open with its error and a Close button. Live SketchUp window and viewport acceptance of this progress display remains pending.
The common footer confirms that changes apply immediately.
Choose the right settings tab
The property tabs have these roles:
| Tab | What you control |
|---|---|
| Appearance | Scale, scene-style override, rearview, Surface Material hatching/fill, cut widths and depth clipping. |
| Sections | Main and nested section state, plus section indications. The tab shows extra guidance only when the linked scene does not save active section planes. |
| Scene | Scene name, description, saved properties and explicit scene update. |
| Tags | Choose the tag preset for linked scenes. |
| Drawing area | Plan clipping mask and perspective image dimensions. |
The following captures show the five settings tabs for the same kind of selected Manager item. Controls can be unavailable when the selected item or saved scene does not support that setting.
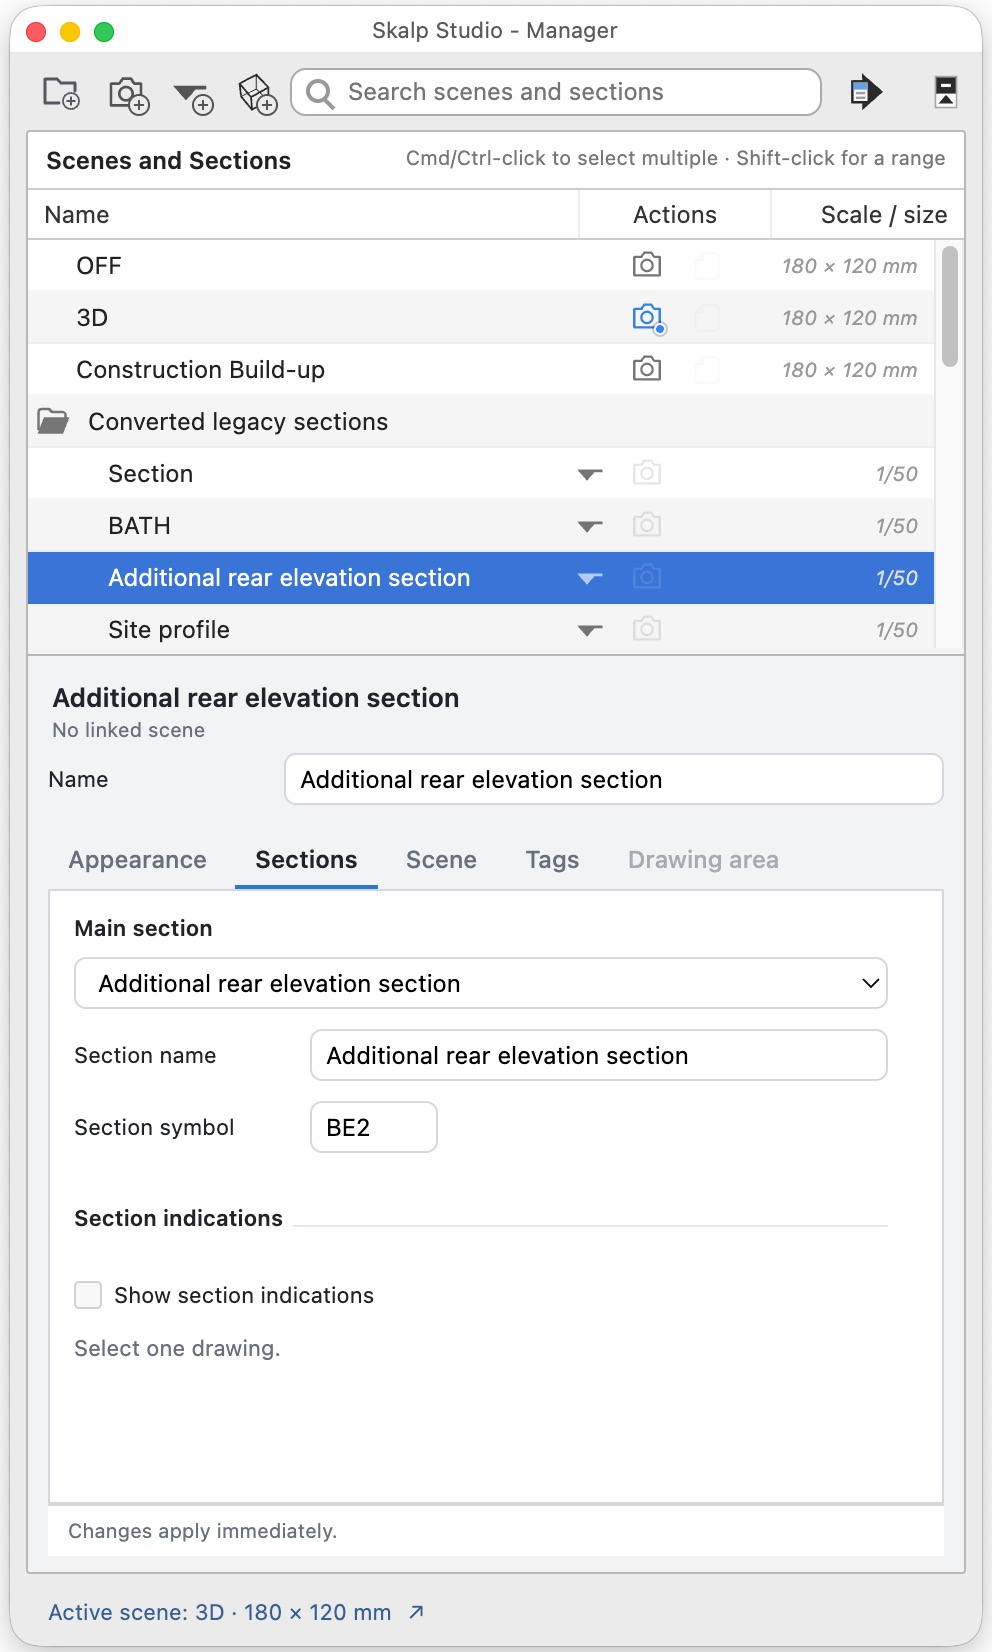
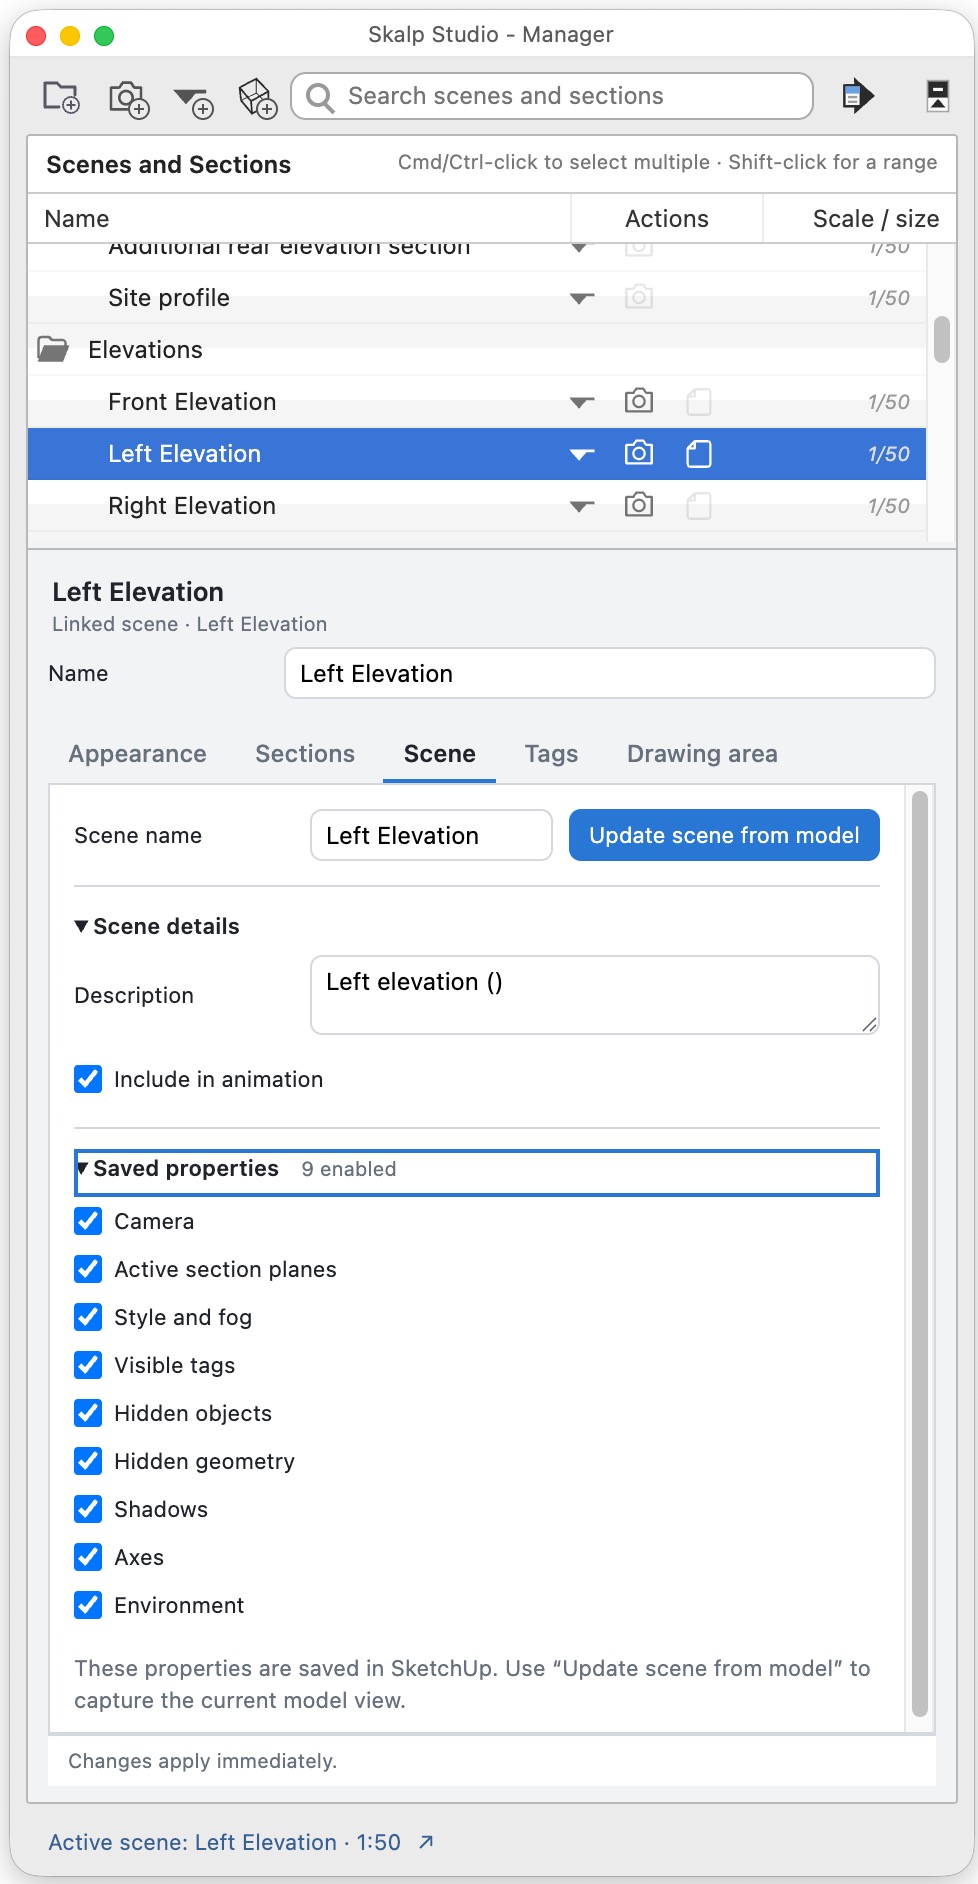
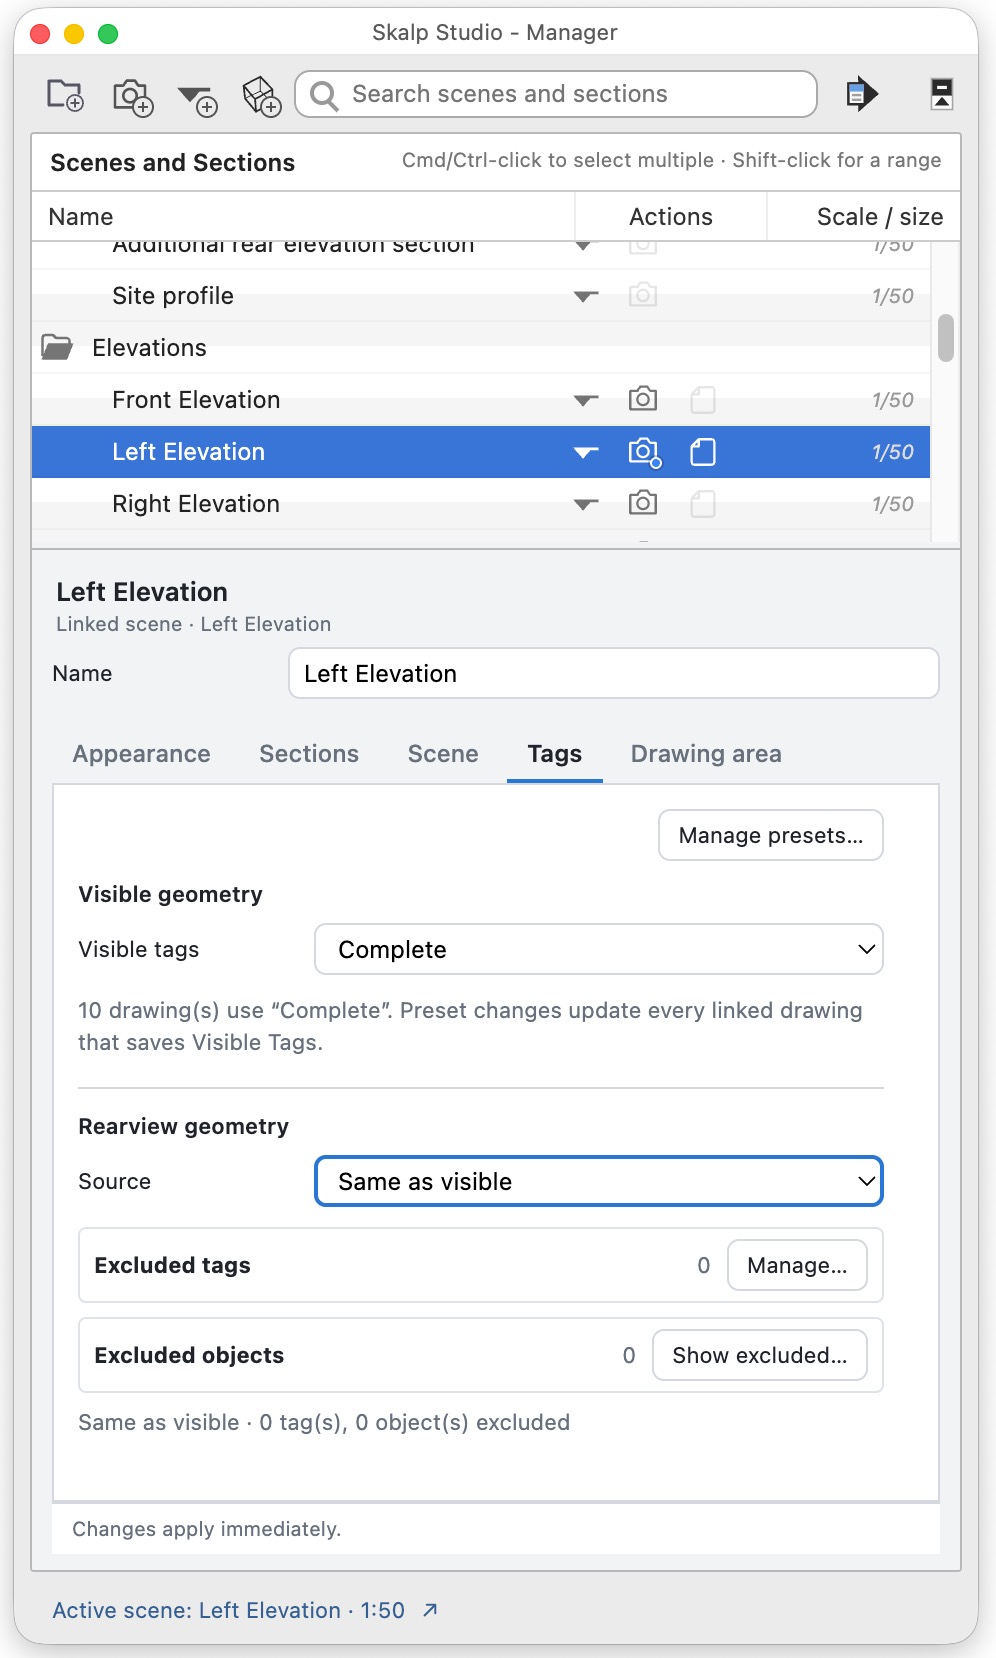
Create or update the linked scene
For a standalone section item, Create scene links a scene to that same item. Update scene from model explicitly captures the current model state according to that scene's enabled property switches. When Style and fog is enabled, the captured state keeps the current face display mode, textures, transparency and Color by Tag setting together, including when the scene uses a Skalp-managed style variant. With Use scene style, saving Shaded with Textures does not switch the view to Hidden Line, and the saved display returns when you reactivate the scene. White vector plan style still deliberately applies its white plan display. It also retains whether SketchUp's section-plane guides are visible or hidden. Switching the guides off and updating the scene keeps them off, including when you activate that scene again. Keep Style and fog enabled to save this display choice; Active section planes saves which planes cut the model.
SketchUp scenes cannot store a separate style override, so Skalp writes the combination into a matching managed style and attaches that style to the scene. The button briefly presses and pulses when the click is accepted; it does not open a confirmation dialog. Editing an inactive item's Skalp settings stores them without applying them to the working view.
Tag presets
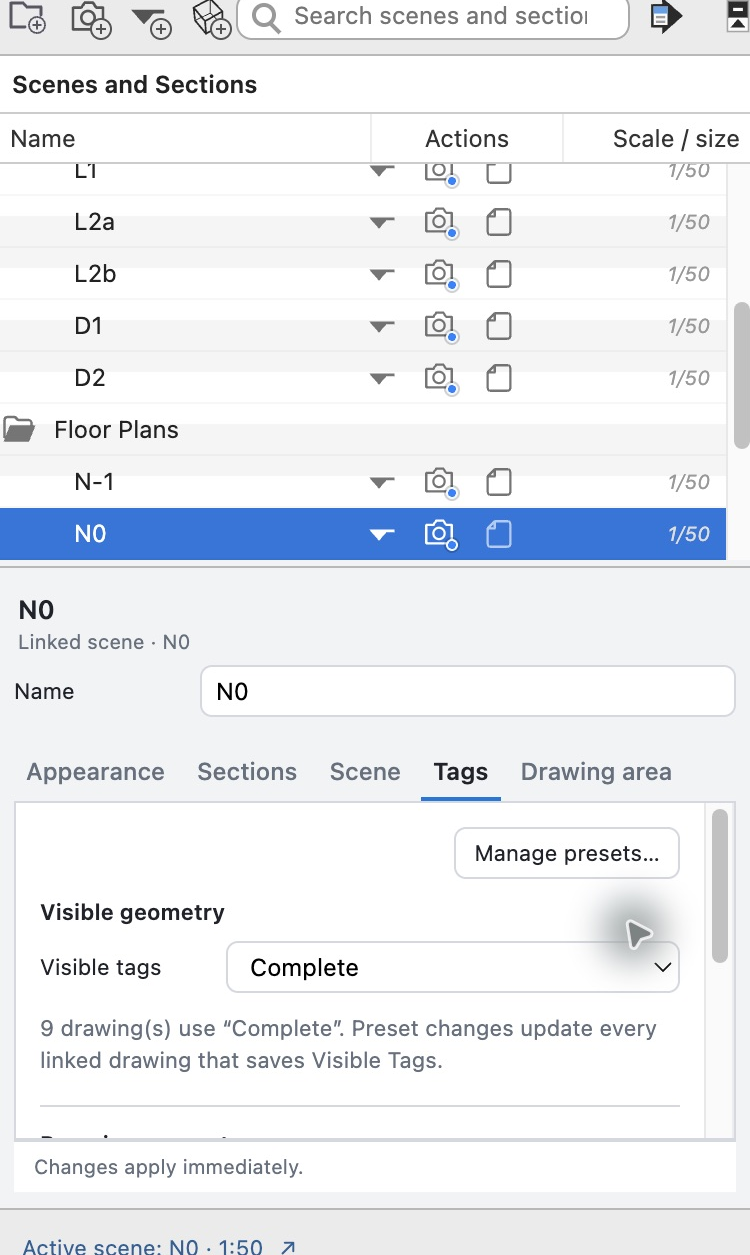
A linked scene may optionally use a tag preset on the Tags tab. The ordinary scene workflow has one Visible tags list; choosing a preset assigns and applies it immediately. The scene must save Visible Tags on the Scene tab. Scenes without a preset keep their own tag visibility. Select multiple scene rows to assign or remove one preset for the complete selection. A mixed selection is identified until a preset is chosen.
Generated section hatching follows the Visible geometry tag filter, including hidden parent tag folders. When that filter changes, Skalp immediately clears the previous section hatching and cut pens while preparing their replacement. Turning the tags back on restores their generated hatching. A separately configured Rearview geometry source keeps its own visibility rules.
Choose a Rearview visibility source
The same tab contains separate Rearview geometry controls for drawings with Rearview enabled. Choose one Source: Same as visible follows the resolved Visible geometry source, Scene visibility uses the scene's saved tag visibility, and a tag preset uses that shared preset. Changing the Rearview source does not change the model view or the scene's ordinary visible tags.
Exclude tags and restore objects
Each drawing also keeps local Excluded tags and Excluded objects. These exclusions are applied after the selected source, so they remain in effect when the source changes and do not modify a shared preset. The Tags tab shows a compact count for each kind of exclusion. Choose Manage… beside Excluded tags to open its larger editor. Choose Show excluded… beside Excluded objects to start the visual restoration mode in the modeling view. Activate that drawing first when the action is unavailable.
The Excluded tags editor preserves the model's nested tag-folder hierarchy. Close an available tag eye to exclude that tag; tags already hidden by the source remain unavailable. Use the larger disclosure arrow beside a folder to collapse or expand its contents; the chosen open/closed state is retained while the Manager refreshes. The folder eye hides or restores all source-visible tags inside that folder in one action, while tags already hidden by the selected source remain unchanged.
In object-restoration mode, the current Rearview stays visible while Skalp prepares every excluded object's Rearview lines as bright magenta dashed strokes. Hover a stroke to show every Rearview stroke belonging to that object as a thicker solid highlight, then click any highlighted stroke to restore the complete object. The restored strokes immediately return to their normal Rearview appearance. Continue clicking other excluded objects or press Esc to finish.
The temporary lines remain visible until the normally filtered Rearview is ready again, so entering or leaving the mode does not blank the drawing. Tag-editor and object-restoration changes apply immediately and can also be reversed with Edit > Undo.
Find the object behind a Rearview line
Choose Inspect rearview source on the Display toolbar, then hover a generated rearview line. Click to select the source object in SketchUp. Right-click the highlighted line to select its source, exclude that object or exclude its tag. When coincident rearview strokes have several sources, press Tab or choose Next coincident source to cycle through them. Escape first unlocks a selected stroke and then exits the tool. Excluding an object removes both its rearview linework and its contribution as an occluder; the exclusion is used by the live preview and by publication/export for this drawing only.
The Appearance tab keeps the Rearview switch and shows a concise summary of its tag source beside it. When Rearview is enabled, Rearview appearance appears directly below that row, followed by its custom line controls when Custom appearance is selected, before Surface Materials. Turning Rearview off hides these appearance controls and preserves their settings. Choose Configure tags… to open and focus the Rearview tags controls on the Tags tab.
Turning Rearview off preserves the saved tag choice, and Configure tags… remains available so that choice can be prepared before Rearview is enabled.
Native LayOut drawing publication applies Visible geometry and Rearview tag exclusions separately, including excluded Rearview objects. A Rearview source can include tags hidden in the visible drawing. Change the source and exclusions in Skalp before synchronizing; changing LayOut layer visibility does not recalculate which model objects contribute geometry.
Create and maintain shared tag presets
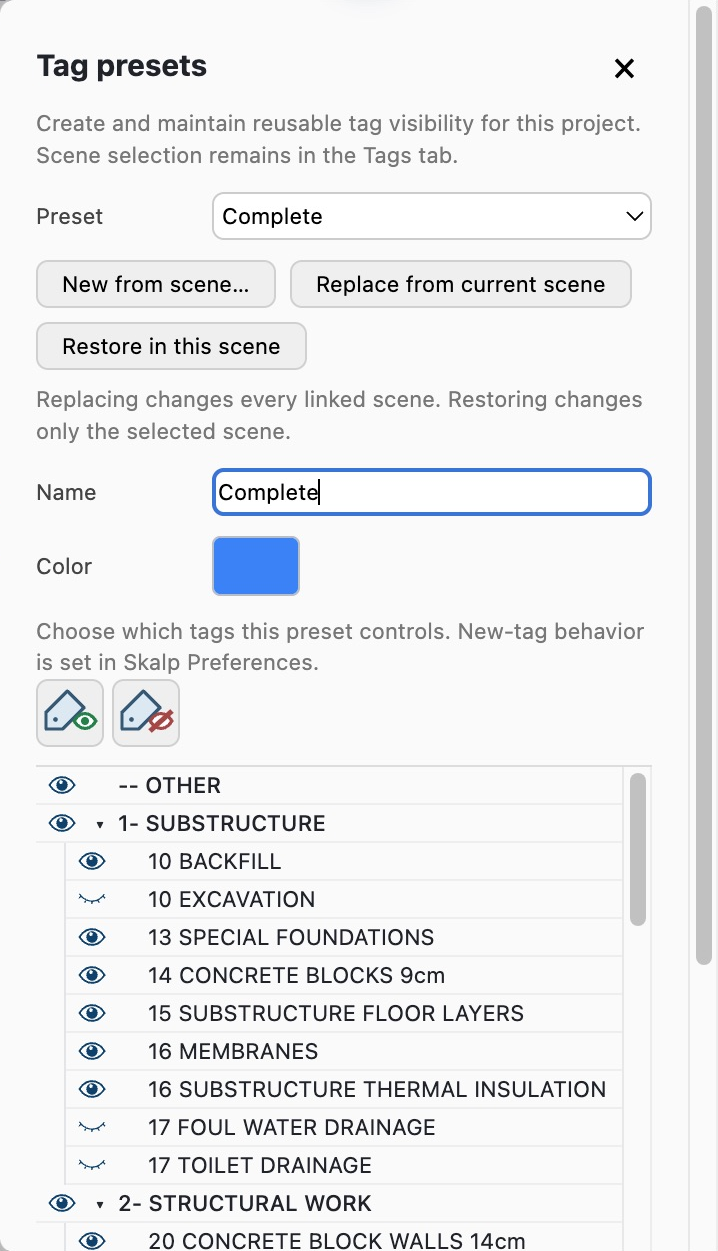
Use Manage presets… at the top of the Tags tab only when the shared project definitions must change. Its neutral position above Visible geometry and Rearview geometry reflects that either visibility source can use the same preset. Choose the definition to edit with Preset inside the editor; this selection does not assign that preset to Visible or Rearview geometry.
The editor therefore remains available when the scene does not save Visible Tags, while New from scene…, replacement and restoration still require that saved scene property. New from scene… captures the current visible and hidden tags, assigns the new preset to the selected linked scenes and selects it in the preset editor so you can immediately change its name, color and visibility rules. Cancelling the name prompt keeps the existing selection. Creation and assignment take effect immediately; subsequent edits require Save. Replace from current scene copies scene visibility into the editor without changing the saved preset or linked scenes. Restore in this scene reapplies the saved preset only to the selected scene. These actions write only tag and tag-folder visibility; they do not activate a scene or alter its camera, style, sections, shadows or other saved properties.
Use the green-eye All tags on or crossed red-eye All tags off icon above the tag tree to set every tag and tag folder in the selected preset at once, including collapsed branches. These are draft changes until Save; they do not change the preset’s rule for newly created tags.
Name, color, individual eyes, bulk visibility and replacement from a scene are edited as drafts. Choose Save to commit the selected preset and update its linked scenes. The editor stays open. Switching Preset retains each unsaved draft while the editor remains open. Close, the title-bar close control and Escape discard all unsaved edits. Already saved changes remain. Restoration uses the saved preset; creation, assignment, restoration and confirmed deletion remain immediate actions.
To recover after All tags off before saving, choose Replace from current scene to read the unchanged scene visibility, then Save, or close to discard the draft. After saving, the linked scenes already contain the new visibility; replacing from one of those scenes does not recover an earlier state. Use SketchUp Edit > Undo or edit the eyes and save again.
Set tag and folder visibility rules
Preset settings provide a name, an identifying color chosen with Skalp's shared color picker and a SketchUp-style visibility eye for every tag and tag folder. The picker offers the standard color palette and Custom color…. The expandable tree follows the model's nested tag-folder structure and sorts sibling tags and folders in ascending natural-name order (for example, 2 before 10). The tree follows SketchUp's compact Tags-panel layout. The icons use SketchUp's original open-eye and closed-eye artwork.
An open eye stores Visible and a closed eye stores Hidden; every listed tag and folder therefore has an explicit result. Folder visibility is stored independently, just as it is in SketchUp, and does not overwrite the saved eyes of its child tags.
The office default for newly created tags is selected once under Preferences > Drawing defaults and is copied into new presets. Skalp notices new tags when the Manager synchronizes and updates linked scenes that save Visible Tags. New tags inside a managed tag folder inherit that folder's profile rule; other new tags are hidden by the default rule.
Identify, disable or delete a shared preset
When a linked scene saves Visible Tags, its scene icon shows the profile color as a small badge. Scenes using the same profile therefore share the same color. A profile may be linked to a scene that is not included in output. If Visible Tags is disabled later, the link is retained but inactive, the badge is hidden and the Tags tab explains how to reactivate it. Deleting a profile unlinks its scenes and leaves their last stored visibility unchanged.
Nested sections and deletion
Nested section planes are managed in their native group/component context, not as independent top-level Manager rows. Instances sharing a component definition also share its nested section state. Rearview and depth-clipping preview controls currently require a main section plane; nested-only scenes have limited controls.
Review the deletion dialog before confirming an item deletion. Explode Folder removes only the folder and preserves all of its contents. A main section plane is removed only when its last item reference is removed; nested planes are not deleted by that operation.
Create and use a clipbox
New clipbox creates a box from the selection or model bounds. For a clipbox item, use Adjust clipbox bounds… to edit it or Deactivate clipbox to stop using it. After confirming the name, wait for the highlighted box and the instruction to drag a face. Creation can take several seconds in a detailed model. Drag a face to resize the box and press Esc to finish adjusting. Pause over a row's section or clipbox control to identify its plane or box directly in the model. The preview disappears when the pointer or keyboard focus leaves the control.
Link clipbox views for LayOut
For a clipbox, the Appearance tab also contains Clipbox scenes for LayOut. Check one or more existing scenes. View applies a linked scene's camera and presentation together with this clipbox, without updating the saved scene. A scene can belong to one clipbox publication at a time. Uncheck it before assigning it to another clipbox. Use separate scenes for an unclipped version. The linked-scene selection is saved with the clipbox. Send to LayOut exports each linked clipping-box scene to its own scale-specific derived SKP. Native monochrome line-width and hatch geometry is baked into that file, so its LayOut viewport may be orbited.
Positioning a section precisely
Move, step and reset the plane
To position the cut precisely, choose Section Plane Slider, immediately beside Reverse on the main toolbar. Drag the slider for live movement, or use its step buttons and arrow keys for fine control. Metric models show -50 cm, -1 cm, +1 cm and +50 cm presets; imperial models show -20 in, -0.5 in, +0.5 in and +20 in presets. The dialog starts at zero each time it adopts an active plane.
Set current as zero keeps the plane where it is and makes that position the new origin. Reset to start returns the plane to the position where the dialog first adopted it, even after the origin has been changed. Reset is one SketchUp Undo operation, and one slider drag is one operation. During a drag, Skalp temporarily hides its lineweight and rearview overlay and does not recalculate it for intermediate positions.
Releasing the slider or finishing a keyboard adjustment calculates the overlay once at the final plane position, reusing the captured model geometry. The compact dialog can be resized horizontally from its smallest clean layout to the maximum useful slider width; its content height remains fixed so no empty area can be added below the controls. Its title identifies the adopted plane as Skalp Studio - Move Section Plane plane name; the controls do not repeat the active-plane icon and name inside the window.
Activating another section plane and refocusing the dialog adopts it automatically.
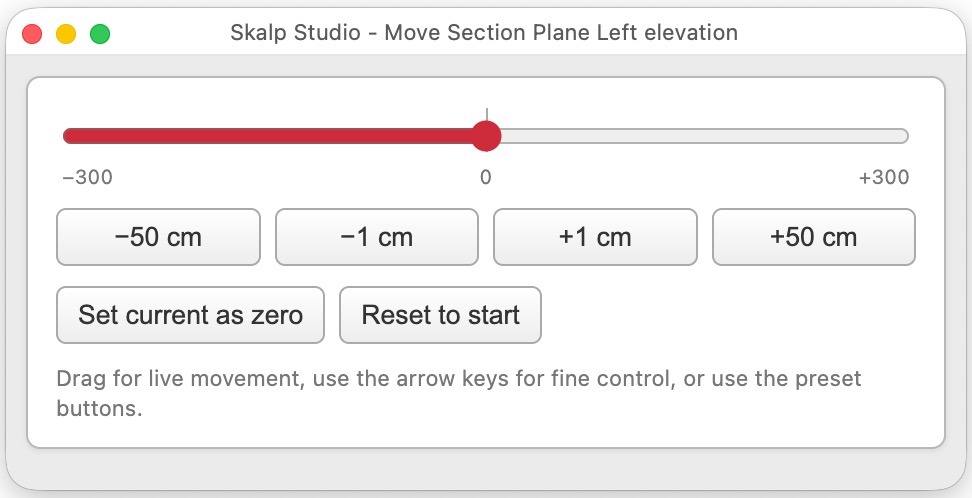
Drawing appearance and scale
Goal Set the printed scale, section outlines and lines behind the cut.
- Select the drawing in the Manager and open Appearance.
- Set Scale; enable Rearview when you need geometry behind the section.
- Choose global, material or custom Rearview appearance.
- Enable section widths or Depth Clipping as needed. Align the section view to see native depth fade.
Check Compare the drawing at its intended scale. Different scales can select different material representations; changing drawing scale does not resize the model.
Find a task: Scale · Rearview · Depth · Shadows
Choose and manage drawing scales
Set Scale on the Manager's Appearance tab. Open **Preferences > Drawing defaults
Manage drawing scales…** to maintain the office scale catalogue. There you can add a custom label and a ratio using paper/model lengths with units. For example, 1 mm on paper to 50 mm in the model defines 1:50. Scale selectors group metric and imperial entries, show the current model's unit system first and order each group from the largest drawing scale to the smallest (ascending ratio denominator). The default scale is used for new drawings; changing it does not alter existing drawings.
Scale determines scale-dependent material representations and printed dimensions of drawing features. Use separate scene items when the same section is needed at different drawing scales. Changing drawing scale does not resize the building.
Choose Rearview appearance
| Control | Effect |
|---|---|
| Rearview | Displays generated linework behind the main section. Rear lines are clipped out of closed cut regions; actual openings retain rear lines. |
| Rearview appearance | Uses the global Preferences appearance, material appearance or a custom override for this drawing. |
| Rearview line style | Uses the material style or an explicit line type. |
| Rearview color | Uses material colors or a custom color. |
| Rearview width | Controls rearview pen width. |
Overlapping straight rearview lines with the same dash pattern share aligned dash and gap positions, including lines from different objects. This prevents one line from filling the other line's gaps. Native LayOut publication combines overlapping straight rearview lines with the same line type, color and width into one patterned path, including lines from different objects and tags. The combined path uses the source layer at its first endpoint. Different pens remain separate. Use Sync Drawing with LayOut to refresh an existing drawing after updating Skalp. Automated preview and native-publication geometry tests cover these cases; matching live SketchUp/LayOut visual acceptance is pending.
Generated native LayOut rearview lines compensate dash scale for pen width so standard dash and gap lengths follow the SketchUp preview at the drawing scale. Changing pen width does not shorten the pattern. Use Sync Drawing with LayOut to refresh existing drawings after updating Skalp. This does not change the dash scale of annotations you draw yourself. LayOut's supported pattern-scale range limits compensation for exceptionally thick or thin pens. Automated publication and native rendering tests cover this correction; matching live visual acceptance is pending.
Rearview omits hidden and softened SketchUp edges, so softened surface divisions are not drawn as rear lines. Smoothing alone changes shading and leaves a hard edge eligible for linework. The adjoining faces still provide occlusion and section boundaries. This filtering has automated Ruby and native SDK coverage; visual acceptance in SketchUp and Windows remains pending.
Set the global Rearview line style, color and width under Preferences > Drawing defaults > Rearview appearance. Every drawing set to Use global appearance uses those values immediately, including an existing drawing after switching to it. In the Manager, select Use material appearance or Custom appearance when one drawing needs an override. Returning that drawing to Use global appearance reconnects it to later Preferences changes.
| Control | Effect |
|---|---|
| Skalp section lines (line width & color) | Enables Skalp's material-specific section outlines. |
| Depth Clipping | Limits rearline depth and applies a native depth fade when the view is aligned. |
Turning SketchUp's section cuts off also hides Skalp's generated rearview lines, section hatches, fills and cut lineweights. Turning section cuts back on restores the cached preview. Hiding only the section-plane guides does not hide the cut presentation. This behavior has automated coverage; live host verification is pending.
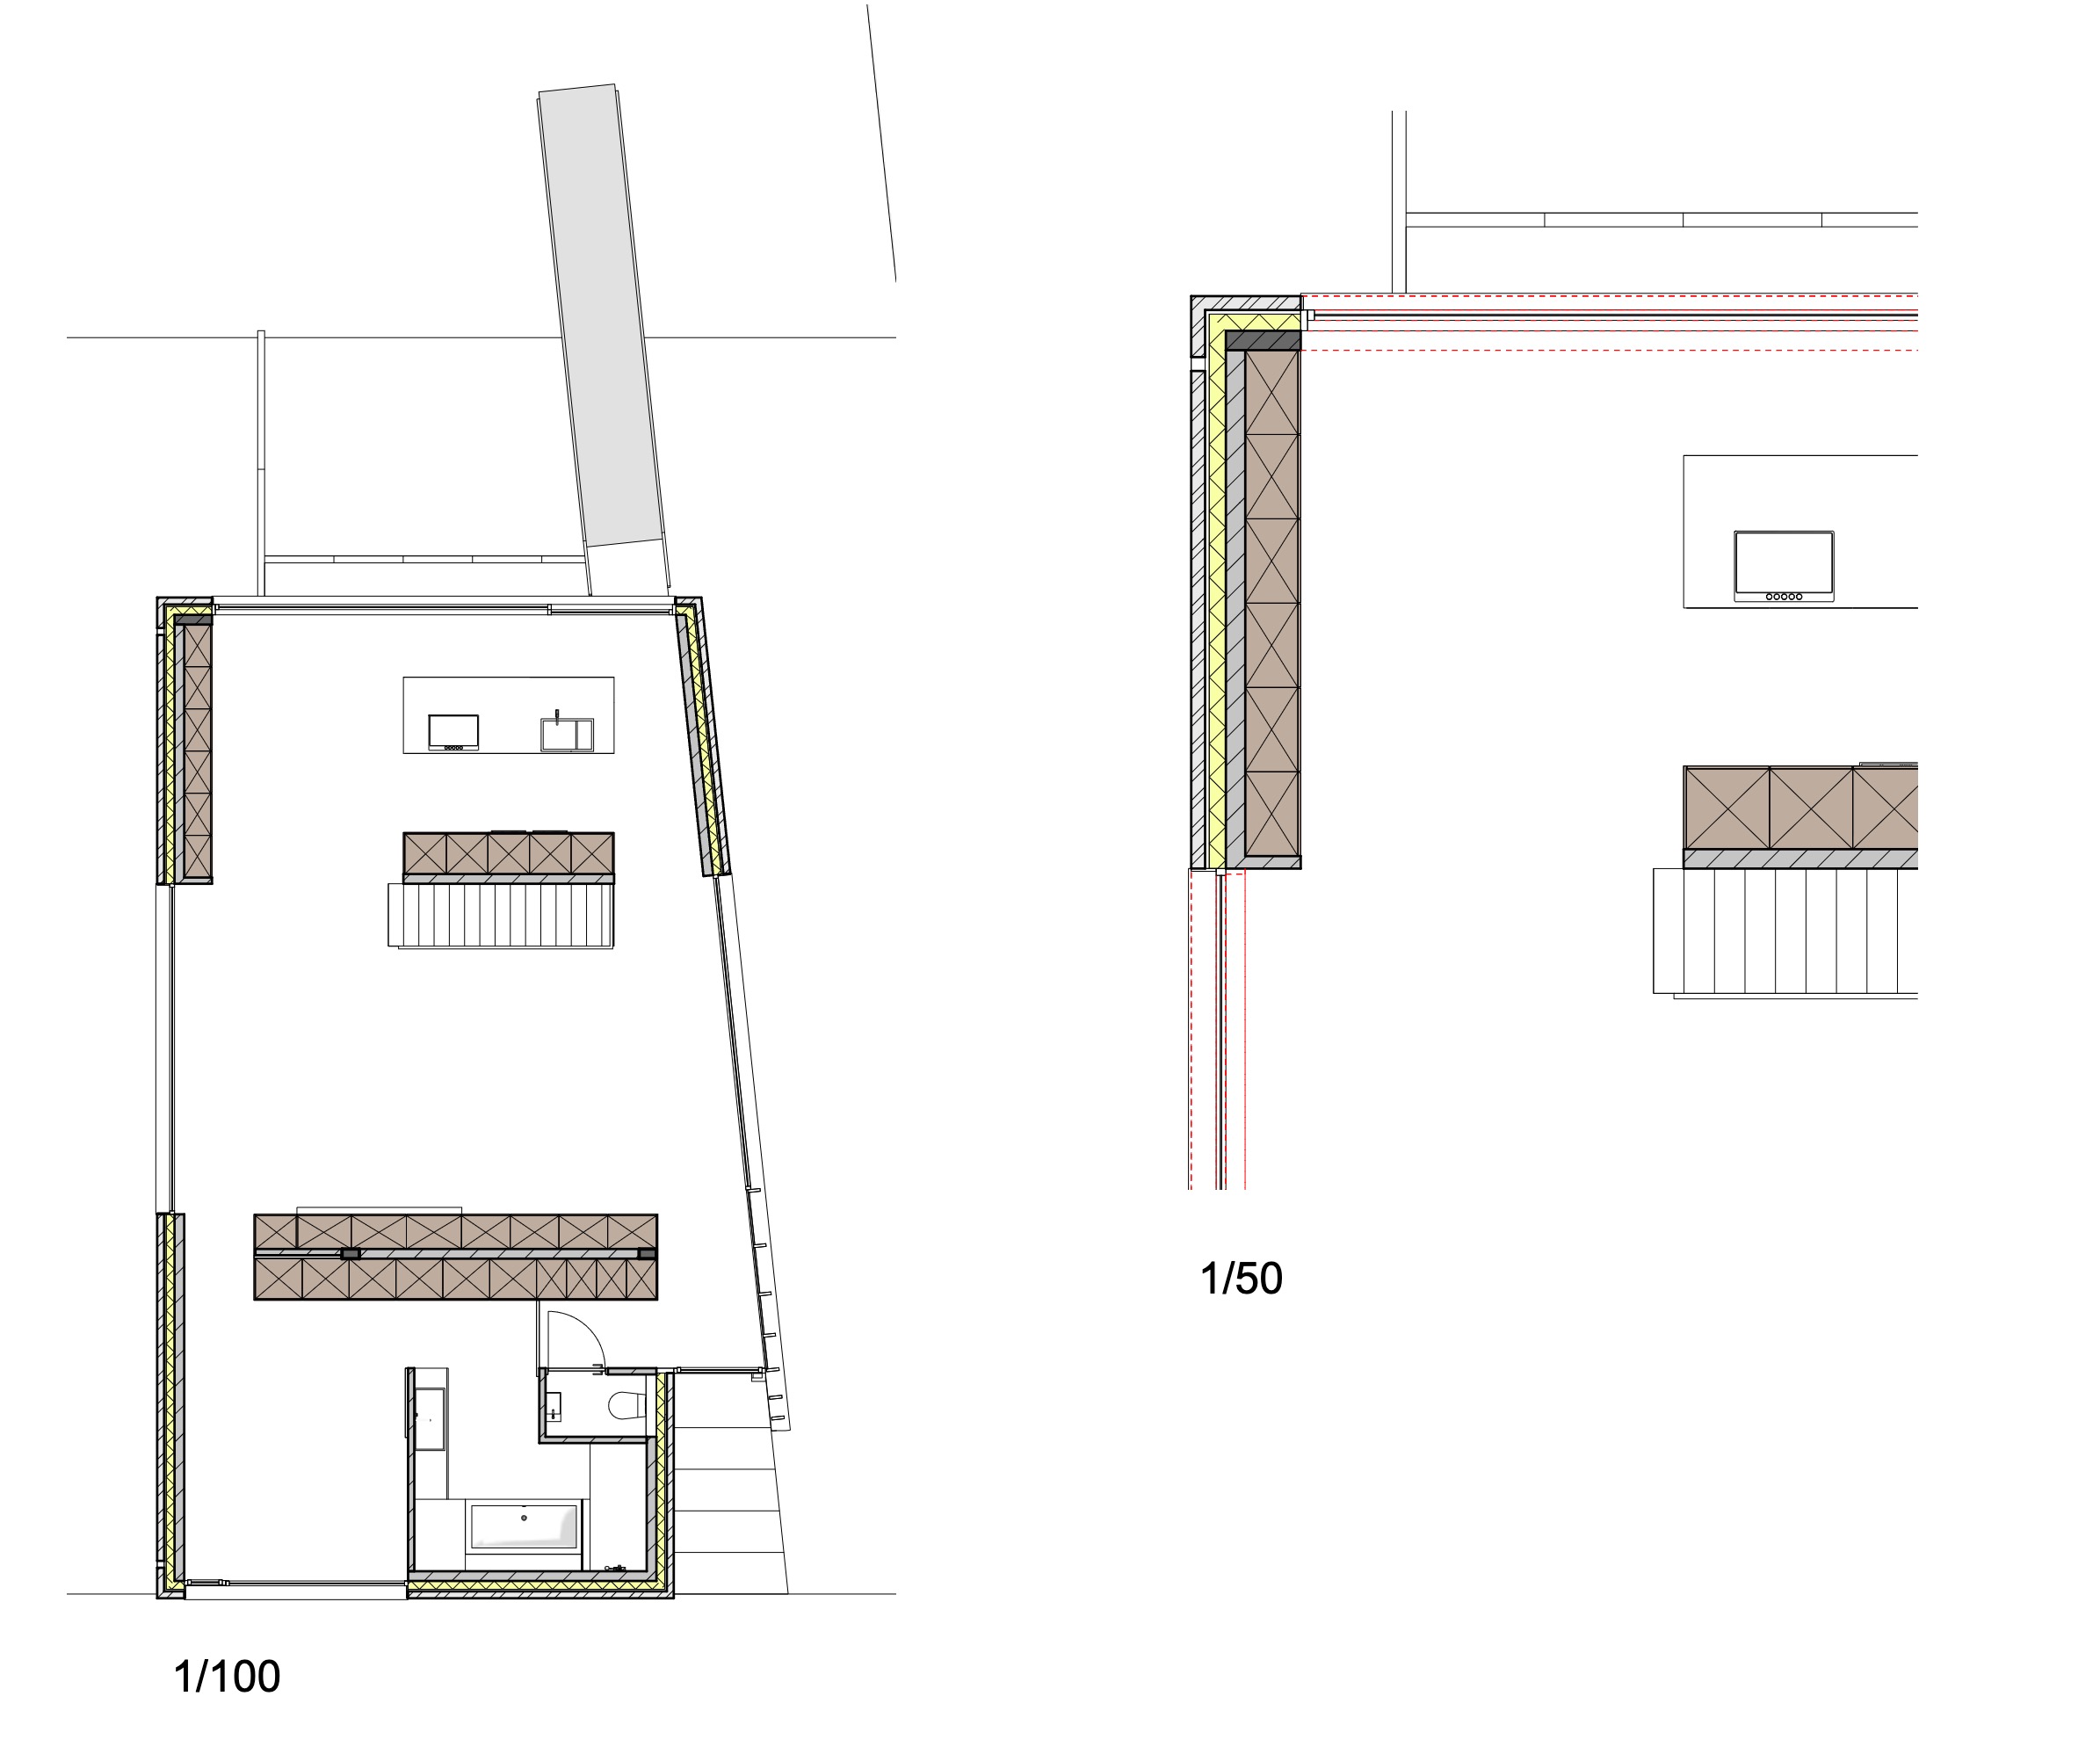
Section outlines and cut-mask limits
Rearview clipping builds the cut mask separately for each object. A separate solid inside another cut region does not create an opening in that region. Excluded tags do not contribute to the mask.
Section outlines can update before rearview. While a replacement is being calculated, the preview follows your Rearview while updating preference. Large-model edit and scene-switch acceptance remains pending.
Set depth clipping
Enter depth with units, such as 6 m or 250 cm. Bare values use the model's length
unit. Native depth fade requires a parallel camera facing the main section squarely.
During an active Skalp section preview, orbiting away or switching to perspective hides
all native fog, including ordinary scene fog when Depth Clipping is off; aligning the
parallel camera again restores the applicable ordinary fog or depth fade. Pan and zoom
keep the fade active.
Scene/style updates cannot leave fog visible in an oblique or perspective view. Skalp does not move the camera merely because you enabled Depth Clipping. Turning Depth Clipping off restores the previous fog settings, while the camera guard remains active until the section preview closes. Generated rearline clipping uses the configured distance; native geometry uses a fog fade. In converted pre-2027 models, Skalp also recognizes the legacy depth fog from its exact saved fade range.
It turns that fog off when you orbit away and records it for later scene activations. Unrelated user-created fog is not claimed or rewritten as depth fog; it is only hidden temporarily outside the aligned view.
Show the active section plane or all planes
The first icon in the Skalp Studio - Display toolbar switches between Active only (the default) and All. It uses one fixed three-plane icon, with a red middle plane and two gray planes. Short perpendicular corner ticks indicate the cutting side, without section symbols in the icon. The button is pressed in All and unpressed in Active only. The tooltip names what clicking will do: Show all section planes or Show active section plane only. Skalp remembers this choice in your user preferences, including when you change models or restart SketchUp.
SketchUp's Show Section Planes remains the master switch. The Skalp icon does not turn it on: with Show Section Planes off, neither mode displays planes. With it on, Active only allows the current native active plane to appear; All allows all ordinary section planes to appear. A scene with several active nested cuts still retains those cuts; Active only chooses the plane in the current edit context first, then the model-level active plane. Construction planes belonging to a clipping box remain managed by its own controls.
Activating another section changes the visible plane in Active only. All remains selected when you change sections. A newly placed active root-level plane is selected in the Manager after the native placement finishes and the Manager refreshes. The visibility mode does not change which planes cut the model. SketchUp's tag visibility and native edit-context display rules still apply.
This behavior is implemented in the current source and covered by automated state-transition tests. Live SketchUp 2027 visual/Undo/save-reopen acceptance and Windows checks remain pending.
Set architectural shadow direction
The toolbar's 45° Shadows Left and 45° Shadows Right set architectural shadow directions matching the side of the cast shadow shown in each icon (the sun comes from the opposite side). Capture/update your scene if those settings should be saved.
The Display toolbar includes the section-plane display command at the left, before the Lineweights command.
Defaults for new items
Open Extensions > Skalp Studio > Preferences… > Drawing defaults to set defaults for new drawings. Existing drawings retain their saved settings, except that drawings using Use global appearance follow changes to global Rearview appearance.
Skalp materials
Goal Give cut objects and visible model faces the right fill and hatch.
| You want to change | Choose | First action |
|---|---|---|
| A cut object's section | Section Material | Activate a section plane, then use Paint Skalp Materials. |
| A pattern on a visible face | Surface Material | Double-click a Surface Material, then click the visible face side. |
| Several objects with the same tag | Section or Surface assignment | Open Skalp Materials by Tag. |
| Objects using one SketchUp material | Section or Surface assignment | Open Skalp Materials by SU Material. |
| A material already used in this project | Its model copy | Select it under In Model and choose Edit. |
Check Direct assignments override broader mappings. Editing a reusable library does not update independent copies already stored in a model.
The next build's bundled Architecture Section library uses black 0.18 mm cut lines wherever the previous cut-line color matched the fill. Other cut-line settings are retained. Black also uses a black 0.18 mm cut line, which has no color contrast against its black fill. This correction applies to newly installed bundled libraries; existing editable libraries and model copies retain their saved settings. To correct an existing copy, select it, choose Edit, and set its section cut-line color to black and its width to 0.18 mm. Automated library installation/reload checks cover the correction; live host acceptance is pending.
Find a task: Choose material family · Paint a surface · Position a hatch · Libraries · Edit/assign · Scale representations
Choose Section or Surface Materials
Section Material definitions are saved as Skalp data inside the model. Their hatch, fill, line and Rearview settings do not depend on SketchUp's material collection, so Purge Unused does not delete them. Existing definitions migrate automatically when Skalp loads legacy model data. Ordinary groups and components use SketchUp-native hatch patterns; Skalp can recreate a missing native hatch from its saved definition.
In the next development build, SketchUp 2027 procedural objects and their generated parts use Skalp's section overlay for solid fills, PAT hatches and procedural Section Material patterns. Paint them with the usual Paint Skalp Materials command. Skalp preserves the assignment without changing the generated object's native hatch. Keep the Skalp section preview active; its fills and hatches remain visible when both Show lineweights and Show rearview lines are off. The same material definitions supply Skalp section exports. This avoids the native hatch assignment that can make procedure-generated geometry disappear on macOS SketchUp 2027. Direct object painting and assignments by tag or SketchUp material have been verified in the macOS development version. Windows and LayOut host acceptance remain pending. A signed download containing this correction has not yet been published. Legacy Section Materials shown from older model data are converted into saved Section Material definitions when selected for painting. Their original SketchUp appearance materials are preserved. Ordinary SketchUp appearance materials keep their usual purge behavior.
Imported dot hatches retain their source PAT line families, dot positions, gaps and drawing scale. Native rendering uses short visible marks for zero-length PAT points; it does not replace a random dot pattern with a regular grid.
The Material Browser keeps Section Materials and Surface Materials in separate, type-specific libraries. The sidebar starts with the In Model group and its Section Materials and Surface Materials entries, followed by separate groups for reusable Section Material and Surface Material libraries. Selecting a library determines the material family; there is no separate family switch. Paint Skalp Materials keeps the last material family and library used in the Material Browser. Surface Paint remains active even when a section plane is active. On first use, Paint chooses Section Materials when a section plane is active and Surface Materials otherwise. Without an active section plane, Paint uses Surface Materials. Surface Paint starts immediately with the last valid Surface Material, or the first available one when none has been used yet. If no Surface Material exists, the browser remains open so you can create one. Select a library from the other sidebar group when you want to work with the other material family. Section Materials retain their existing fill, cut-line, hatch and Rearview settings.
Surface mode lists only the separate materials that were explicitly created as Surface Materials; it does not convert or expose existing Section Materials as surface patterns. New and Edit open the Surface Material Editor. It uses the same Hatch panel, graphical pattern-type menu, calibrated pattern preview and searchable PAT library as the Section Material Editor. Basic patterns and the scalable Tiles, Bond, Joints and Board & Gap construction patterns therefore share their generators and controls between both editors.
Surface fill and hatch settings
Fill color sets the background associated with that Surface Material and Fill opacity sets its opacity from 0% to 100%; existing definitions without an authored color or alpha use opaque white. The pattern preview draws the fill over a checkerboard so its current opacity remains visible while you adjust the slider. Surface Material cards in the Material Browser use the same checkerboard behind their preview, so you can also compare transparency without opening the editor.
The color and alpha are stored together in the Surface Material fill definition and are shared by the live overlay, CAD export and native LayOut publication. For a pattern that generates strokes, Line Color sets the hatch-stroke color and Line Weight sets its paper width; existing definitions use black and 0.18 mm. These controls are hidden for None, because that type has no hatch strokes.
Surface mode removes representations, Paper Preview, Section appearance, Rearview, Image, Timber, Rigid Insulation and Batt Insulation because those settings describe a cut section rather than a repeating face pattern. Its patterns always use fixed model dimensions. Choose None in the Hatch menu to create a fill-only Surface Material: the selected fill remains visible and exportable, while Skalp generates no hatch strokes. A Surface Material created with New remains in its selected Surface Material library, while existing Section Materials remain unchanged in their own libraries.
The Browser also hides its paper preview-scale selector when a Surface Material library is selected.
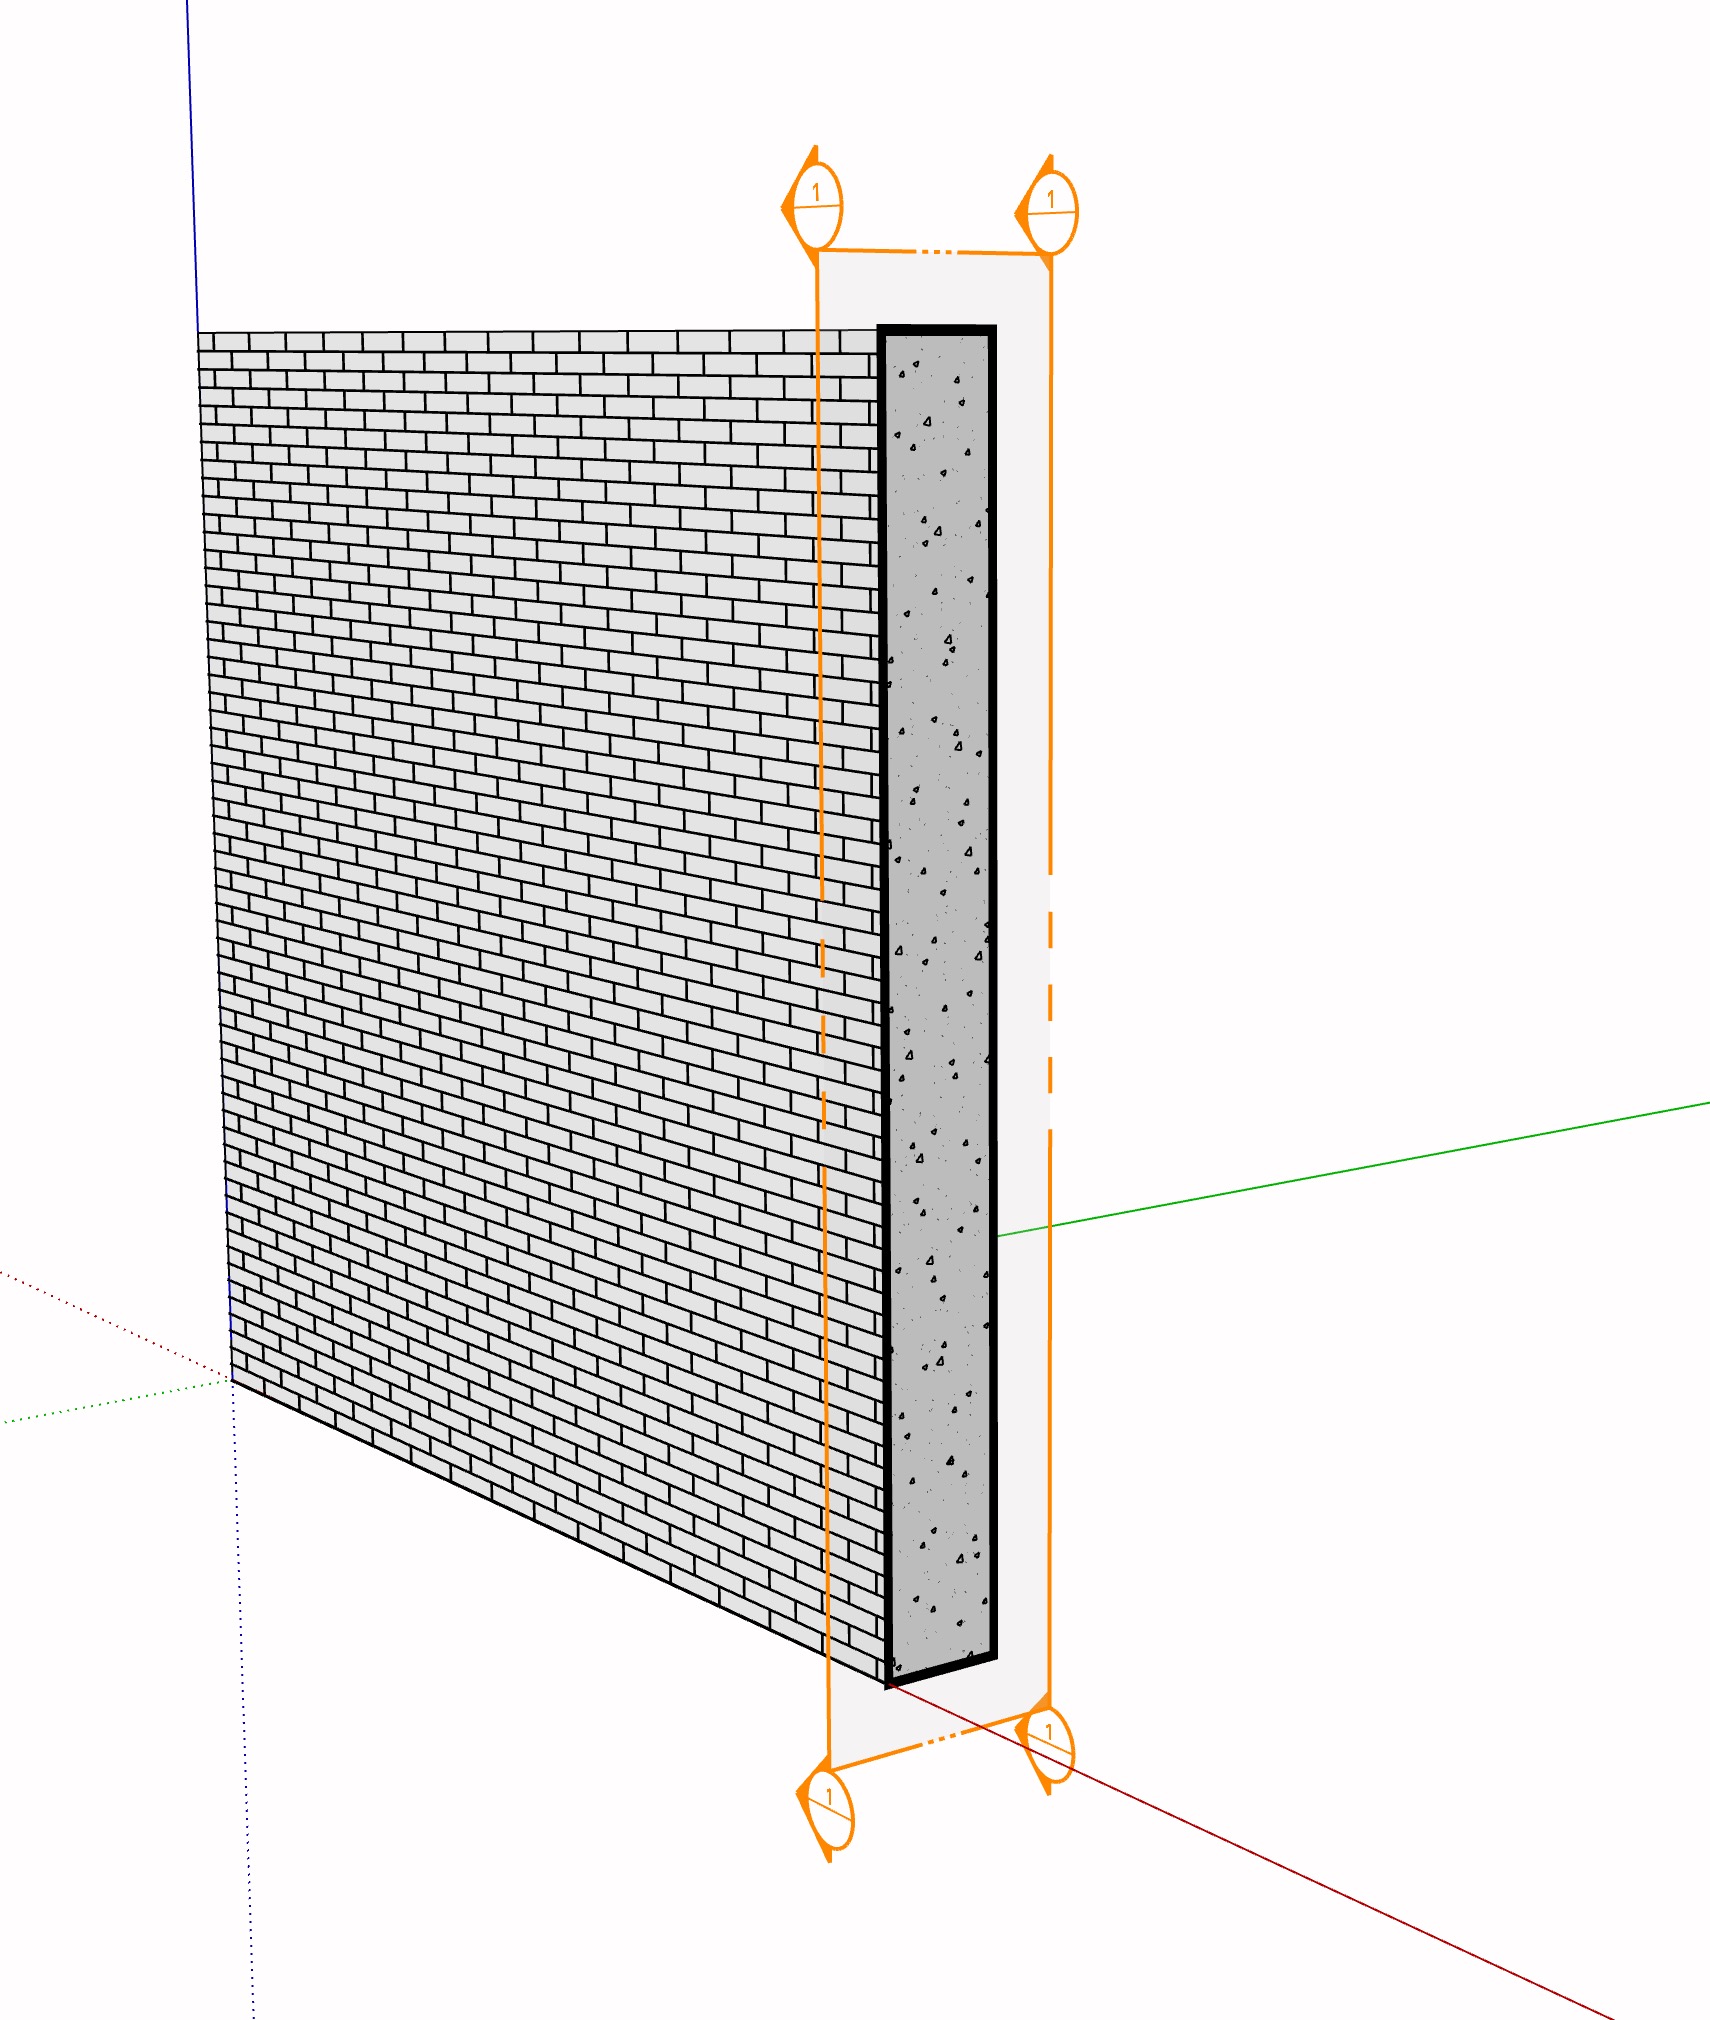
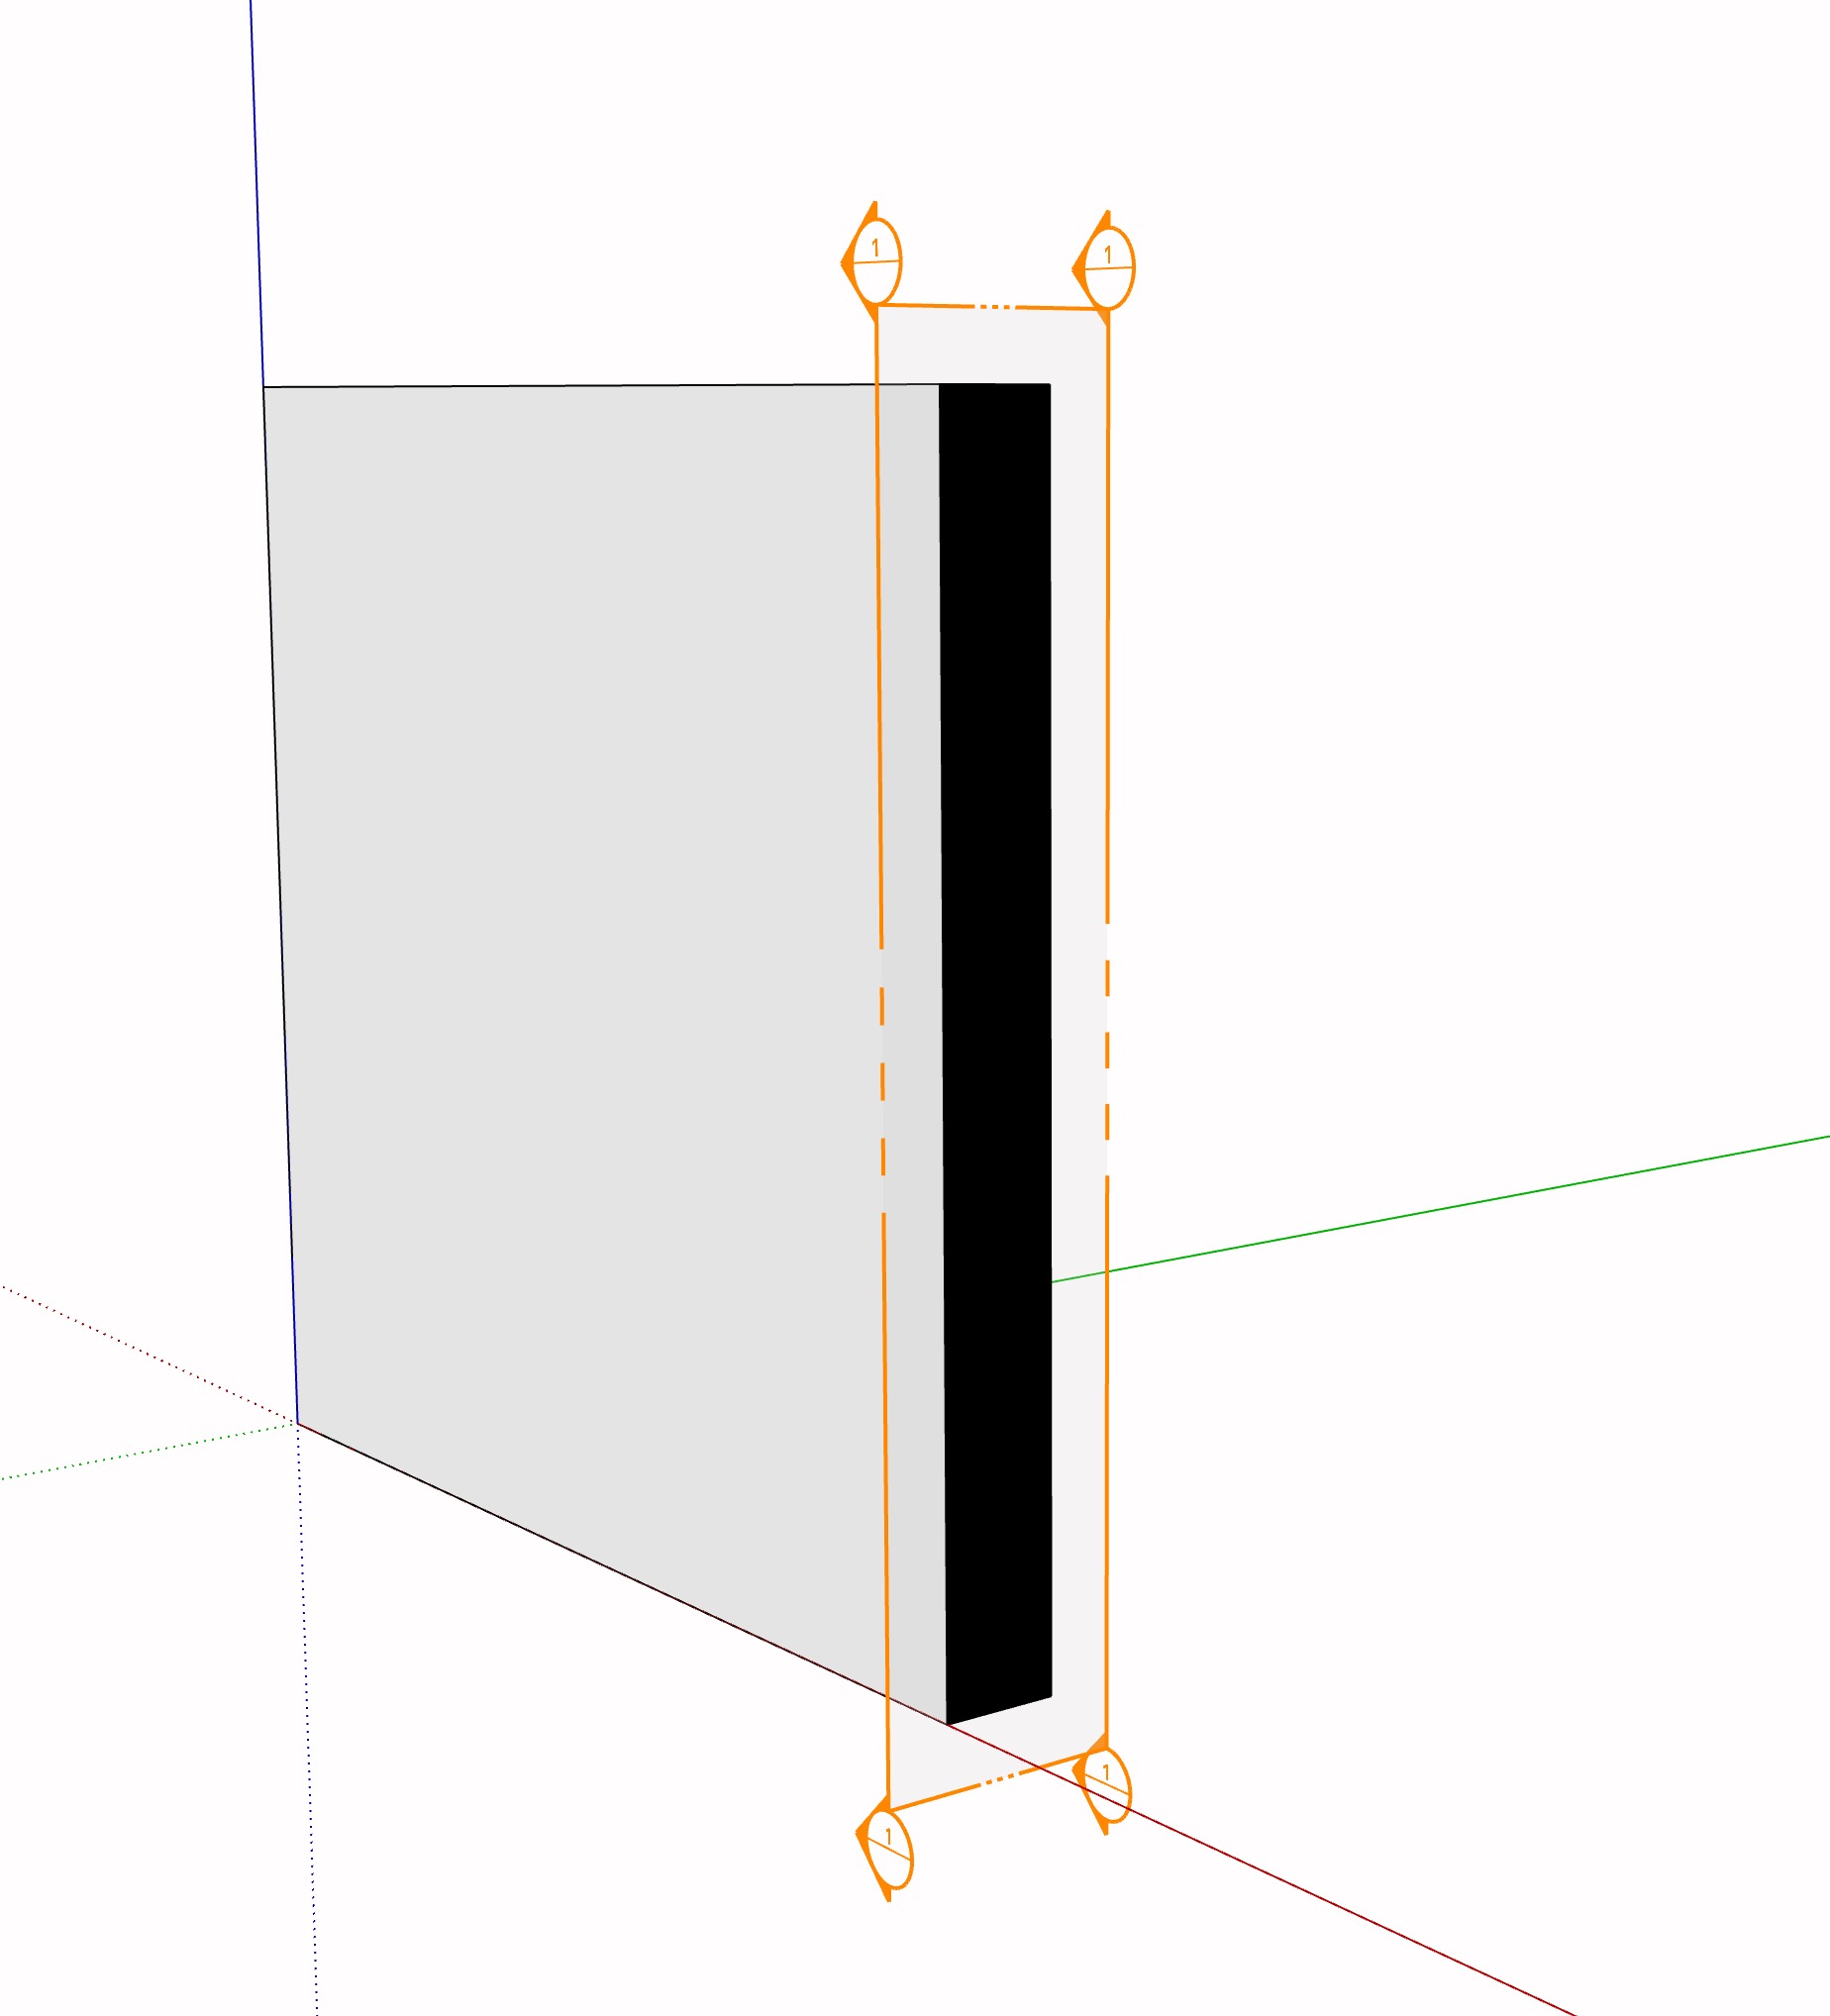
Edit the library or the model copy
The first time you use a Surface Material from a local or linked library, Skalp stores an independent copy in the open model. Editing the library material afterward changes only the library; it does not alter the model copy or any faces, tags, objects or SketchUp materials that use it. To change an existing model copy, select it under In Model > Surface Materials and use Edit. In Model > Surface Materials also lists Surface Material definitions that have been painted from another library and are therefore stored with the open model, even when they are not separate native SketchUp materials. Selecting one reuses the existing model definition rather than creating a duplicate.
Converted solid-fill materials
When converting a pre-2027 Skalp model, an old material whose hatch color equals its background fill is treated as the legacy solid-fill workaround. Skalp stores that converted material as a solid fill without hatch lines, so it does not also appear as a reusable Surface Material. Reconvert an original pre-2027 model to apply this rule; already converted material definitions are not rewritten.
Paint a Surface Material
Double-click a Surface Material to start Surface Paint, then click the visible side
of a SketchUp face. This works through nested groups and components without adding
edges, faces or groups to their Entities collections, so a painted solid remains a
solid. A direct paint click affects only that face side in the clicked occurrence.
When copied groups or component instances share geometry, Skalp makes the required
instance branch unique in the same Undo step; other copies keep their assignments.
Front and back assignments are stored independently. Right-click a directly
painted side and choose Remove assignment to reveal the next object,
SketchUp-material or tag assignment. Pattern dimensions come from the material
definition and are not scaled per face.
When a newly painted face shares an edge with one or more faces using the same Surface Material, Skalp automatically unfolds the pattern coordinates across the shared edge. If those neighbours have different positioning, the largest connected face is the default source. This keeps courses and joints aligned around corners without changing the pattern scale.
Pick and reuse a Surface Material placement
To reuse an existing placement, Command-click on macOS or Ctrl-click on Windows while Surface Paint is active, or right-click the source and choose Pick Surface Material and UV. Skalp uses this as a paint-tool pipette: it picks the Surface Material together with its UV position, translation and rotation. Ordinary subsequent clicks paint both the material and those UV data on other faces. You can also right-click a target and choose Apply Picked Surface Material and UV. Connected targets are unfolded from the picked face, while separate coplanar targets retain the same global pattern phase.
Position a Surface Hatch
To override one face directly from Surface Paint, point at any face that resolves to a Surface Material and press Enter. This includes faces whose Surface Material comes from a direct face or object assignment, By SU Material or By Tag. It starts Position Surface Hatch… through nested groups and components without opening them. Moving or rotating an inherited pattern creates a direct override only for that visible face side; opening the tool and cancelling it leaves the inherited assignment unchanged.
Position Surface Hatch… and Pick Surface Material and UV are also available from Surface Paint's right-click menu for inherited patterns. Remove assignment and Reset Surface UV appear after a direct face override exists. Skalp retains the face resolved when the right mouse button goes down so the menu does not depend on a second macOS pointer pick.
For nested faces, these actions can appear alongside the parent group's normal context menu.
With SketchUp's ordinary Select tool, you can instead open the object for editing when necessary, select exactly one face with an effective Surface Material and right-click it; Position Surface Hatch… then appears in the ordinary face context menu as a fallback, with Reset Surface UV added when that side has a direct override. Placement follows the face inside moved, rotated or scaled groups/components.
The hatch therefore stays on the edited face while positioning and after closing the object; editing one component definition also retains the corresponding placement on every occurrence.
Move and rotate the hatch without changing its size
Click a hatch intersection, endpoint or line to pick up that exact pattern point; intersections such as the corner between a bed joint and a vertical brick joint take precedence over a generic point on a line. Move the pointer and click the destination, following SketchUp's ordinary source-point/target-point convention.
The destination snaps to vertices and edges of the same face, while an unsnapped click places the source at the freely chosen face point. The two screen-space controls follow SketchUp's Texture Position convention and use the same red and green pushpin artwork at the same compact screen size. The red four-arrow pin moves the hatch and the green circular-arrow pin rotates it. The small white foot of each marker identifies its exact point on the face; the raised coloured part is the handle.
Drag the green coloured handle to rotate around the red pin. A protractor, swept angle arc and live angle value appear during the drag. The displayed angle matches SketchUp's Rotation Measurements field, including the Surface Material's base rotation. Dragging within 3 degrees of a multiple of 45° snaps to that angle; move farther away to rotate freely. The guide becomes blue while an angle snap is active.
You can still type any exact angle in Rotation, including negative values and
fractional degrees such as -138.399. Both decimal points and decimal commas are
accepted. Typed angles are applied exactly and are never rounded to a 45° snap.
Typing during a drag replaces that drag with the entered angle.
Drag the red pin's small white foot to relocate the rotation pivot without moving the hatch. It uses SketchUp inference points in the painted face's plane, including points on other model geometry; hatch points and face vertices or edges are also available. The red coloured handle still moves the hatch itself. Drag the green pin's white foot to reposition its rotation control point without rotating or rescaling the hatch. That foot snaps to hatch intersections, hatch endpoints and lines, and then to face vertices or edges. The pins stay in place while you move the pointer toward a handle; hovering only previews a possible hatch snap.
The tool deliberately omits SketchUp's blue scale and yellow distortion pins: spacing, element sizes and shape remain fixed by the Surface Material. Press Enter to finish or Esc to return to Surface Paint. The override is stored only on the visible face side and remains independent of later automatic alignment. Choose Reset Surface UV from the Surface Paint or positioning context menu to discard the manual translation and rotation and rebuild that side's default automatic alignment.
While the pointer is over a paintable face, Surface Paint shows a translucent blue fill and blue outline on exactly that face. The feedback is screen-space overlay content; it neither selects nor changes the face. The Material Browser may remain open; Skalp returns input focus to the model automatically, so moving over the model shows the Paint cursor and the first click paints instead of merely activating the model window.
Surface fills and hatches are overlays, not ordinary selectable SketchUp geometry. They follow the source face's visibility, active section cuts and fog. A Surface Material does not add edges or faces to the solid. In parallel views, surfaces seen exactly edge-on do not draw surface fills or hatches on either side. Section edges remain independent of this visibility rule.
Show or hide Surface fills and hatches
The Display toolbar has separate Show Surface Hatches and Show Surface Fills buttons. In the ordinary 3D model view, the first controls the authored hatch strokes and the second controls the RGBA fill drawn over the existing SketchUp material. A translucent 3D fill therefore mixes with that underlying material; it is a modelling preview and does not force the SketchUp material to use the same opacity. The two global choices are remembered independently of saved drawings. Starting Surface Paint automatically turns on both global display switches, including when starting it again after manually hiding either layer.
Activating a linked scene applies its drawing's Appearance choices without changing either global switch. A layer is visible only when both switches are on; Update scene from model never copies the global switches into Appearance. Existing installations initially use their preceding Show Surface Materials choice for both layers. Surface Paint still respects the drawing's Appearance choices; enable the hatch in Appearance to see its pattern while painting. Position Surface Hatch respects both the drawing and global visibility switches. Positioning handles remain available independently.
Surface appearance in Drawing Mode and publication
Entering 2D Drawing Mode switches the native viewport base to opaque white monochrome: textures, native material transparency, X-Ray and Color by Tag are disabled for the session, while sky and ground are hidden. The model's actual materials, colors, UV data and transparency are not edited. Show Surface Hatches and Show Surface Fills remain independent, usable switches during the session. Leaving the mode, a failed activation, or closing its session restores every preceding rendering option. A translucent Surface fill in the ordinary 3D view can still differ from publication when its SketchUp material has another opacity; automatic per-face opacity matching is not implemented.
Saved drawing visibility versus live display
The Hatching and Fill switches under a drawing's Appearance > Surface Materials settings independently control the two presentation layers. The global toolbar switches additionally gate only the live overlay; they do not change publication. The tooltips explain that individual scene settings still apply.
Publication limit: For parallel plan and elevation drawings, Send Drawing to LayOut includes Surface fills and hatches with their authored line color and paper weight in both Skalp native and viewport presentations. The drawing's Hatching and Fill switches apply independently. Republish and synchronize an existing drawing to add surface layers omitted by an earlier development version. This correction has automated publication coverage; displayed host acceptance is pending. Perspective and clipping-box viewport publication does not include these surface overlays. DXF/DWG includes Surface fills and hatches. Ordinary SketchUp export and SketchUp's own Send to LayOut retain normal model materials; they do not export Skalp overlays.
Material libraries and storage
Use the chevron at the start of the toolbar to Hide libraries or Show libraries. Collapsing the sidebar preserves the selected library and gives its materials the full browser width. When collapsed, the selected library name appears beside Preview: in the bottom status bar; hover over a shortened name to see its full text. The chevron button matches the search field's height. Only this button changes whether libraries are shown: starting Section Paint or Surface Paint, refreshing materials and reopening the same browser preserve your choice. A new browser starts with libraries visible.
Create materials and use a smaller browser
The toolbar's New button creates a material; the context menu still calls this action New Material. The browser can be resized. Collapse the sidebar when you need more grid space. At smaller heights, the materials scroll while the toolbar and preview status bar remain visible. When narrowing it, the search field shrinks while action buttons retain their size. Collapse the sidebar for more space. Live SketchUp verification of the narrow layout remains pending.
The Material Browser's Skalp Libraries sidebar lists In Model > Section Materials and In Model > Surface Materials first, then groups reusable libraries by their fixed material type. Each library contains only Section Materials or only Surface Materials. Group headings use bold text at the library text size; library names use regular-weight text. The number beside each library is its material count. With the sidebar open, the library name and count appear there, so the material grid starts directly below the search/action toolbar.
A compact status bar below the grid shows Preview: on the left and the scale selector on the right, with any duplicate indicator between them. The scale selector uses the status bar's background without a border, retaining its dropdown arrow and a visible keyboard-focus outline. The selected scale text is right-aligned beside the dropdown arrow. The selector has a fixed width so the Preview: label stays in place when the scale changes. The status bar remains visible while scrolling the materials.
Dot hatches in Material Browser cards use a minimum screen size so their points remain visible in small previews. Pattern spacing, saved hatch widths and drawing output are unchanged.
The selector retains Active scene and its current scale as well as explicit scale choices; it changes material previews, not the scene's drawing scale. The toolbar and bottom status bar each have a subtle separator from the material grid. Technical model import counters (SU, Skalp ID, imported) are not shown in the browser. If the selected library or current search has no results, it identifies the missing family, for example No Surface Materials found.
Where library definitions are stored
| Library type | Storage and behavior |
|---|---|
| In Model > Section Materials | Section Material definitions belong to the active SketchUp model and are saved with its .skp file. |
| In Model > Surface Materials | Surface Material definitions belong to the active SketchUp model and are saved with its .skp file. Save the model to retain them; browser previews are not a project backup. |
| Local Section or Surface Material library, such as test | One type-specific JSON file in Skalp's local material library folder. It is independent of the active project. |
| Linked Section or Surface Material library | One type-specific JSON file in an external folder connected through Add Library Folder.... The browser reads the external file rather than importing a local copy. |
Copy or move between compatible libraries
The library menu offers New Section Material Library and New Surface Material Library. New, Edit, search and previews follow the selected library's fixed type. Exporting either model entry includes only that material family. Dragging or using the context menu can copy or move a material only to a library of the same type. While dragging, incompatible libraries are marked as unavailable; dropping there leaves the material in its original library and explains that Section and Surface Materials must stay in separate libraries.
Local folders and backups
In SketchUp, the local folder is <SketchUp Plugins
folder>/Skalp_Studio/material_libraries/. On macOS, a typical SketchUp 2027 location is
~/Library/Application Support/SketchUp
2027/SketchUp/Plugins/Skalp_Studio/material_libraries/
. The exact Plugins folder is
resolved by SketchUp; the version and operating system affect its location. This local
storage is tied to that SketchUp installation, not to the project folder. A library
created as test normally uses test.json; renaming its display name does not rename
the file.
The development package includes Architecture Section (38 Section Materials) and Architecture Surface (8 Surface Materials) as editable starter libraries. Their material names are English; material patterns, colours and settings are retained. You can rename your local copies without changing the bundled originals.
Bundled JSON libraries are copied into the local folder when the browser opens if a file
with the same name is not already present. Folder connections are stored locally in
linked_library_paths.json; each computer maintains its own connections. Back up
reusable library JSON files separately from project files.
Sharing an office library
- Create an office library through … > New Section Material Library or New Surface Material Library, and add materials of that type that colleagues should reuse.
- Select it and choose Export.... Save the JSON file in a dedicated shared
folder accessible to colleagues, for example on an office server, NAS or
synchronized office drive. Use a simple lowercase filename such as
office-materials.json. Keep only Skalp library JSON files in this folder; the browser treats every.jsonfile directly inside it as a library and does not scan subfolders. - On each computer, choose … > Add Library Folder... and select the shared folder. Each colleague may use their own local path to the same shared folder.
- Select the linked library to use its materials. If its JSON file is writable and the library is not marked read-only, editing and saving writes directly to that shared file. Otherwise the browser treats it as read-only.
Import, export or link a shared library
Import... imports a library into local storage. It does not maintain a connection to the original file. After exporting, use the linked library when maintaining the shared version.
Permissions and simultaneous edits
For office use, give one library administrator write access and other users read access through the shared folder's permissions. The current implementation rewrites the complete JSON file on save and provides no file locking or conflict merging. Simultaneous edits can overwrite each other; synchronized drives can also introduce delayed updates or conflicting copies. Coordinate edits and keep backups. The browser requests fresh data when its window regains focus, but this is not a continuous synchronization service. Unavailable shared folders are omitted until accessible again. Office sharing is implemented in source; live acceptance testing on your chosen shared storage remains required.
How model copies remain independent
Using a library material copies its definition into the model. That model copy has its own identity and no live link back to the source library. Later library edits do not update materials already stored in projects, and removing a library does not remove those model copies. If the edited library definition is used again later, Skalp creates or reuses a model copy that matches that newer content without rewriting the older model copy.
Removing libraries
In the Material Browser, right-click a writable local library and choose Delete Library... to permanently delete its file and all stored materials, including an empty library. Review the library name and material count in the confirmation before proceeding. Materials already copied into the active model are kept. The Model library, read-only libraries and linked external libraries cannot be deleted this way. For a linked library, Remove Library Folder disconnects its folder without deleting files; all libraries in that folder are removed from the browser. Live SketchUp verification of library deletion remains pending.
Editing and assigning materials
Skalp drawing materials control section presentation independently of ordinary SketchUp surface materials. The assignment order is default → tag → SketchUp material → object: an object assignment overrides the broader mappings. See Which assignment wins.
- Open Skalp Materials.
- Select a material and choose Edit, or use New Material / Duplicate.
- In the editor's Section tab, configure fill, cut-line color and pen size, and the available pattern settings.
- Configure material line color, weight and type on Rearview.
- Choose Save. Cancel abandons the editor changes.
Saving an edited Section Material from In Model > Section Materials immediately updates its existing native section hatches in the model, including objects that inherit the default Section Material. You do not need to repaint those objects.
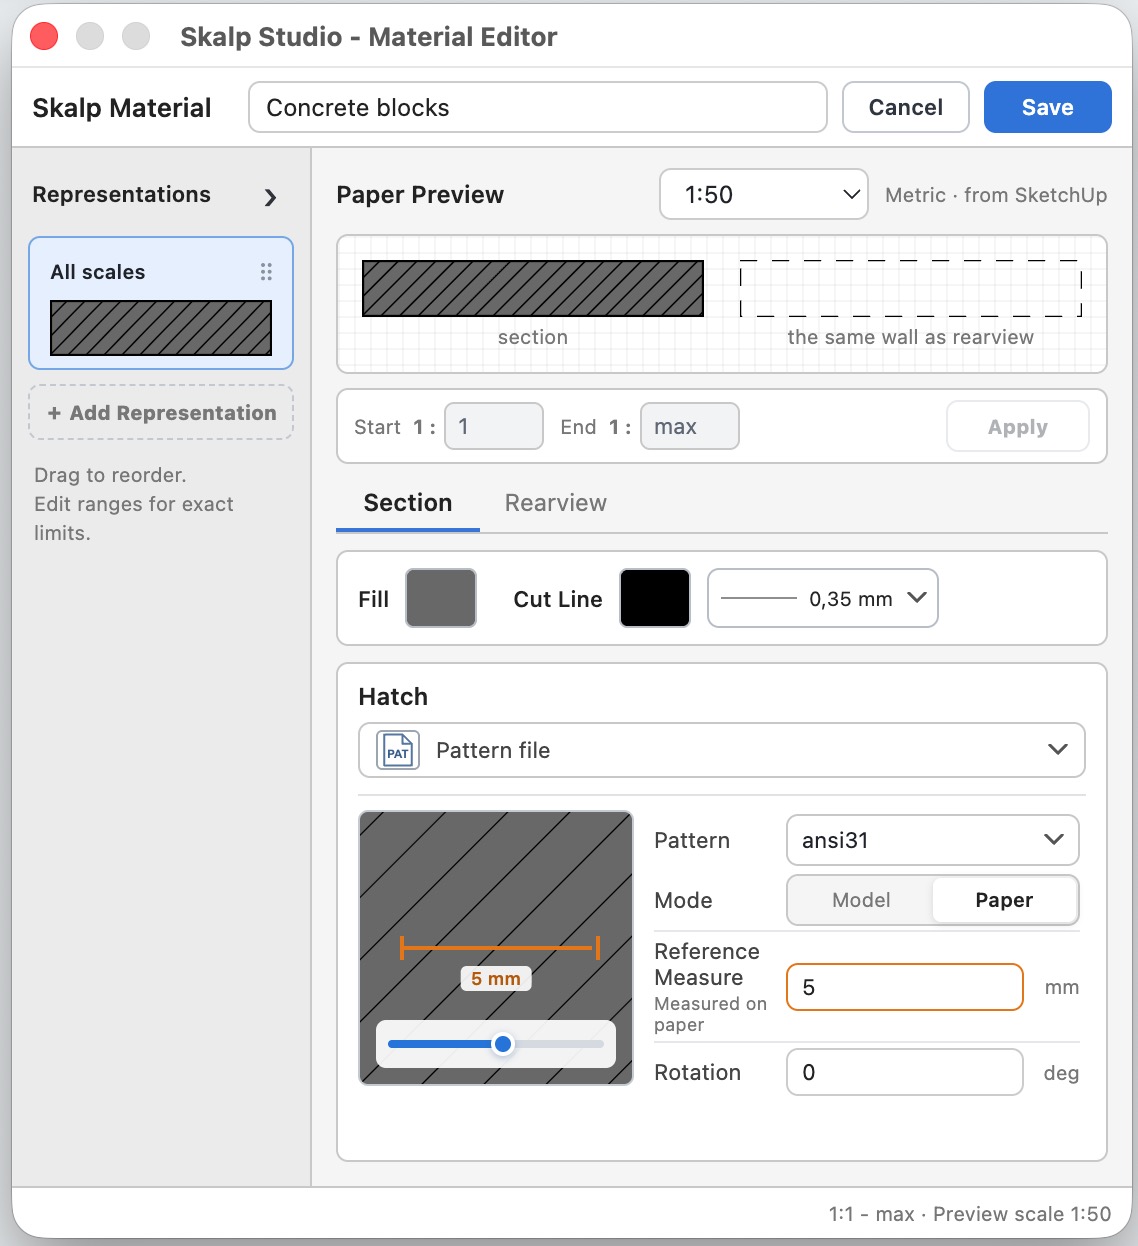
Representations and editor preview
Use the chevron before Paper Preview to Hide representations or Show representations, matching the Material Browser's library toggle. It preserves the selected representation and unsaved edits. Reopening the editor starts with the sidebar expanded.
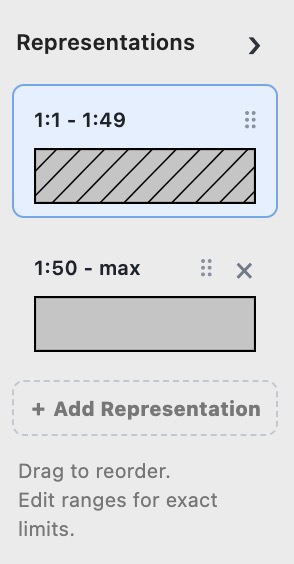
The Paper Preview and each representation card use separate aspect-correct renders of
the same Section appearance. Boundary-fitted symbols such as Rigid Insulation and
Batt Insulation therefore retain their intended proportions in both the wide paper
strip and the narrower representation card. Procedural symbols remain separate from
similarly named imported PAT entries, so selecting Batt Insulation cannot substitute
the catalog's BATT pattern in these compact previews.
The Material Editor has a fixed size. Scroll its settings when additional controls extend below the visible area. Native macOS window/focus acceptance remains pending.
Read pattern controls and dimensions
The Pattern dropdown shows the selected pattern name; open it to choose a library pattern. Dimension fields, including Line Spacing and Joint, show the unit outside the input and only the numeric value inside; the suffix supplies mm or in. Hatch uses separate Line Color and Line Weight rows to keep controls within the settings column. For Lines, the preview marks the spacing with one compact orange dimension line between two adjacent hatch lines, short end ticks and the spacing value centred below it.
Both end ticks align with the measured hatch lines, including when the preview is scaled or rotated. For Grid, Tiles, Bond, Joints and Board & Gap, the orange measurement geometry follows the rendered pattern's scale, origin, repeat, stagger and rotation. Its tile edges and internal sequence marks therefore coincide with the corresponding displayed pattern lines. Rearview uses Line Color, Line Weight and Line Type labels.
Choose fill, cut-line and hatch colors
Material color controls use a clickable swatch without a separate hex field. The color fills the swatch up to a single border, matching Drawing Properties. Fill and Cut Line share one horizontal panel with compact square swatches. The Paper Preview, representation cards and Material Browser previews retain the selected Cut Line color and weight, including when its color matches Fill. A matching color therefore blends into the fill; choose a different cut-line color if you need contrast. The section renderer also retains this selected color and weight for current material definitions. Untagged objects use the material assigned to SketchUp's Untagged tag. If a material style is missing, the fallback is an opaque white fill with a thin black outline. For Timber, Rigid Insulation, Batt Insulation and Rearview, the color swatch spans the same width as the line-weight control below it.
Pen-size controls sit beside the cut-line swatch and use a compact line sample and printed width. The pen-size dropdown keeps each preset value and unit on one line in a compact list. Rearview Line Type shows graphical line samples in the control and dropdown; hover a sample to see its name. Scroll the settings area if needed at smaller window sizes or for patterns with additional settings. Hatch line color cannot match Fill in the material editor.
A matching color automatically becomes black, or white when Fill is black. This applies to all line-based hatch options and the selected representation, including changes to either color. The selected hatch is preserved. Solid fills and images are unaffected. Timber uses Line Color for its two diagonals.
Pattern sizes, bond and rotation
Pattern controls depend on the selected pattern. They can include line spacing, element dimensions, joints, bond, board/gap sequence, reference measure and rotation. Size sets element width and height for grid, tile and brick patterns. When the Hatch type is Image, the source row is labelled Image and its empty chooser reads choose image instead of the PAT-oriented Pattern and choose pattern labels.
For Bond, the selected 1/2, 1/3 or 1/4 value offsets alternate rows by that fraction of the element width while retaining the full element width between vertical joints in each row. Surface previews and the live model use the same generated line families. The hatch preview marks every entered pattern measurement in orange.
Depending on the pattern, it identifies the line spacing, element width and height, joint, complete board/gap sequence, PAT reference measure or image width and height. Height labels sit inside the measured element, while their vertical bracket remains at its right edge, so the value is not clipped by the preview. Patterns without a dimension control do not show a measurement marker.
Hatch type reference
Open the graphical Hatch menu to see all Section Material pattern families. The Surface Material Editor intentionally offers only the subset listed below in the text; the screenshots in this reference show the Section Material controls. The Custom Sources group contains Pattern file, Image and SketchUp Material.
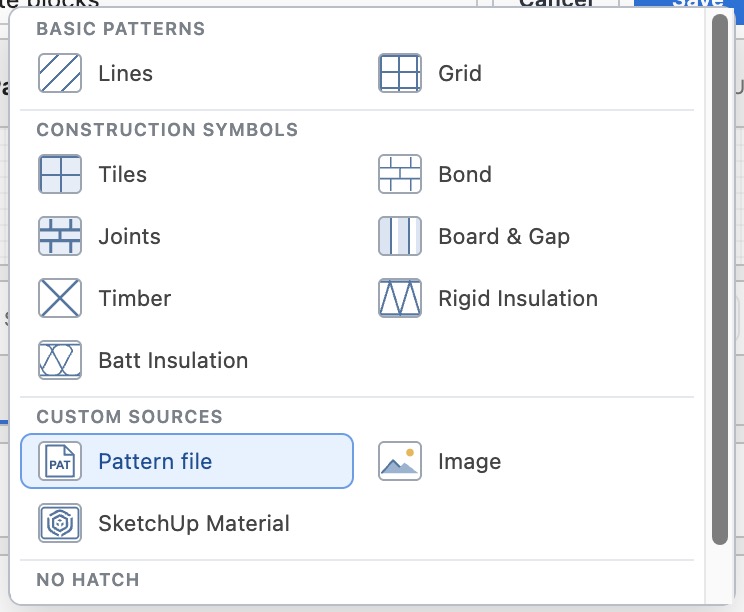
The procedural construction patterns expose their physical repeat controls:
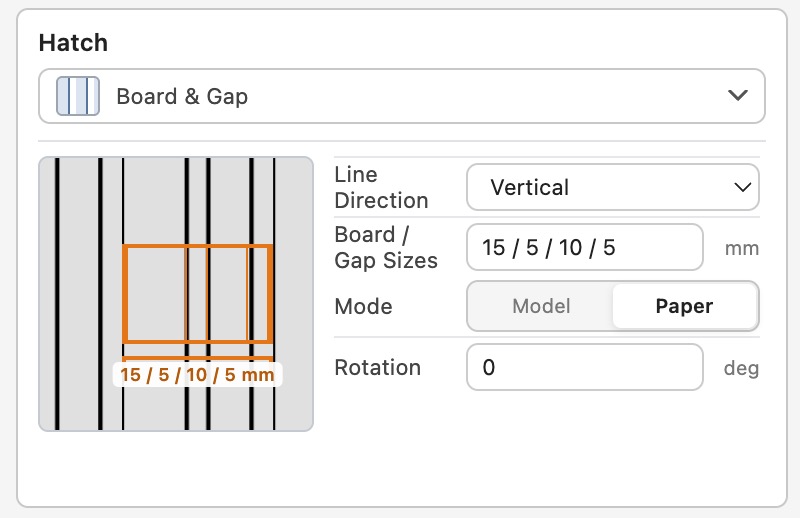
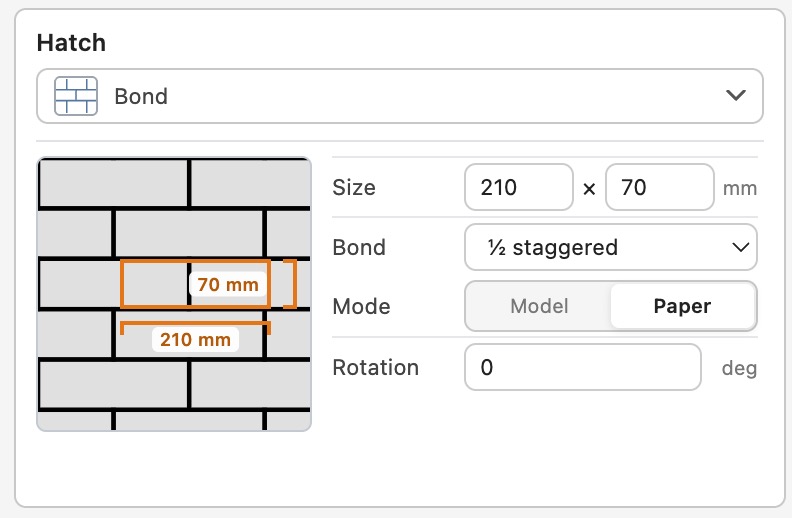
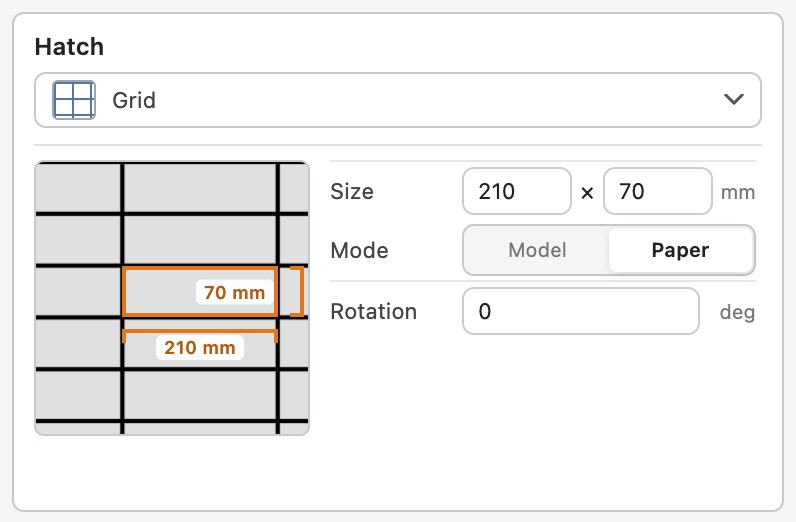
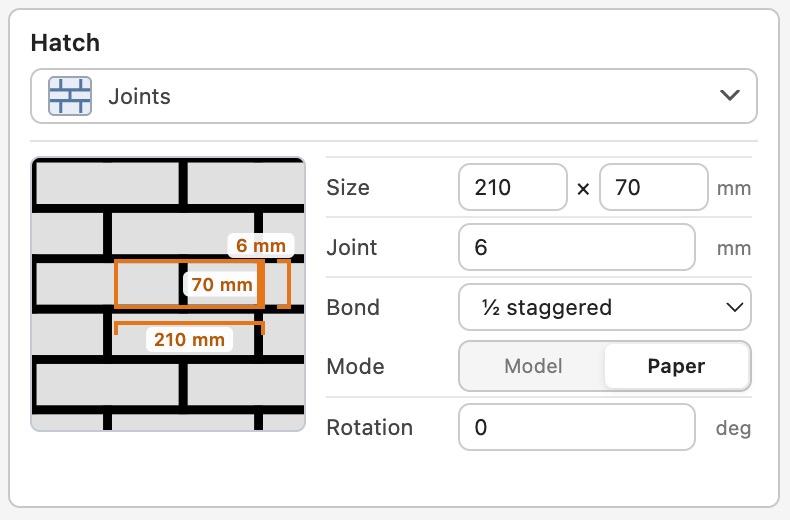
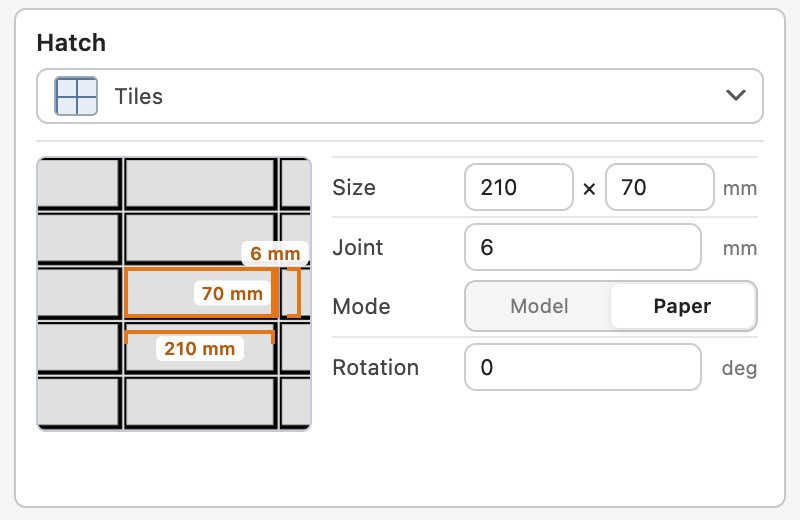
The basic, imported and section-only hatch types use these controls:
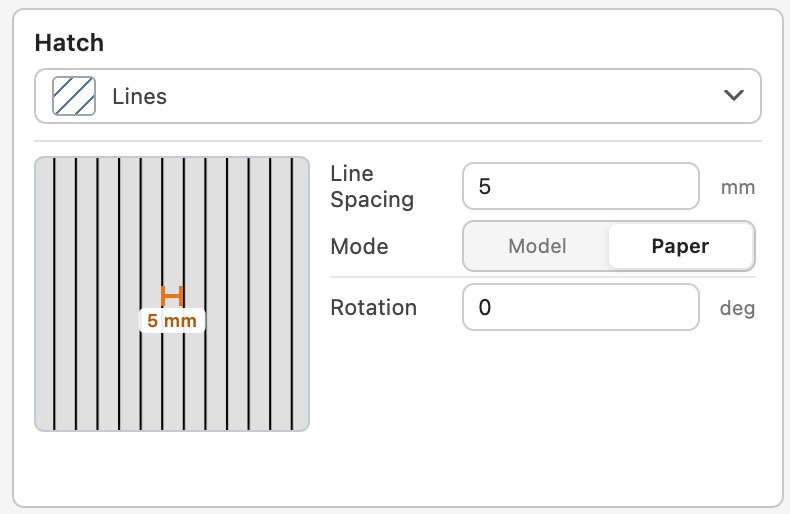
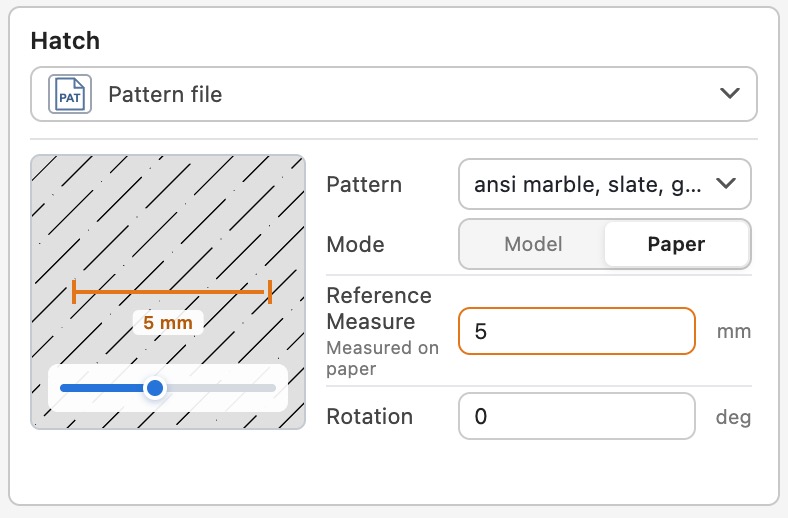
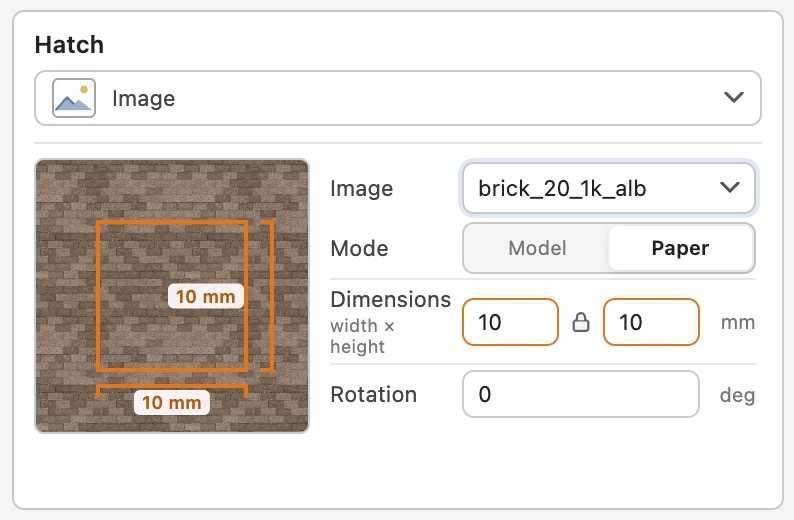
Use a SketchUp material as an image hatch
Choose SketchUp Material to open a searchable list of the current model's materials with preview swatches. Selecting a textured material captures its texture with SketchUp's current color mix applied; selecting an untextured material creates a solid-color image. Material transparency is retained. For a textured material, the initial hatch width and height come from the physical SketchUp texture size and remain editable. In a metric model these two values are rounded to whole millimetres; SketchUp Material dimensions do not retain decimal millimetres. If the source SketchUp material is edited later, select it again to refresh that snapshot.
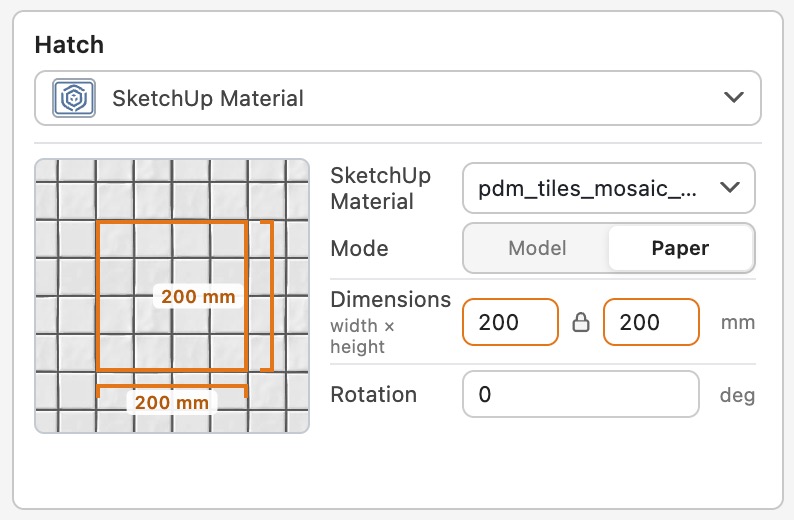
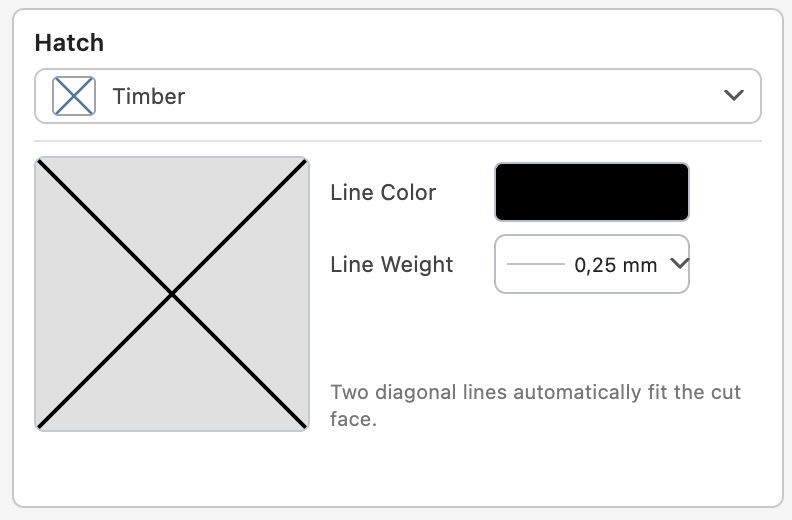
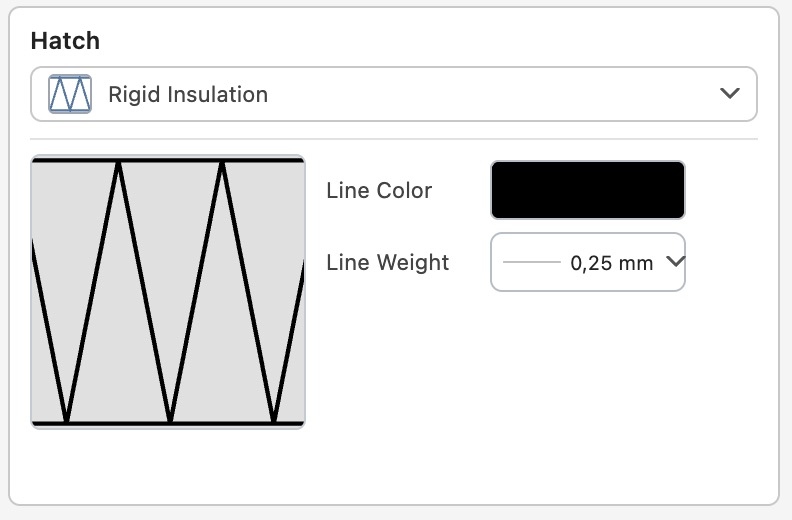
Batt Insulation uses procedural looped linework with line color and weight.
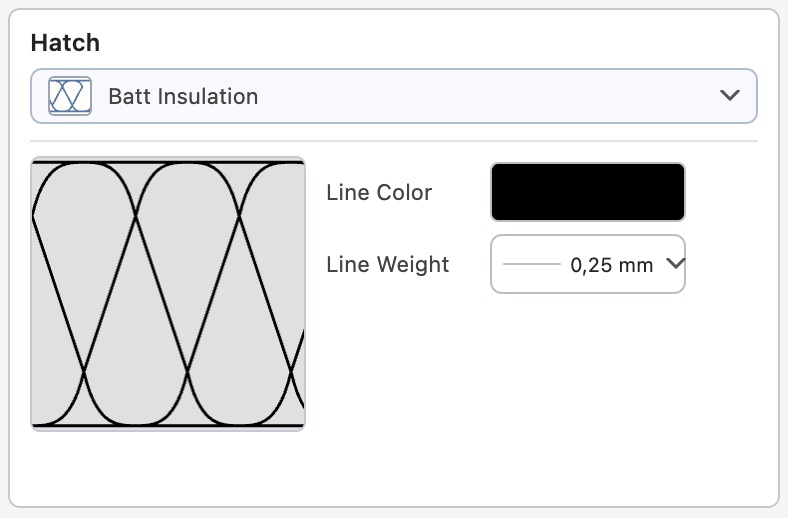
Surface pattern types and initial sizes
In the Surface Material Editor, the available pattern types are limited to None, Lines, Grid, Tiles, Bond, Joints, Board & Gap and Pattern file. None uses only the Surface Material's fill color and has no pattern dimensions or hatch strokes. The other choices provide meaningful repeat dimensions on a face.
New metric Surface Materials start from model-sized defaults rather than paper-sized hatch values: Lines use 100 mm spacing; Grid and Tiles use 300 × 300 mm elements; Tiles use a 10 mm joint; Bond and Joints use 210 × 50 mm elements, with a 10 mm joint for Joints; and Board & Gap uses the alternating 150 / 100 / 50 / 100 mm sequence. A new PAT pattern uses a 100 mm reference measure.
Changing the pattern type resets these generator fields to the corresponding logical Surface default; stored values remain intact when reopening an existing Surface Material. The Section Material Editor retains its existing paper-oriented defaults.
Model-size versus paper-size patterns
Mode selects Model or Paper. Model keeps pattern dimensions in model
space; Paper keeps printed dimensions fixed as drawing scale changes. This also
applies to imported .pat files: changing the active drawing scale recalculates their
native hatch scale and reapplies that hatch to the affected SketchUp objects. The
configured reference measure therefore keeps the same printed distance, and export uses
the hatch prepared for that drawing scale. Check the library's Preview scale when
comparing appearances. In the material browser, Active scene always remains
available.
For example, changing Paper mode from 1:50 to 1:10 makes the model-space repeat five times smaller while keeping its printed size. Returning to 1:50 restores the original model-space repeat. Converted PAT materials follow this same rule.
The list shows a short metric or imperial scale list sorted from detail to overview (increasing scale denominator), without duplicate ratios. It uses the SketchUp model length units, independently of material representations. Material Browser cards use the same paper-scale hatch calibration as the Material Editor's Paper Preview, with a smaller crop. A selected custom preview scale remains available until reset.
For converted PAT materials, the Browser, representation cards and Paper Preview retain the pattern's drawing calibration. The reference measure describes its calibration frame; it is not necessarily the distance between adjacent hatch lines. Opening and saving the Material Editor preserves the existing hatch scale; changing the reference measure adjusts both the preview and the drawing scale of the hatch. Check converted hatches at the scales used in your drawings.
Import and search PAT patterns
The SketchUp category contains all 83 default hatch patterns from SketchUp 2027,
including ALUMINUM, the ANSI and ISO patterns, masonry, insulation and wood.
Select SketchUp in the category menu, then search by pattern name. These are
bundled PAT definitions with previews; you do not need to import the SketchUp
.skh files. Where a name already exists in Skalp's library, the new entry has
(SketchUp) after its name so both versions remain available. This collection
is included in the development source; live SketchUp acceptance remains pending.
In the PAT pattern picker, Import PAT into library… adds the first pattern from a
.pat file to your user library and automatically saves an SVG thumbnail of its hatch
geometry. The thumbnail appears in the pattern picker; the editor also shows a live
preview. Importing the same pattern name again replaces its stored pattern and
regenerates its thumbnail. Reimport older imported patterns to give them thumbnails.
Skalp normalizes older numeric PAT notation before storing or sending a pattern to
SketchUp.
Decimal values without a leading zero, such as .51 and -.36, optional leading plus
signs, trailing decimal points and whitespace after a sign are written in a consistent
SketchUp-compatible form. An unambiguous missing comma between two legacy dash entries,
such as -.43.0, is also repaired. Negative dash values remain gaps and zero values
remain dots in the live preview. Files without renderable hatch lines are rejected.
Close the picker without choosing a pattern with its × button, by clicking outside it or by pressing Escape; the current pattern remains unchanged. This behavior is implemented in the development source; live SketchUp acceptance testing is still required.
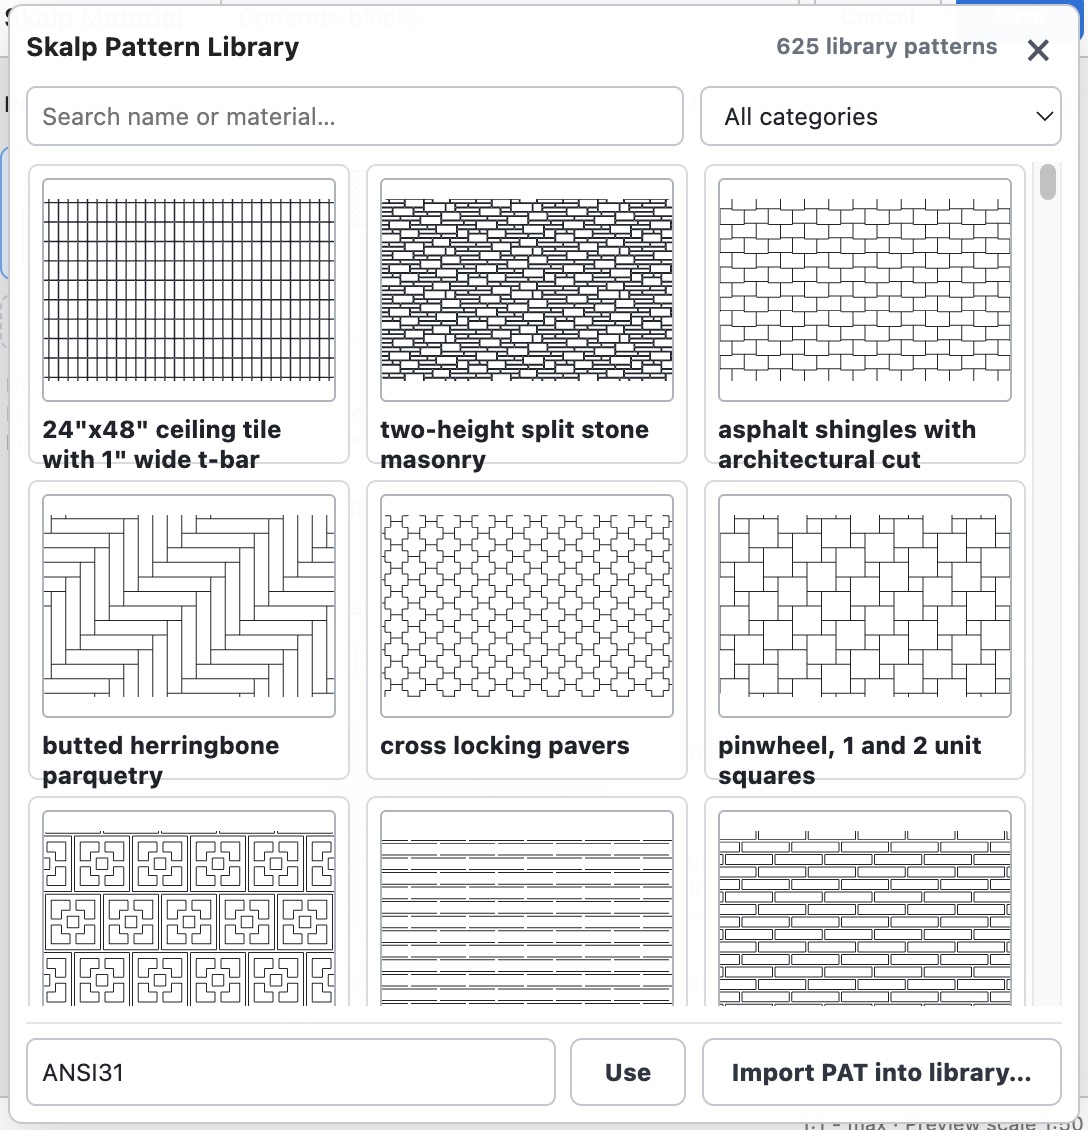
Create scale-dependent representations
Representations are labeled by their scale ranges, such as 1:50 - 1:99, rather than positional names. A single representation is labeled All scales. The range appears once above its thumbnail; the Start/End bar omits a duplicate representation name. Each sidebar thumbnail shows the section representation directly across the available thumbnail area, without a surrounding white card.
The Scale range fields stay visible in the representation bar directly below the paper preview. Select a representation, edit Start or End, and choose Apply. Changing a boundary updates the adjoining representation automatically. With three or more representations, both boundaries of every intermediate representation are editable. Only Start 1:1 on the first representation and End max on the last representation are fixed. With only one representation, the complete range is fixed from 1:1 to max; add a representation to edit a boundary.
Use Add Representation and the representation range controls to create different appearances at different scales. For example, use a detailed pattern for a close detail and a simpler fill at an overview scale. Select the intended representation before editing its Section or Rearview properties, and verify the result at each scene scale. Saving a material that is already in the model immediately refreshes its section appearance, including the procedural Timber, Rigid Insulation and Batt Insulation linework.
Rigid Insulation uses 45-degree zigzag legs fitted to the actual insulation contour, including shallow slopes and bends. Each straight direction has its own zigzag; at bends, the patterns are trimmed to their local miter without a connecting line or a shared phase across the corner. Short returns also receive linework. Unequal-width returns retain their own local pattern. At a roof/parapet junction, the pattern follows the individual insulation runs; open notches remain separate. Complex junctions still need visual review in the intended output.
Batt Insulation keeps the same loop proportions in short, long, horizontal and vertical strips: repetition follows the insulation thickness rather than the overall strip length. At bends, the loops retain their shape and are trimmed to the local miter instead of being stretched or sheared along the whole leg. Check both patterns at the intended drawing scale before publication.
In a clipbox, procedural insulation linework uses the world position and orientation of each nested box plane and is limited by all six box faces. It therefore matches the visible native section fill instead of being displaced or continuing along an unbounded section plane.
Assign materials by tag
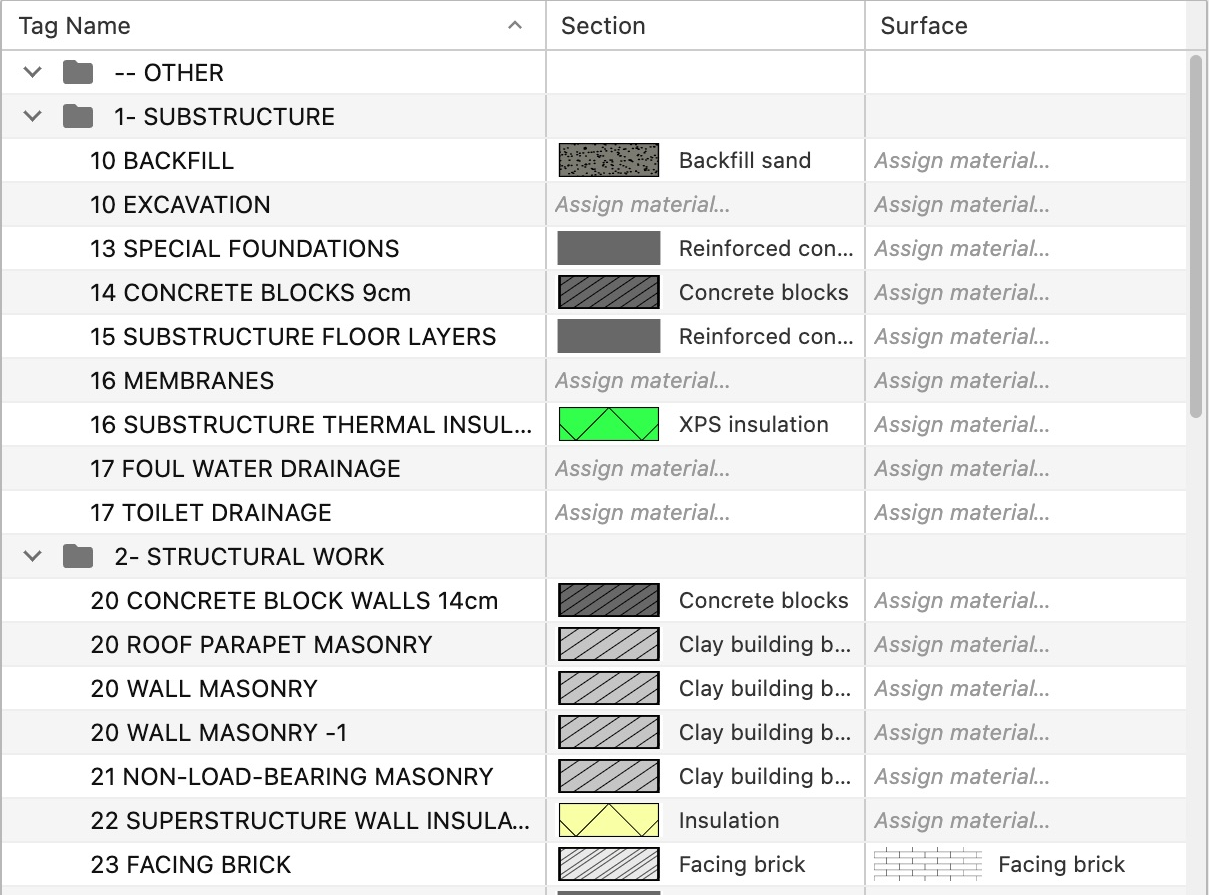
Skalp Materials by Tag opens Skalp Materials by Tag and assigns Skalp materials to SketchUp tags. The two assignment columns are labeled Section and Surface. Assigned materials in both columns show the same compact preview swatch beside the material name. Choose Assign material… in the applicable column for a tag without that assignment. Right-click an existing assignment and choose Edit to open its editable Skalp material definition, or choose Remove assignment to clear only that Section or Surface assignment from the selected tags.
Its fixed labels, search controls and assignment actions follow the selected interface language; tag names and material names remain exactly as entered. Opening the window does not start a native-hatch recovery pass or scan the model's group/component hierarchy.
Transfer tag assignments to another model
Use the menu button at the right of the search field to transfer this setup to another model. Export… writes the complete tag-folder hierarchy, tags, Section and Surface assignments, and only the referenced Section Material and Surface Material definitions to one JSON file. Import… merges folders by their path and tags by their exact internal name, creates missing folders and tags, and applies the transferred assignments. An existing Section Material with the same name and definition is reused; when that name already belongs to a different definition, Skalp imports a uniquely named copy and keeps the transferred assignments connected to it. Import is one SketchUp Undo operation.
Assign materials by SketchUp material
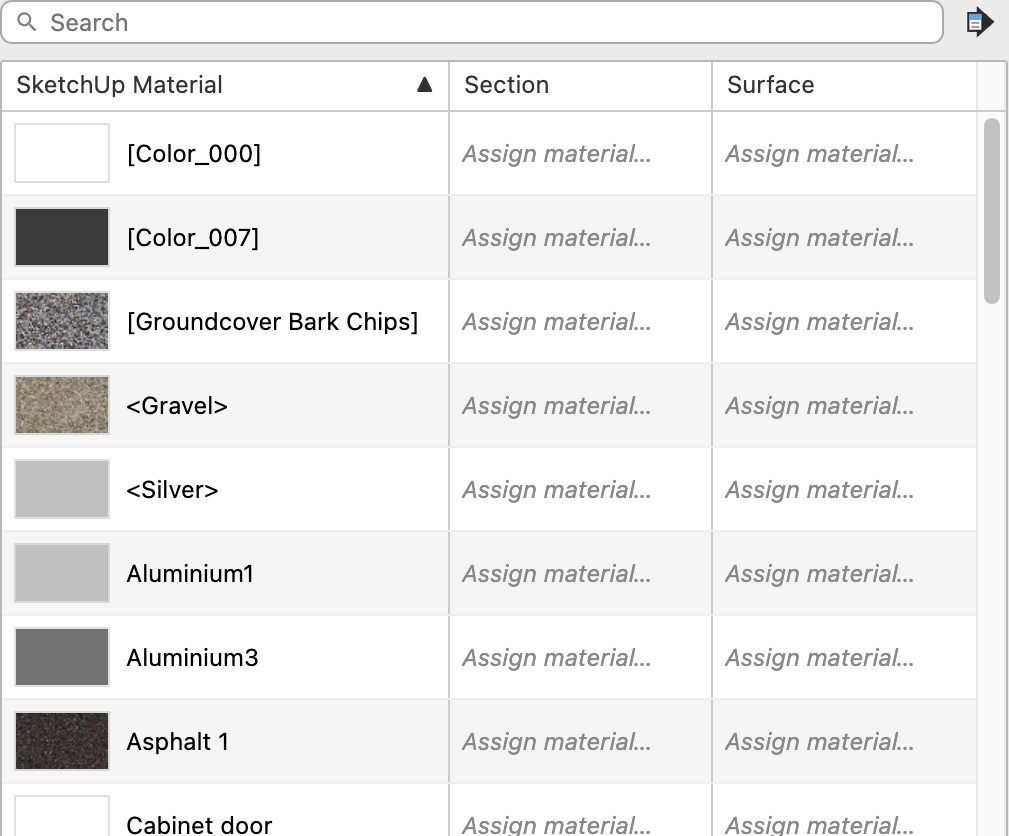
Skalp Materials by SU Material opens an alphabetical list of the SketchUp materials currently used on groups or component instances. Each row shows the SketchUp material name and a preview of its effective texture, including the material's SketchUp colorization and transparency. Assigned materials in both the Section and Surface columns show a compact preview swatch beside the Skalp material name. Choose a Skalp material in the Section or Surface column to associate it with every group or component using that SketchUp material.
Multiple rows can be selected with Shift-click or Command-click on macOS and Ctrl-click on Windows. Right-click an existing assignment and choose Edit to open its editable Skalp material definition, or choose Remove assignment to clear the assignment from the selected rows. The menu button at the right of the search field provides a separate Export… and Import… workflow for these mappings. Its JSON file contains the assignments and their referenced Section and Surface Material definitions, but does not copy native SketchUp materials.
Import matches native materials by their exact internal names, applies mappings to the matches and reports names that are absent from the destination model. It does not create placeholder SketchUp materials. Conflicting Skalp definitions receive unique names, and the import is one SketchUp Undo operation. Removing an association lets the next applicable assignment level apply again.
Which assignment wins
Section-material precedence is direct object assignment, then SketchUp material assignment, then tag assignment, and finally the Skalp default material. Consequently, Paint Skalp on an object overrides both assignment dialogs; a mapping by SketchUp material overrides the object's tag. Changes to an object's tag, its SketchUp material, the linked SketchUp/Skalp material or its direct assignment are tracked after the SketchUp transaction and update only the affected groups and component instances. A complete object scan is reserved for initial capture or explicit recovery.
From 27.0.016, Skalp prepares the default section hatch for groups and component instances automatically, including before the first Skalp command. An ordinary SketchUp section therefore does not need a separate Skalp activation step to show this hatch. Empty models are left unchanged until an eligible object exists. Explicit object, SketchUp-material and tag assignments keep their precedence; an existing customized default retains its settings. The old Skalp default material remains available for explicit assignments; it does not replace the current system default. Locked objects are skipped. This automatic hatch preparation does not turn on Rearview or other drawing features.
Background hatch writes wait until the Select tool is active, so a hatch may update shortly after finishing another native SketchUp tool. A nested group or component without its own direct, SketchUp-material or tag assignment keeps its native hatch undefined and inherits the hatch of its parent. An assignment on that nested object remains an explicit override.
Initial capture and explicit recovery remove obsolete Skalp default hatches and other previously stored child hatches from unassigned nested objects while the parent assignment controls them, so existing models resume this native inheritance, including the parent's fill color.
Surface-material precedence is direct surface assignment, then direct object assignment, then SketchUp material assignment, and then tag assignment. A direct surface assignment belongs to the visible front or back side of one face and includes its UV placement. The other three levels supply an automatically aligned Surface Material to faces that have no direct assignment on that side. Thus, painting one surface overrides all broader mappings without changing them.
Choose the active paint material
Clicking a material in the Material Browser selects it for editing, duplication and other material actions. Double-clicking it remembers it as the active material and starts the matching Paint tool. In a Section Material library, this starts Paint Skalp Materials; in a Surface Material library, it starts Surface Paint. When the selection comes from a reusable library, Skalp copies its material and prepares its native hatch in the active model before the first paint stroke on both macOS and Windows.
Starting Section Paint requires an active section plane. Clicking Paint Skalp Materials opens the Material Browser when it is closed or brings it to the front. It preserves the library sidebar visibility, selected library and material family. On first use it chooses Section Materials if a section plane is active, otherwise Surface Materials. Use the chevron whenever you want to hide or show the library list.
With a Section Material library selected and a section plane active, Paint starts Section Paint with the currently active material. With a Surface Material library selected, it starts Surface Paint even when a section plane is active. Without an active section plane, it uses Surface Paint with the last valid Surface Material, falling back to the first available one. In both modes it returns input focus to the model so the paint cursor responds immediately, including when the browser was open.
When no Surface Material exists yet, the Browser remains ready for New instead of starting an unusable tool. Select a library from the other sidebar group to change material family. A single click on another card only changes the Browser selection, while a double-click switches the active material and starts the matching Paint tool. Double-clicking a Section Material without an active section plane gives the section-specific warning; Surface Paint does not require a section plane.
Section Paint controls
Paint Skalp Materials applies the selected material interactively:
While hovering, a thick blue contour marks the section region belonging to the object that the next click will paint. Skalp calculates this cut contour only when the hover target changes; the feedback creates no model geometry and does not become part of LayOut or CAD output.
| Action | macOS | Windows UI mapping |
|---|---|---|
| Paint object | Click | Click |
| Paint tag | Option-click | Alt-click |
| Paint by SketchUp material | Shift-click | Shift-click |
| Replace material throughout model | Shift-Option-click | Shift-Alt-click |
| Pick an existing section material | Command-click | Ctrl-click |
| Finish painting | Esc | Esc |
Pressing or releasing a paint modifier updates the cursor immediately, even when the pointer remains still. The By SketchUp material cursor uses a crisp, high-contrast checker badge on both platforms.
Painting by SketchUp material assigns the active Skalp material to the nearest SketchUp material on the picked group/component path. It therefore requires an existing SketchUp material under the cursor and affects every group or component that uses that material. The picked object's direct Skalp override is removed so the new material mapping can take effect. While hovering, the tooltip shows the effective Skalp material followed by Object, By Material, By Tag or Default, identifying the assignment that currently controls the hatch. The status bar separately shows the active paint material and mode. The replace action has model-wide scope. When deleting a library material, review Replace with in the deletion dialog.
To remove Section Material associations, double-click Remove assignment, the first card in every Section Material paint library. Click a cut object to remove the assignment currently controlling its hatch: an object assignment (including an inherited parent assignment), a SketchUp-material mapping or a tag mapping. The crossed hatch-circle cursor identifies removal mode. Hover feedback names the source and states when a material or tag change affects all objects using it. The default has no assignment to remove, so clicking it changes nothing.
Each click removes one association in one Undo operation. The next applicable assignment can become visible; removal does not delete a material definition or force an empty hatch. Option/Alt and Shift still target an explicit tag or SketchUp-material mapping. Model-wide replacement is unavailable in Section removal mode. Command/Ctrl picks a material and resumes normal painting, or double-click a material card to resume painting. Remove assignment remains available in an empty paint library, cannot be edited, duplicated or dragged, and is not offered in assignment-selection dialogs.
Surface Paint controls
Surface Paint uses the same hierarchy with one additional target, the individual surface. Its modes are:
| Action | macOS | Windows UI mapping |
|---|---|---|
| Paint the visible face side (Surface) | Click | Click |
| Paint the containing object | Shift-Command-click | Shift-Ctrl-click |
| Paint the object's tag | Option-click | Alt-click |
| Paint by SketchUp material | Shift-click | Shift-click |
| Replace the effective Surface Material throughout the model assignments | Shift-Option-click | Shift-Alt-click |
| Pick an existing Surface Material and its UV placement | Command-click | Ctrl-click |
| Remove a direct surface-side assignment | Right-click, Remove assignment | Right-click, Remove assignment |
| Finish painting | Esc | Esc |
To remove assignments by painting, double-click Remove assignment, the first card in every Surface Material paint library. Its crossed hatch-circle icon also appears on the removal cursor. A plain click removes whichever assignment currently controls the clicked face side: the direct face-side assignment, an object assignment (including an inherited parent assignment), a SketchUp-material mapping or a tag mapping. Hover feedback names the target and states when a shared material or tag mapping affects every object using it. With no assignment, the cursor is unavailable and clicking changes nothing. The opposite face side's direct assignment is retained.
The existing modifiers still select explicit object, SketchUp-material or tag removal and preserve other levels. Shift-Option-click on macOS (Shift-Alt-click on Windows) removes all assignments using the clicked face's effective Surface Material throughout the model, including both face sides and object, SketchUp-material and tag mappings. Each removal click is one Undo operation.
Removing an assignment can reveal an inherited Surface Material from another level; it does not force the face to have no Surface Material. Remove assignment is a tool option, not a material definition: it cannot be edited, duplicated or copied to a library. It remains available in empty Surface Material paint libraries. Double-click another material to resume painting, or use the pipette modifier to pick an existing Surface Material and UV placement. Assignment-selection dialogs do not include this paint-tool option. The Hatch menu's None still means a fill-only material and does not remove assignments.
The Surface target preserves the per-side UV workflow and remains the strongest override. Object, material and tag modes remove the clicked side's direct override; material and tag modes also remove the clicked object's direct Surface override. The normal priority still applies, so an existing SketchUp-material mapping continues to outrank a newly painted tag mapping. Hover text reports the effective Surface Material and whether it comes from Surface, Object, By Material or By Tag.
SketchUp Style management
Under Preferences > Drawing defaults > SketchUp Style, Manage style from Skalp controls the starting style behavior of new linked drawings in SketchUp and LayOut. It is enabled by default. Set Section Line Width and Profile width to whole numbers of 1 or greater, or switch Profiles off. Both widths default to 1; profiles of 2 or thicker remain available. Width 1 is recommended when using Skalp lineweights. SketchUp style widths are not printed millimetres and are separate from LayOut's Line weight (pt). Existing drawings retain their saved style-management setting and widths; the Manager does not repeat these office defaults per scene. Activating a linked scene applies its saved Section Line Width, Profiles switch and Profile width to its managed style, including the first activation after linking it. Merely opening or refreshing the Manager does not rewrite styles.
Original styles, managed variants and recovery
Skalp creates a saved variant of the source style, preserving its other appearance settings. Identical source/width combinations reuse a variant. Changes affect the focused scene, not every selected row; the current SketchUp view changes only if that scene is active. Disabling management reconnects the original style. Keep the original style in the model.
If SketchUp purges a source style, Skalp promotes the scene's last managed variant as its recovery source instead of blocking scene updates; its displayed appearance is preserved, but the purged source's earlier appearance settings are no longer available. The setting is independent of LayOut viewport ownership. Live SketchUp/LayOut rendering, Undo/Redo and save/reopen acceptance remain pending, including whether thicker profiles impose a visible minimum on section lines.
Skalp Studio - Solid Tools
Goal Combine or cut two solid groups/components while retaining the result's object properties.
The six commands are built into Skalp Studio. Install or update the matching Skalp RBZ and restart SketchUp. They keep their own Skalp Studio - Solid Tools toolbar, separately from Power Tools and Tag Tools. The integrated tools do not request a separate licence; Skalp Studio retains its own licence and SketchUp 2027 requirements.
- Prepare two unlocked manifold solids.
- Choose a Solid Tools command and click the first, then the second solid.
- For Subtract or Trim, click the cutter first and the target second.
Check The result is selected and the tool remains active for another pair. Each successful pair is one Undo step. See the operation-order table below before using a direction-sensitive command.
The Skalp Studio - Solid Tools toolbar follows SketchUp's Solid Tools order: Outer Shell, Intersect, Union, Subtract, Trim and Split. As in SketchUp, a separator divides Outer Shell from the other five Boolean commands.
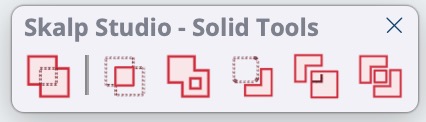
It uses the SketchUp 2026 solid-selection cursors. For Subtract and Trim, the status bar first says Select cutter solid., then Select solid to cut from.: the first solid cuts material away from the second. If one solid is preselected, it is the cutter and the prompt asks for the solid to cut from. Cancelling the first choice or completing a pair returns to the cutter prompt. The other four commands use Select first solid. and Select second solid. The toolbar icon geometry also follows SketchUp 2026, with its blue changed to Skalp red. The commands are also available under Extensions > Power Tools.
Choose solids and operation order
Each operand must be an unlocked manifold SketchUp group or component. Activate a command and click two solids, or preselect one solid before activating a command and then click the second. A valid two-solid preselection runs when the command is activated. For operations where direction matters, clicking is the clearest way to control the order:
| Icon | Command | First solid | Second solid | Result identity |
|---|---|---|---|---|
 |
Outer Shell | First source | Second source | First solid |
 |
Intersect | First source | Second source | First solid |
 |
Union | First source | Second source | First solid |
 |
Subtract | Cutter | Target to retain | Second solid |
 |
Trim | Cutter, retained unchanged | Target to trim | Second solid |
 |
Split | First source | Second source | First solid for every returned piece |
Properties retained on the result
Result identity follows the established AW Boolean behavior, adjusted to SketchUp's standard cutter-first order for Subtract and Trim. Skalp restores the identity source's object material, tag, name, attribute dictionaries and cast/receive-shadow settings. Attribute value types are preserved. Immediate result geometry is reset to Untagged with no face material (including back-face material), so the result uses its coherent object-level material instead of a mixture copied to individual faces. This also keeps a material-linked Skalp section appearance attached to the resulting solid.
Repeat, cancel and undo
After a result, the tool remains active for another pair and the result is selected. Press Esc after choosing the first solid to cancel that choice; press Esc again to leave the tool. A failed native boolean is rolled back and produces no partial model change. Each successful pair is one Undo step.
Live acceptance in SketchUp 2027 is still required for cursor appearance, toolbar scaling, nested edit contexts, all six native geometry results and Undo/Redo after the move to the shared extension.
Power Tools and Tag Tools
These tools are included in Skalp's own installation. Install or update Skalp through Extension Manager, then restart SketchUp. They supply Power Tools, Tag Tools and Skalp Studio - Solid Tools, with commands under Extensions > Power Tools. They load when Skalp is enabled; disabling Skalp and restarting SketchUp also stops these integrated tools from loading.
The tag and Power Push/Pull buttons use the red, pale-red and black Skalp artwork. If a toolbar is hidden, enable it through View > Tool Palettes on macOS or View > Toolbars on Windows. If you upgraded from the earlier independent Power Tools extension, uninstall that old extension through Extension Manager and restart SketchUp. Its separate installation is no longer required by Skalp. Other products' independently installed tools remain separate.
Power Push/Pull: Click a face inside a closed group or component, move to the desired distance and click again, or enter a length. Drag-and-release also works. Press Esc to cancel, or double-click a face to repeat the last distance. The copy modifier is Option on macOS and Ctrl on Windows. Groups become unique when needed; component definitions remain shared. Locked instances, including locked shared copies, are protected. Each confirmed edit is one Undo step.
The translucent blue preview indicates the extrusion without modifying geometry. It does not display the final materials or geometry removal when shortening an object. FrameUp wall faces resolve to their editable source where supported; ambiguous opening reveals and unsupported procedures are refused. Retyping a length after confirmation is not supported. This tool has its own picking and inference, so its behavior differs from SketchUp's built-in Push/Pull.
Control tag visibility
The Tag Tools toolbar controls SketchUp tags, independently of LayOut layers:
| Command | Effect |
|---|---|
| All tags on | Show all tags and their parent folders. |
| All tags off | Hide every tag except Untagged. |
| Only selected tags on | Show the selected objects' tags and Untagged; reveal their parent folders. |
| Hide selected tags | Hide visible tags belonging to selected objects; remember that batch in this model. |
| Restore last hidden tags | Restore the last batch hidden by the preceding command, including parent folders. Repeat to restore earlier batches. |
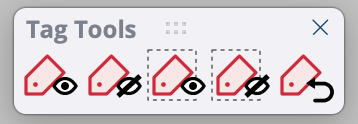
Select objects before isolating or hiding their tags. Untagged remains visible. Tag changes and the per-model hide history participate in Undo; deleted tags are ignored during restoration. Existing SiteRef hide history is retained. Assign keyboard shortcuts to these shared command names in SketchUp preferences.
Command/status translations are AI drafts in all SketchUp languages. Skalp's English language preference also applies to these tools; restart SketchUp to refresh their toolbar/menu labels after changing that preference. Automated Ruby and installation checks cover the shared implementation. Interactive SketchUp 2027 macOS/Windows acceptance and a public software release remain pending.
Crop and publication settings
Goal Define the drawing boundary and prepare the scene for publication.
- Activate the intended section scene and set its scale.
- Open Drawing area > Set…, adjust the draft clipping mask and press Enter.
- Choose Capture current view for LayOut with the intended view active.
Check A saved mask makes a regular section scene a plan. The mask is stored in model coordinates; panning and zooming do not redefine it.
Find a task: Set/adjust crop · Display guides · Perspective · LayOut defaults
Plans and publication eligibility
A regular section scene becomes a plan when it has a saved clipping mask. The drawing-area icon remains available before that mask exists. Clicking it activates the linked SketchUp scene and opens clipping-mask setup directly. Once the mask is saved, clicking the same icon immediately enters 2D Drawing Mode; when Drawing Mode is already active on another plan, the same single click waits for SketchUp to restore the new scene's section state and keeps Drawing Mode active. Clicking the drawing-area icon again on the active plan closes Drawing Mode. Click it once more to reopen the mode.
Clicking the separate scene icon for the active plan also closes Drawing Mode and activates that scene. Send to LayOut sends the active saved scene using its ordinary, plan or clipping-box output path.
CAD export remains independently selectable. Its scene list can include ordinary non-plan scenes; use Plans to select all eligible defined plans in one step, All for every eligible scene or None to clear the selection.
Resolve unavailable drawing-area controls
When the linked scene stores everything needed for publication, no status line is shown. If there is no linked scene, or if it does not save camera, section state, style, visibility, shadows or environment, the Drawing area tab has a muted state. Open it to read the specific reason in gray. Missing saved properties must be enabled on the Scene tab before publication settings become available.
Before capture, set up the actual view you want. Capture current view for LayOut saves the required scene properties, including camera, section state, style, visibility, shadows and environment where supported. It does not align the camera or change perspective into parallel projection.
Parallel-view crop
Without a stored clipping mask, Skalp reports Not set — the saved scene camera determines the boundary. Choose Set… with a matching parallel view. Skalp immediately places an unsaved mask centered on 75% of the current model viewport. Drag one of its four edges or corners, click a W/H label or enter exact paper dimensions; click the filled blue Save clipping mask button at the top-right or press Enter to save, and press Esc to discard the draft.
Because saving is available in the viewport, the Manager does not need to remain open while the mask is adjusted. Activating another Skalp scene from the Manager saves the current clipping-mask adjustment before restoring the next scene. For an existing mask, choose Adjust… and use the same controls. Choose Remove… and confirm to discard the stored mask; the saved scene camera then determines the drawing boundary again.
If 2D Drawing Mode is active, Adjust… and Remove… close that mode first so the
crop tool or removal can take ownership of the plan boundary safely. Removing the mask
is one undoable SketchUp operation. Click a W/H label for numeric dimensions, or enter
width;height in the Measurements box, in printed millimetres. Numeric resizing keeps
the top-left corner fixed. Enter saves; Esc or switching tools discards the draft. For
example, 180;120 makes a 180 × 120 mm crop on paper at the selected scale.
Show the crop and annotations
In SketchUp’s Overlays panel, the drawing-area overlay is named Skalp Studio -
Drawing area when Skalp uses English. All Skalp overlay names start with Skalp Studio -, followed by their purpose
(for example Section Selection, Show Surface Materials, Drawing,
Manager Hover or Section Preview). The purpose follows Skalp’s UI language.
The crop is stored in model coordinates. Later pan, zoom or window resizing does not redefine it. Rotation, roll or perspective can suppress its editing preview; return to the matching view to adjust it. The Skalp Studio - Display tool palette's Show plan clipping toggle is on by default and saved as a user preference. It displays the active scene's stored crop whenever the camera matches its orthographic plan view, including after pan or zoom.
It does not depend on selection, the Drawing area tab, or the Manager remaining open. Rotation or perspective hides it automatically; returning to the matching camera orientation restores it. With the toggle off, the crop is shown only while setting or adjusting it. Scenes without a stored crop have no persistent crop preview. Hovering the drawing-area icon does not show it. Live acceptance of the persistent preview remains pending.
Control annotation visibility
The Show 2D LayOut info toggle on the same palette (dimension, text and eye icon) shows or hides Skalp's 2D annotations (including dimensions, text and scrapbook elements). Section indicators remain visible because they also identify sections in 3D. They remain visible when the camera is orbited away from the drawing orientation and in perspective views, so they can still be clicked with Go to Section; use their own visibility settings to hide them.
Turning the toggle on automatically aligns the active section's orthographic drawing view, so its annotations become visible immediately. Turning it off does not change the camera. It is on by default, remembers your user preference and works independently of the crop toggle. Visibility switches directly without rebuilding Manager scene details or starting a drawing calculation. Apart from aligning the camera when switched on, it changes display state only; stored elements and LayOut publication remain unchanged.
Active tool previews and selected editing grips can still appear while working in 2D
mode. Entering 2D Drawing Mode temporarily forces Show 2D LayOut info on, so
existing annotations cannot be hidden while the drawing tools are active. Its A + eye
display button remains visibly checked and is not greyed out; clicking it cannot switch
off the mandatory overlay.
Leaving Drawing Mode, including an automatic exit after a scene or context change, restores the visibility state that was active before entering without changing the saved user preference.
Understand the crop and annotation zones
The dotted inner crop limits the visible model, cut lines, fills and hatches; it does not delete source geometry. Annotations keep their outer bands. Around it, the editor shows a green dimension zone. It adds an outer blue section-indication zone only when the plan currently has visible section indicators.
The on-screen legend follows the visible guides: it always names the clipping mask and dimension zone, and names the section-indication zone only when that blue zone is present. The green zone remains visible even when no section indication can be resolved. The clipping mask contains published model geometry, the dimension zone reserves space for dimensions, and the section-indication zone reserves space for section symbols and labels. The green/blue guides are not published.
The dimension reserve defaults to 15 printed mm and is edited under the indication editor's Lines settings. Placing a dimension does not resize this reserve. Section symbols and labels determine the outer indication band. The preview's drop shadow follows the bottom and right edges of the complete white paper area, including these bands. It is a preview effect only.
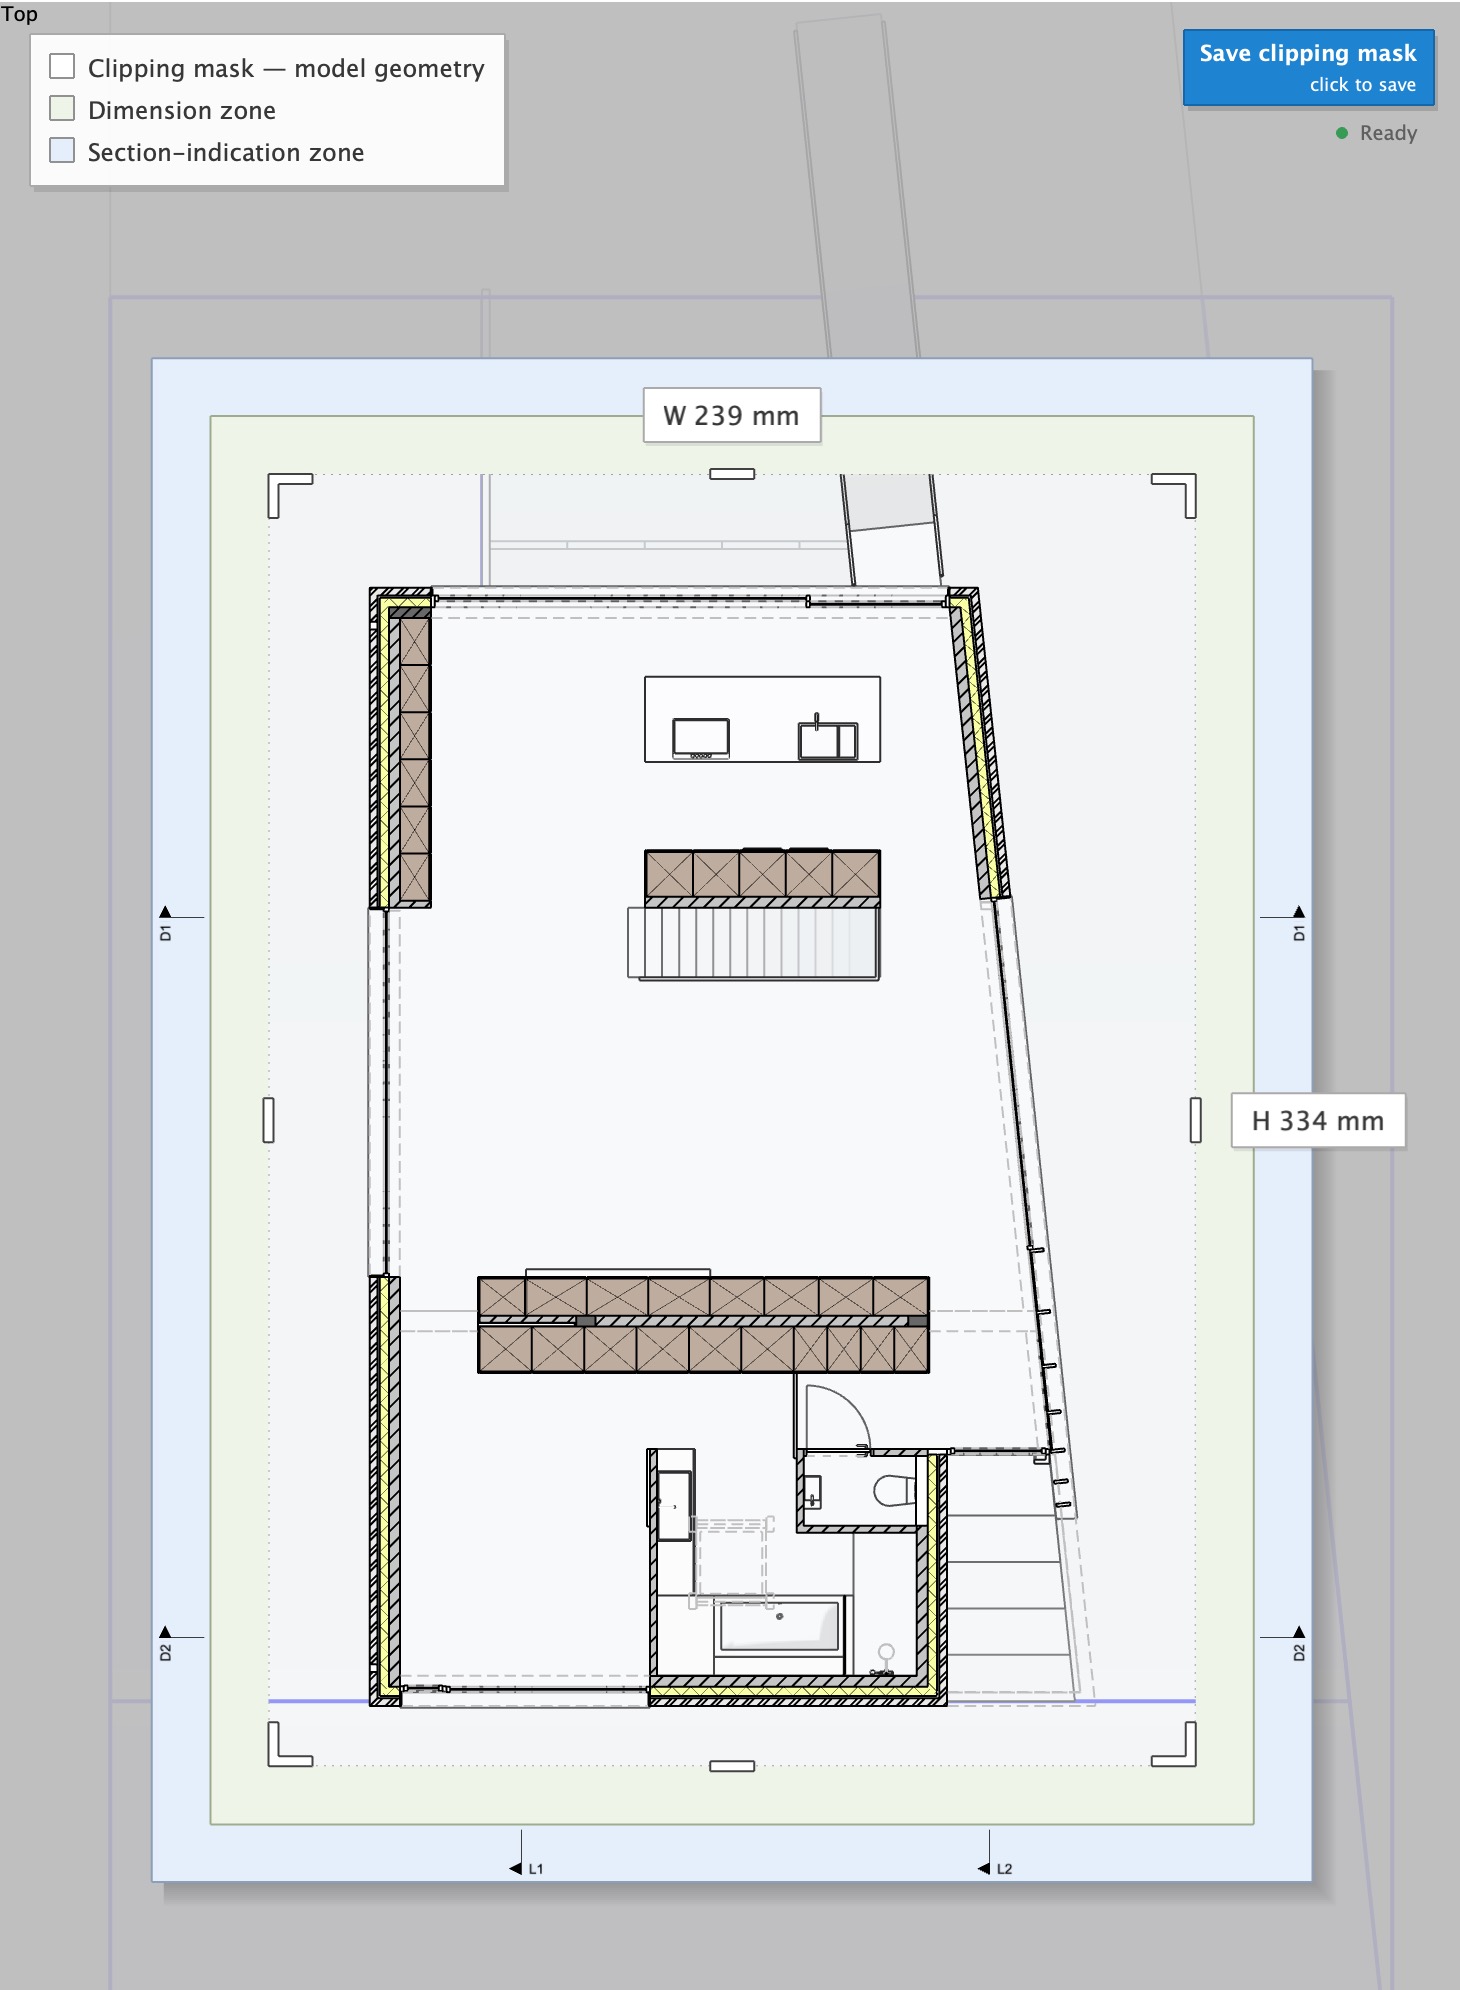
Ordinary scenes and perspective views
Scenes without section planes and perspective scenes can also be published. For perspective views, set Image width (mm) and Image height (mm); defaults are 180 × 120 mm, with each dimension accepting 1–2000 mm. Perspective has no single model-to-paper publication scale and uses the saved camera's native rendering. The Appearance scale still controls hatch detail and line weights in the live model; it does not replace the perspective image dimensions. Orthographic supplemental section/rearview strokes are not added to the published perspective image. Existing authored 2D content prevents changing that drawing to perspective.
LayOut defaults
Open Preferences > LayOut defaults to set Render mode (Raster, Vector or Hybrid), Show background, Line weight (pt), Dash scale and, for parallel views, Preserve scale on resize. Dash scale 0 means automatic.
On update determines ownership of these display settings:
- Keep settings in LayOut preserves the existing placement's display choices.
- Manage from Skalp reapplies the saved Skalp viewport settings on updates.
New drawings use these office settings in either case; existing drawings retain their saved values. Changes are saved immediately in SketchUp's user preferences and remain selected when Preferences or SketchUp is reopened. Camera and drawing scale remain controlled by Skalp. Perspective image-size edits remain available per scene because they commonly vary between drawings.
Section indications
Goal Show where another section crosses this plan and navigate to it.
Before you begin: Both the host and related section must be eligible plans. The related section needs a clipping mask and must cross the host's model crop.
Find a task: Enable indications · Appearance · Positions · Open linked section
Which related sections can be shown
Section indications identify linked perpendicular sections in a plan. Eligible sources must themselves be defined as plans with a clipping mask; their section line must cross the inner model crop. Multiple plan scenes using one physical section produce one indication. Visibility choices retain custom positions and labels. LayOut publication clips supplemental model strokes to the inner crop, while authored section indications remain visible outside it. Automatic indication text boxes include two printed points of width allowance to avoid wrapping or truncation from differences between preview and LayOut font metrics. Manually resized text boxes retain their chosen dimensions. Rotated text boxes retain their projected position on either side of the section. Check labels in the published drawing, especially when custom fonts or manually sized text boxes are used.
Show related section indications
- Select the host scene in the Manager and open Sections.
- Enable Show section indications for the selected scene (off by default).
- If no related section view is defined as a plan, choose Create section plan… and create its clipping mask. Views that lack required saved scene properties remain unavailable and explain what is missing.
- Skalp selects related sections automatically. Use Change… only to exclude or restore individual indications.
- Use Adjust positions… to move endpoint and text handles.
- Expand Preferences > Drawing defaults > Section indication style for Lines, Symbols, Labels and reusable office styles.
Choose section-indication appearance
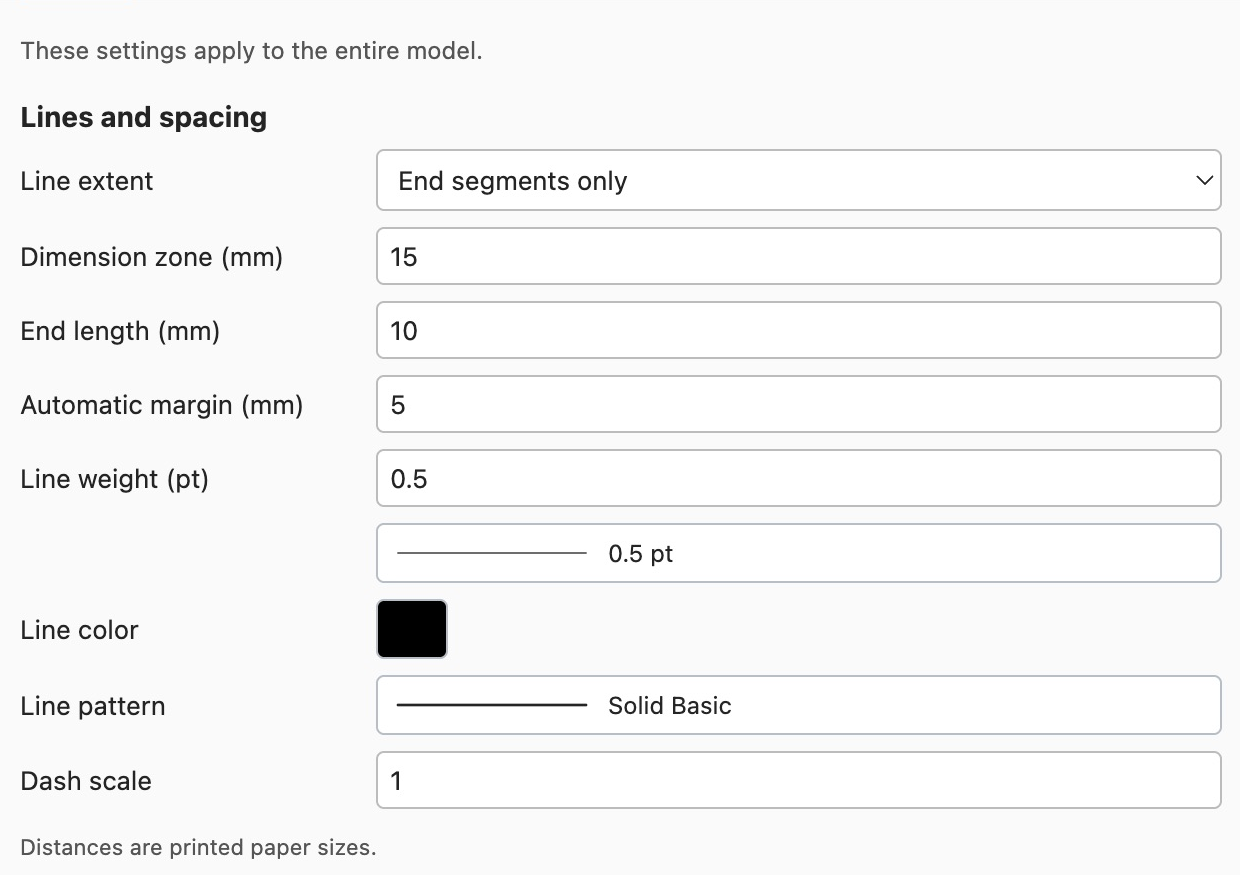
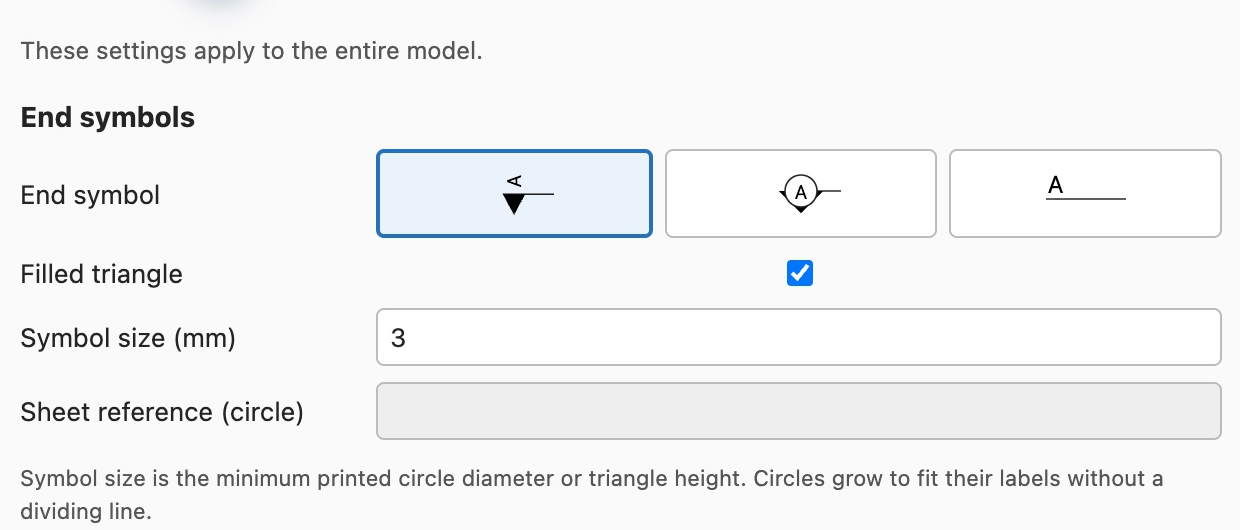
Appearance settings are model-wide: changing them or applying a saved style affects all plans. Enable indication visibility separately in each desired scene; positions and custom labels remain local. Applying an appearance style does not change scene visibility.
Choose Circle + triangle, Triangle + text or Line + text. Circle size is its minimum printed diameter: the circle grows to contain the label and optional sheet reference. Without a sheet reference, the label is centered in the circle; with one, the two rows are centered together. There is no dividing line inside the circle. The triangle grows with the circle. Choose a full connecting line or end segments, independently of its dash pattern.
The text gap is measured to the text-box edge and defaults to 1 printed mm. Check the live preview while changing font, size, spacing, colors or label format. Rotated indication labels in the SketchUp overlay compensate for mirrored section-plane projection so letters remain readable without moving their boxes. Visible glyphs are centered across the triangle tip axis. Circle labels also use the projected text renderer so they stay inside the circle when the section view is mirrored.
In the SketchUp plan overlay, the circle's opaque white disc masks the triangle and section line exactly as shown in Preferences, with the label drawn in front of both.
Labels and sheet references
Automatic labels use the source code/name according to the selected format. Custom labels are retained when sources are renamed. A sheet reference is entered explicitly; it is not automatically inferred from a LayOut page number.
Adjust indication positions
Endpoint handles move along the true section intersection. Text handles adjust labels independently. The reference line cannot be moved sideways away from its source plane. Automatic position restores automatic placement. Nearby automatic labels can move outward to avoid collisions; fixed placements remain fixed, and unresolved overlaps are reported for manual adjustment.
Finish adjusting, Enter with no pending move, or Esc with no pending move ends the tool. Esc during a move cancels that move first.
Navigate to a linked section
Choose Go to Section on the main toolbar, then click a visible indication's symbol, label or line to open its linked scene and apply the section. The tool provides a generous target area around the visible line and label. Highlighting is requested on pointer entry without an intentional hover delay; SketchUp's tooltip may appear later.
Moving away restores its normal colors; hovering does not activate the section or change its saved appearance. The tool stays active until Esc. If several enabled scenes share the plane, navigation uses the first in SketchUp scene order. Native Select does not perform this navigation; hidden indications cannot be picked.
2D drawing and annotations
Goal Add editable lines, text, dimensions and measurements to one scene's drawing.
- Activate an eligible section scene and choose 2D Drawing Mode.
- Create/save a clipping mask if prompted.
- Choose a Drawing tool, set its defaults and place your content inside the white paper area.
- Use Space for 2D Select. Leave the mode with its active button or toolbar command.
Check Your enabled Drawing toolbars and the property inspector are visible. Your content belongs to the drawing scene; it is not added as SketchUp model edges.
Find a task: Drawing tools · Measurements · Select/edit · Numeric input · Layers · Text/style · Dimensions · Scrapbooks
Enter and leave Drawing Mode
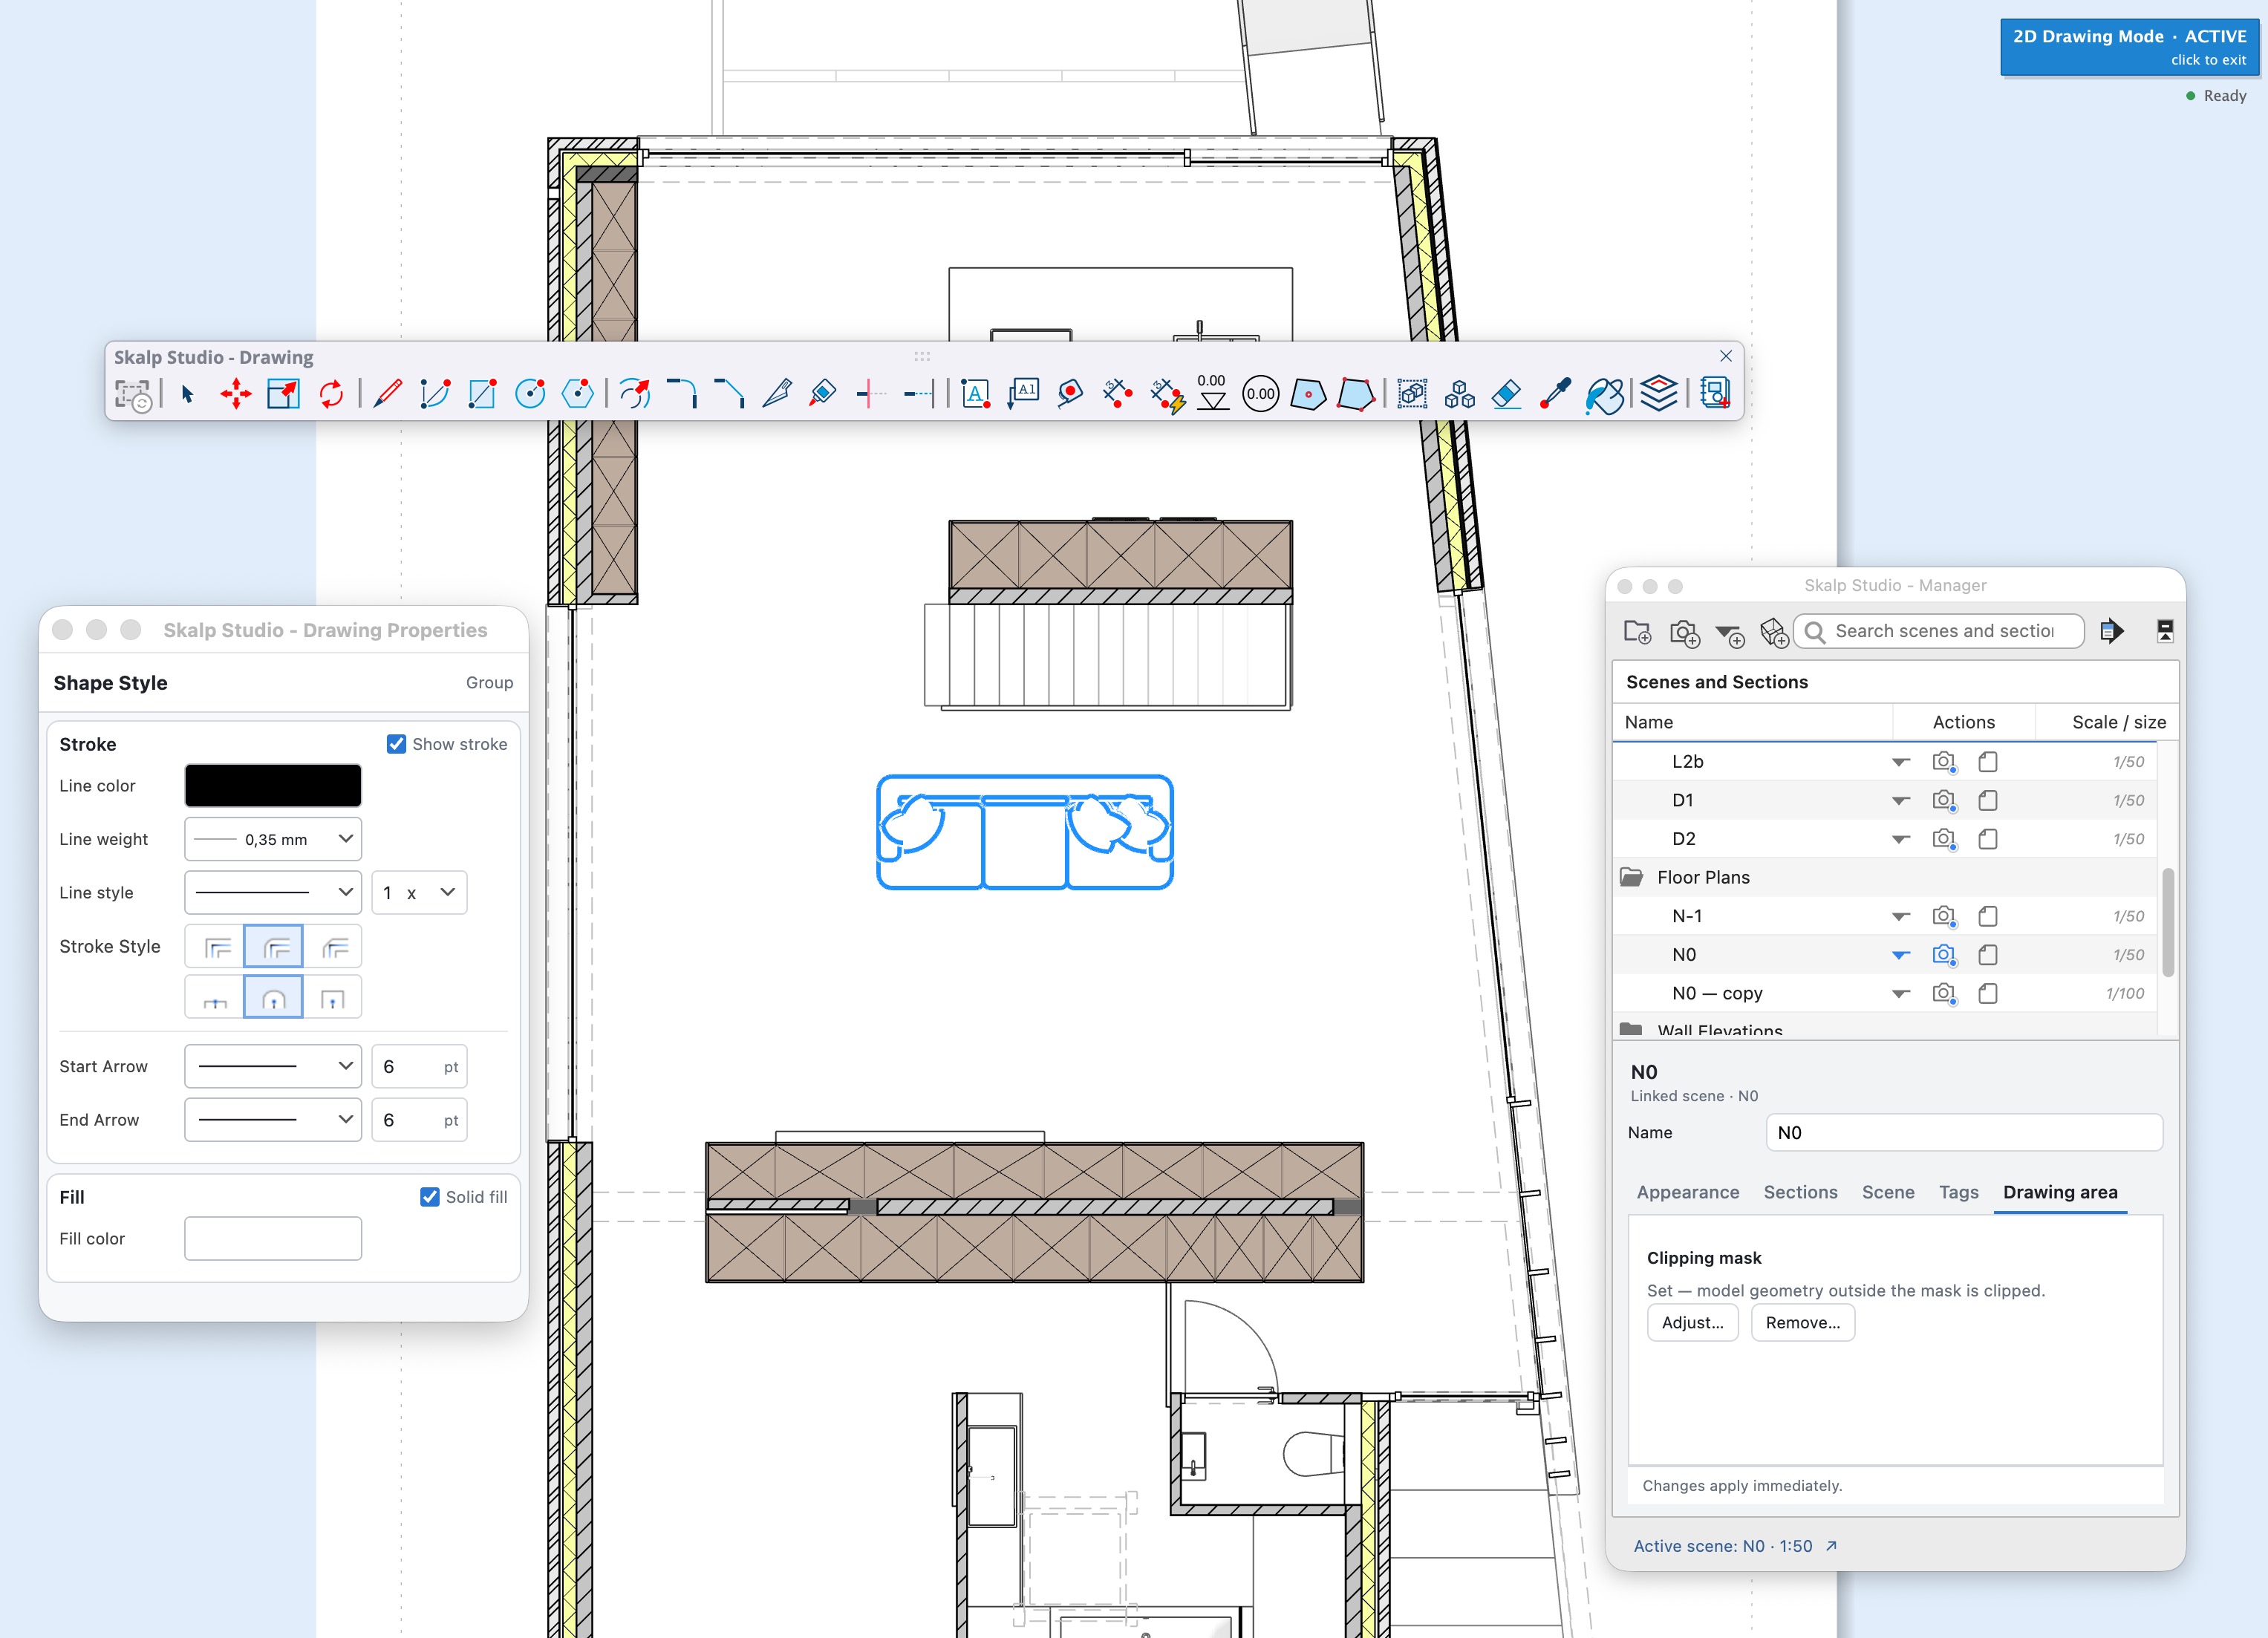
Activate a scene with a supported model-level section, then choose 2D Drawing Mode. The view aligns to the section and the properties inspector opens. The five Drawing toolbars remain in their user-selected positions and visibility states. A filled blue 2D Drawing Mode · ACTIVE button appears at the top-right. Smaller regular-weight click to exit text appears inside the button on the next line. Click anywhere on the button to close the mode. Background-calculation progress appears below the button, aligned to its right edge, with an amber dot above the crop background, leaving SketchUp's Top/other view name free. A green dot and Ready remain when no calculation is running.
Drawing tools are split into five independently switchable native toolbars:
| Toolbar | Tools |
|---|---|
| Skalp Studio - Drawing - Basic | Sync Drawing with LayOut, Select, Move, Scale, Rotate, Group, Ungroup, Erase, Picker, Paint, 2D LayOut Layers and Insert Scrapbook. |
| Skalp Studio - Drawing - Draw | Polyline, Arc, Rectangle, Circle and Polygon. |
| Skalp Studio - Drawing - Annotations | Text, Label, Measure, dimensions, elevation measurements and area measurements. |
| Skalp Studio - Drawing - Edit | Offset, Fillet, Chamfer, Split, Join, Trim and Extend. |
| Skalp Studio - Drawing - Arrange | Alignment and distribution. |
| Skalp Studio - Drawing - Order | Bring to Front, Bring Forward, Send to Back and Send Backward. |
Use SketchUp's native toolbar controls to show or hide each toolbar separately. SketchUp restores their saved positions and visibility on startup. Entering or leaving Drawing Mode never opens or closes these toolbars, including ones you hide while Drawing Mode is active. Outside an active supported 2D drawing, all their buttons are gray and unavailable. Alignment and distribution additionally require an eligible selection. The main 2D Drawing Mode command remains the entry point. These are native SketchUp toolbars; placement and docking follow the host platform's standard toolbar behavior. Automated command/state coverage is in place; live macOS and Windows position-restoration acceptance remains pending.


While 2D Drawing Mode is active, the Manager’s Scale selector is disabled for scenes. Leave Drawing Mode before changing a scene’s scale; the selector becomes available again when the mode closes.
Create a missing mask and read the paper boundary
A valid saved clipping mask is required before entering 2D Drawing Mode. If the active scene has none, Skalp asks whether to create one now instead of showing a prerequisite error. Choosing Yes aligns the section view, places a 75%-viewport draft without opening the Manager, and enters 2D Drawing Mode automatically after the on-screen Save clipping mask button or Enter saves it. The calculation status appears below that button rather than over it. Esc cancels the draft and leaves Drawing Mode closed.
The full white LayOut paper zone, including the configured dimension reserve and section indicator space, is the drawing boundary. The area outside it becomes light blue; the viewport no longer has a blue border. The crop is shown automatically during the session, even when its normal visibility toggle is off. Drawing Mode also uses an opaque white monochrome model base. Surface Hatches and Surface Fills retain their independent display switches while annotations are edited.
Closing the mode restores the previous crop visibility, render mode, textures, material/X-Ray transparency, Color by Tag, face colors, background color, sky and ground settings.
Keep drawing content inside the paper
Drawing clicks outside the paper are ignored. Complete paths, text boxes, dimensions and endpoint markers must fit inside the frame, including stroke width. This is checked before saving all creation and geometric edits, including snapping, Measurements input, moves, copies, scaling and scrapbook insertions. Temporary drawing previews remain visible across the complete white paper area, including the dimension and section-indication bands outside the dotted model clipping mask.
An operation that would extend outside the frame is rejected without saving a partial edit; adjust the gesture or value and try again. Existing outside geometry may be deleted or reassigned to a layer; a geometric edit must bring its affected components fully inside. The boundary is fixed for the session; exit and re-enter after changing the LayOut crop or annotation reserves.
Select tools, navigate and exit safely
Temporary pan and zoom remain available, including Shift + middle-button pan; camera rotation, roll and perspective are locked. A 2D command remains active throughout the session. Press Space in the viewport to end the current command and activate 2D Select. Unconfirmed gestures and previews are discarded; already completed edits remain. Native SketchUp selection is cleared, and standalone native tools return to 2D Select. Finishing or canceling scrapbook insertion returns to 2D Select while the session is active.
Delete or Backspace with no drawing selection is consumed without editing model geometry. These guards protect drawing-tool interactions; they are not a global lock on SketchUp menu commands, extensions or the Ruby Console. Choose 2D Drawing Mode again in the main Skalp toolbar to leave Drawing Mode. The Drawing toolbars keep their positions and visibility, with their buttons disabled. Closing the floating inspector also exits the mode. In the Manager, clicking the active plan's drawing-area icon again or clicking that same scene's scene icon also closes the mode. Changing scene/model or leaving the supported section also exits the mode.
Cut, Copy and Paste 2D elements
Select one or more objects with 2D Select, then use the standard shortcuts with focus in the drawing viewport:
| Action | macOS | Windows |
|---|---|---|
| Cut | Cmd+X | Ctrl+X |
| Copy | Cmd+C | Ctrl+C |
| Paste | Cmd+V | Ctrl+V |
The drawing's right-click menu also provides Cut, Copy and Paste. After Paste, move the preview and click inside the paper to place it. The insertion anchor is the first drawing point of the first object in drawing order. Esc cancels the preview without inserting anything. Paste again to place another independent copy.
Groups, separate selected objects, relative positions and appearance are retained. Copies receive new identities and use the destination's active visible LayOut layer; paper-scaled objects adapt to the destination drawing scale. You can paste into another Skalp drawing or model. Copied dimensions have independent model links; face-area measurements pasted into another model retain their drawn appearance as ordinary groups rather than linking to an unrelated face in that model.
Cut removes the selected elements only after their data reaches the clipboard. Cut and each completed placement are separate SketchUp Undo steps. Canceling a Paste after Cut does not restore the source: use Undo to undo the Cut. Copy does not change the drawing. Hidden objects are excluded from the selection.
This clipboard format carries Skalp 2D elements; it does not exchange editable objects with other applications or SketchUp's native 3D clipboard. The native Edit menu and Standard toolbar can therefore remain disabled for a 2D selection; use the shortcuts or the drawing's right-click menu. Copying something else to the system clipboard replaces the drawing clipboard. In a text field, the standard shortcuts keep their normal text-editing behavior. Automated tests cover both platform adapters and drawing state transitions; complete live clipboard workflow acceptance remains pending on macOS and Windows.
Annotation visibility outside Drawing Mode
Outside 2D Drawing Mode, authored elements are visible only in the saved orthographic section orientation. Pan and zoom preserve visibility. Orbiting, rolling the camera, viewing the reverse side or switching to perspective hides the ordinary authored annotations immediately; returning to the saved direction and up orientation shows them again. This keeps camera navigation responsive and treats the content as a pure 2D drawing rather than model-space geometry. Show 2D LayOut info still controls whether the authored drawing is displayed. Section indications keep their separate visibility settings and remain visible in non-orthographic views because they identify sections in 3D and provide navigation targets.
Drawing units and input focus
These tools create scene-local drawing content, not SketchUp model edges. Dimensions and path geometry use model lengths; stroke weights, text sizes and text boxes use paper units. The first click in the view therefore performs that tool's first action; a separate click merely to activate the view is never required. An explicit text-edit command is the exception: it deliberately focuses the text field until editing is finished. The section plane must retain its original position and orientation during editing. If it moves or rotates, restore its pose before continuing the session.
Drawing tool reference
| Icon | Drawing action | Purpose |
|---|---|---|
 |
Sync Drawing with LayOut | Update the current drawing and its annotations. |
 |
2D LayOut Layers | Choose the active layer or assign selected elements. |
 |
Insert Scrapbook | Choose a library symbol and place a copy. |
 |
Paint | Apply current appearance defaults to a target. |
Choose a tool below for its clicks, numeric input and modifiers. Use Space to return to 2D Select during a drawing session.
| Task | Tools |
|---|---|
| Select and organize | Select · Group / Ungroup · Erase |
| Transform and copy | Move · Scale · Rotate |
| Draw paths and shapes | Polyline · Rectangle · Circle / Polygon · Arc |
| Edit path geometry | Offset · Fillet / Chamfer · Split · Join · Trim · Extend |
| Annotate and dimension | Text · Label · Linear Dimension · Auto Dimension |
| Measure distances | Measure |
| Copy appearance | Style |
| Measure elevations and areas | Elevation Mark · Plan Elevation Mark · Area Measurement · Drawn Area Measurement |
 Measure
1 · Start point → 2 · End point
Choose Measure (the tape-measure icon) on the Drawing - Annotations toolbar. Click a start point, move to read the distance, then click the second point to keep the result visible. The distance appears in a large, pale-yellow bordered readout beside the endpoint and in SketchUp's Measurements field, using the model's length units. The readout moves inside the viewport near its edges. Click again to begin another measurement. Esc or Enter clears the measurement; Space returns to 2D Select.
Use the shared endpoint, midpoint, edge and intersection snaps to measure between drawn elements, between SketchUp elements, or from one to the other. SketchUp references are projected onto the active section plane: the result is the distance in the 2D drawing plane, excluding depth differences. Drawing scale does not change the measured model distance. Shift and arrow-key inference locks remain available. The tool creates no drawing objects, guides or model edits and does not resize geometry through numeric entry. Source and automated interaction checks cover this workflow; live SketchUp/platform acceptance remains pending.
 Select
Click an object · Drag a selection box · Shift toggles
Click an element, or drag a selection box. Left-to-right encloses; right-to-left crosses. Shift toggles; Ctrl (Windows) / Option (Mac) adds; Shift with Ctrl/Option removes. Select one path, text, label or dimension to show its editing grips. Drag a grip, or click it and then its destination; type a measurement during the edit. Double-click ordinary text or a label to edit content. Delete or Backspace removes the selection. Right-click for properties and transformations.
 Move
1 · Base point → 2 · Destination · Ctrl / Option: copy
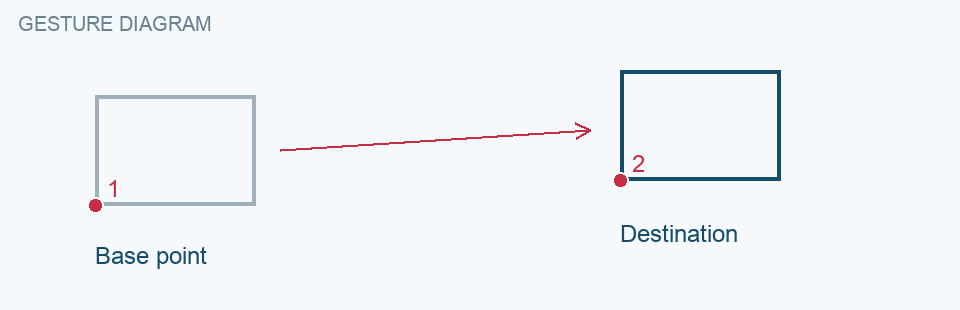
With no selection, click an element at its base point, then click its destination, or
drag to move. With a selection, click the base point and destination or drag. Point in
the desired direction, type a distance and press Enter. The moved elements remain
selected. Ctrl (Windows) / Option (Mac) toggles Copy; the cursor gains a plus. After
copying, *5 makes five copies at the same spacing; /4 places four copies at equal
intervals within the original move distance, including its destination.
The equivalent 5*, x5, 5x and 4/ forms are also accepted. Use 1–1000 copies,
within the drawing's total element limit.
 Scale
1 · Pivot → 2 · Reference → 3 · New size
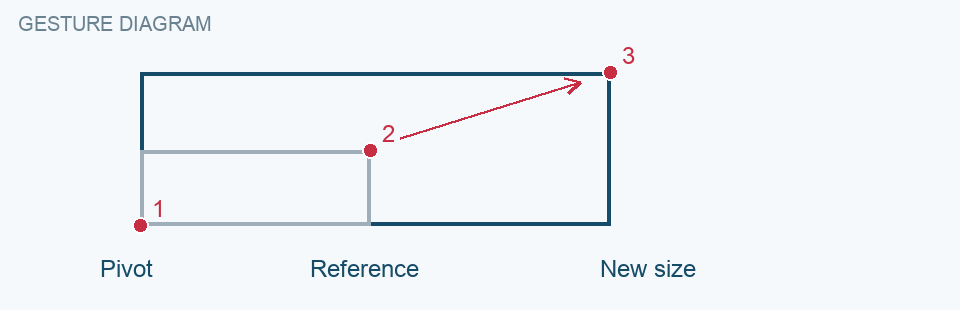
Select, then pivot, reference and destination; a numeric factor (2 or 2x) can
replace the last two clicks. Immediately after scaling, type another factor to correct
the same result.
 Rotate
1 · Pivot → 2 · Reference → 3 · Angle
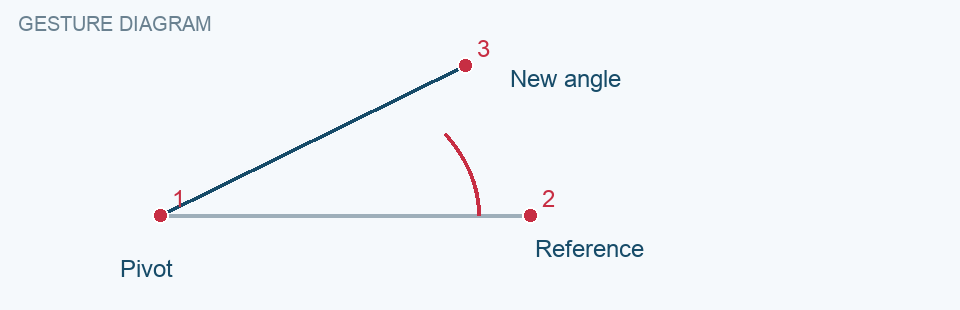
Select, then pivot, reference and destination; signed degrees can replace the last two clicks. Immediately after rotating, type another angle to correct the same result.
 Polyline
1 · Start → 2 · Next point → Continue · Enter: finish
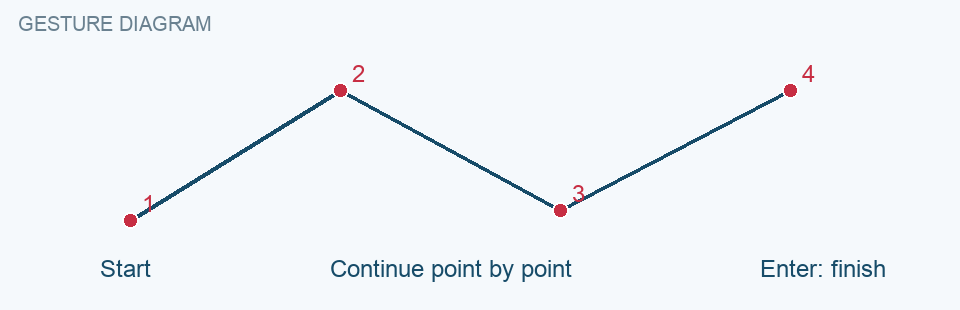
Click successive points, or drag the first segment. Type a length, or length;angle in
degrees (for example 2m;30). Immediately after completing a segment, typing corrects
that last segment; the next click continues from its corrected endpoint. Click the first
point to close. Enter finishes.
 Rectangle
1 · First corner → 2 · Opposite corner
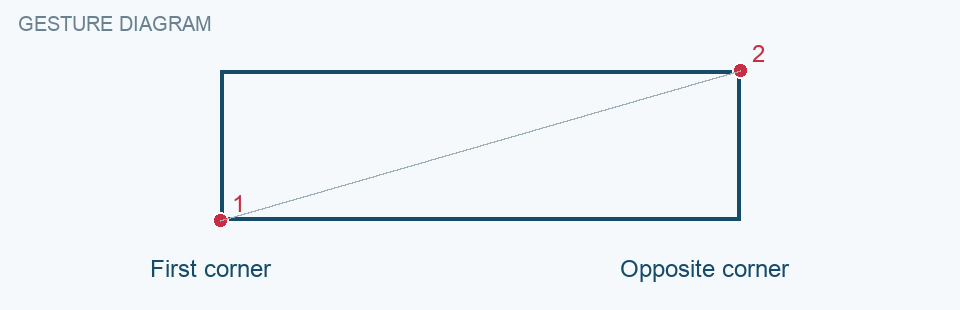
Click opposite corners, or drag from the first corner. After the first corner, or
immediately after placing the rectangle, enter width;height (or width,height) with
model length units. Leave one value blank to retain that side, for example 2m; or
;1m. Point toward the desired quadrant before entering dimensions.

 Circle / Polygon
1 · Center → 2 · Radius · 20mmd: diameter · 24s: segments
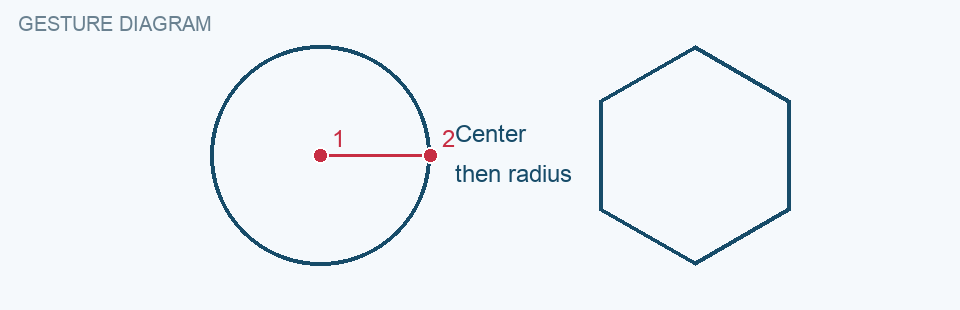
Click center and radius point, or drag from center. Type radius before the final click
or immediately after placement. Add d for diameter (20mmd). Circle starts with 96
segments; Polygon starts with six sides. Type 24s for 24 segments before or
immediately after placement; Polygon also has a sides context menu. A radius can be
entered immediately after the center.
 Arc
1 · Center → 2 · Start → 3 · End
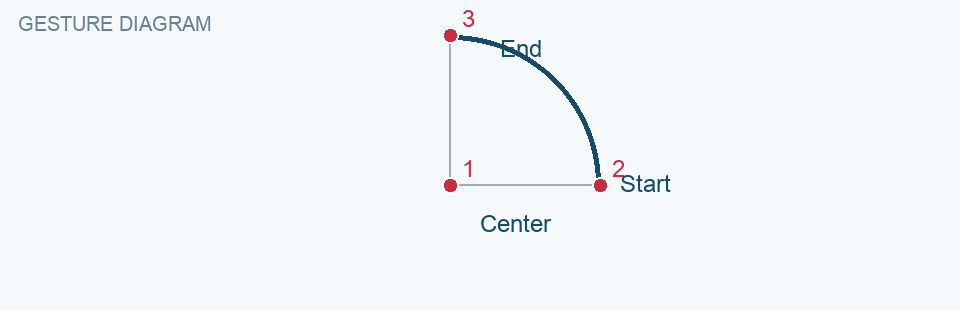
Click center, start and end. Type radius after center or signed sweep after start. Clicked arcs run counterclockwise.
 Offset
1 · Select path → 2 · Choose side → 3 · Set distance
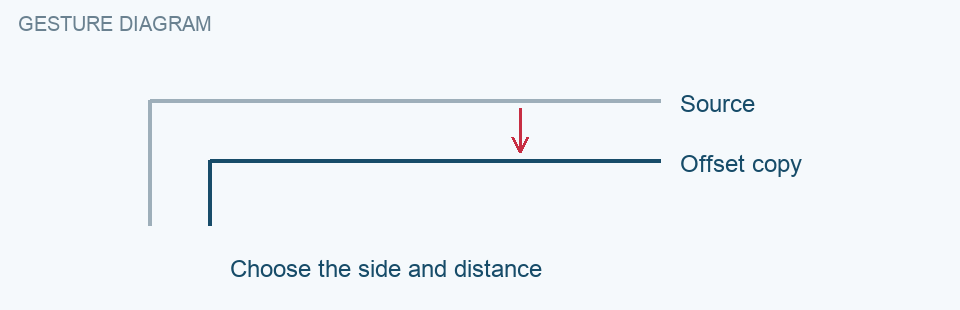
Select path, then choose side and distance. Typed positive distance is left of the selected segment's direction. Creates a copy.

 Fillet / Chamfer
1 · First segment → 2 · Second segment → 3 · Confirm size
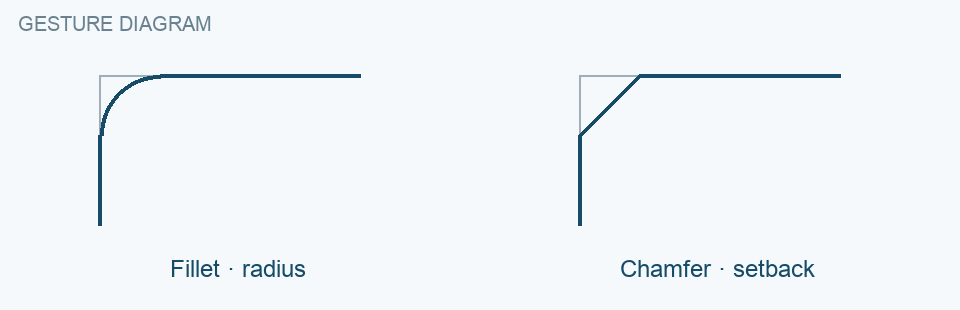
Click two open paths near their end segments, or two adjacent segments of one path. A blue preview appears after the second choice. Type a radius (Fillet) or setback (Chamfer) in Measurements to update it; click again to apply, or Esc to cancel. The initial size is 10 mm; the last valid size is retained while using the tool.
 Split
Click inside a path to split it
Click inside a path. A closed path also splits at its existing closing vertex.
 Join
1 · First path → 2 · Second path
Click two open paths whose endpoints touch. The first path supplies identity, layer and style.
 Trim
Hover: red removal preview → Click to trim
Hover over an individual path to highlight in red the portion a click will remove, then click to trim. Other authored paths supply cutting edges. No highlight appears when the hovered portion cannot be trimmed.
 Extend
Hover near an endpoint: blue extension preview → Click
Hover near an open path endpoint to preview the added portion in blue, up to the nearest authored boundary ahead; click to extend. No preview appears for closed paths or when no boundary is available ahead.
 Text
1 · Place anchor → 2 · Enter text → Set appearance
Click an anchor; the content field receives focus so you can immediately enter text. Edit appearance in Drawing Properties.
 Label
1 · Attachment → 2 · Elbow → 3 · Text anchor
Click the model attachment, elbow and text anchor, then choose automatic object information or enter custom text. When the first point resolves to SketchUp geometry, Drawing Properties offers the same model-information families as LayOut labels. The last leader segment is horizontal and meets the vertical center of the text. In 2D Select, select one label and drag its arrow-tip, elbow or text-anchor grip to reposition it.
 Linear Dimension
1 · First point → 2 · Second point → 3 · Offset
Click two measured points, then move the pointer to choose the dimension line. Place it above or below the two points, within their horizontal span, for a horizontal measurement. Place it to either side, within their vertical span, for a vertical measurement. In the corner regions or between the points, the dimension follows the picked points. The preview shows the chosen direction; the measured points keep their actual attachment positions. Click to place, or type the offset distance after pointing to the desired side. Numeric offsets use the direction shown in the preview. After placing a dimension, double-click each next point to continue from the previous endpoint on the same dimension line and in the same direction. Dragging a point shared by two adjacent dimensions moves that point in both segments. Off-axis snapped points retain their actual attachment positions; the measurement is projected along the chain direction. Esc or Space ends the chain.
 Auto Dimension
1 · Choose line source → 2 · Cross the drawing → 3 · Place chain
Choose the dimension style and Line source in Drawing Properties when the tool starts. Press at the crossing line's start, drag across the part to dimension and release at its end; alternatively, click the two endpoints separately. Releasing after a drag immediately fixes the crossing segment, after which moving perpendicular to it previews the dimension chain; click its offset position to place it.
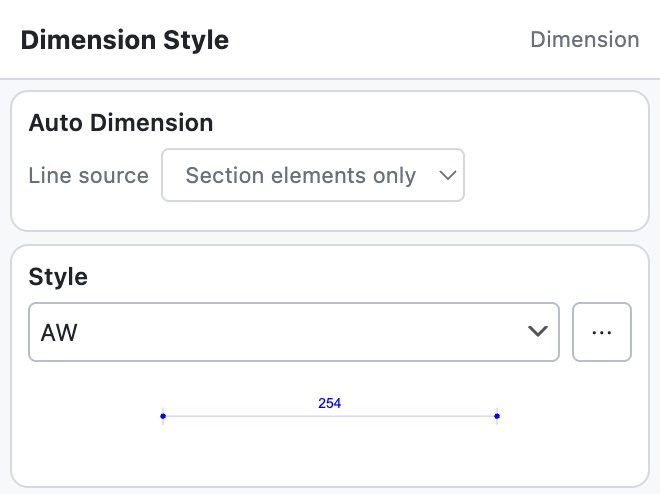
The first press or click in the drawing after activating the command immediately sets the start and is not consumed merely to return focus from the toolbar or Drawing Properties. While the crossing segment follows the pointer, every currently eligible intersection is shown as a small blue marker with a white halo. Duplicate or hidden candidates are filtered exactly as they are for the resulting chain, and the fixed markers remain visible while positioning its offset.
Skalp places one chained dimension through all eligible intersections; there is no separate point-confirmation step. Choose All visible lines in Drawing Properties, press Tab or right-click while drawing to switch sources; the last choice is retained.
Native candidates behind an opaque visible surface are excluded; each crossing/camera visibility result is reused while positioning the dimension line. Coincident intersections are combined automatically.

 Group / Ungroup
Select elements → Group · Ungroup releases children
Select one or more elements and use the toolbar or right-click Group. Both use the same command. The context action is absent without a valid selection. Alternatively, toggle elements with Group and press Enter. Ungroup releases immediate children.
 Erase
Click an element or group
Click an element or group.
 Style
1 · Sample source → 2 · Apply to targets
Click a source, then targets to copy style. Groups sample their first leaf and receive styles on all leaves. Area measurements copy their complete presentation while every target keeps its own polygon or linked face.
 Elevation Mark
Choose reference zero → Click a model point
Use the 0.00-over-triangle toolbar icon, whose closed triangle touches a ground line
below, and click to place live elevation marks. The tool stays active after each
placement so you can place several marks in succession. The complete live symbol,
including its current elevation value, follows the pointer and uses its lower triangle
point as the hotspot. A small SketchUp-style inference marker remains visible at that
exact snap point and changes shape for an endpoint, midpoint or intersection. An
unchanged preview is reused between redraws.
The placement point uses SketchUp geometry inference and the authored drawing snaps. Right-click while the tool is active to use Model Z, the project zero or the scene zero, or to set either custom zero at the current pointer position.
 Plan Elevation Mark
Hover above a surface → Click to store the elevation
Use the 0.00-in-a-circle toolbar icon in a plan drawing. Move over a plan location:
Skalp casts vertically downward in world Z and previews the complete mark with the
elevation of the first surface it finds. The live circle is the hotspot, with a small
inference marker showing the exact effective snap point. Click to store the plan
position and elevation; the tool stays active for the next mark. Each mark is
recalculated from that same plan position when the drawing refreshes.
Right-click to use Model Z, the project zero or the scene zero, or to set either custom zero at the pointer.
 Area Measurement
1 · Select face → 2 · Position area value
Use the highlighted-face toolbar icon. Hover to project perpendicular to the section, highlight the first visible face and preview the complete measurement. Click once to lock that face, move the area value to its required position—even outside the face—and click again to place it with an explicit link to the locked face. Press Esc before placement to unlock the face and choose another one. After placement the tool returns to face selection so you can measure more faces in succession.
The live annotation follows its hotspot, while a small inference marker shows the exact effective snap point. Drawing Properties can additionally show the linked face as a colored polygon, an outline, or both. The marker and label cursor remain available while explicitly relinking a face. The icon is unit-neutral for metric and imperial models.
 Drawn Area Measurement
Click boundary points → Close polygon → Area value
Use the blue polygon icon with red corner points. Its cursor shows the same area polygon beside a drawing pencil; the pencil tip is the exact point used for snapping and placing boundary points. Click at least three boundary points in the 2D drawing; every native or authored snap is projected onto the active section plane. While placing, the prospective area has the same translucent blue fill and blue outline used by the linked Area Measurement preview.
Click the first point, double-click or press Enter to close the polygon and calculate its area; the tool immediately starts a new empty boundary so you can draw several areas in succession. The polygon remains hidden after placement by default; Drawing Properties can show its configured fill, outline, or both without changing the editable measurement boundary. Esc clears an unfinished boundary; press Esc again while the boundary is empty to return to Select.
Selecting the value text highlights the measured polygon with the same translucent blue fill and blue border; this highlight remains during editing. Drag a red corner grip to move that point, or drag a smaller blue midpoint grip to insert a new point. Alternatively, right-click a boundary segment and choose Insert Area Point… to add a point exactly at the clicked position. Right-click near a corner and choose Remove Area Point to delete it; at least three points are retained.
With 2D Move, starting the move on its value text moves only that text; the stored boundary stays fixed.
Measurement formatting and reference levels
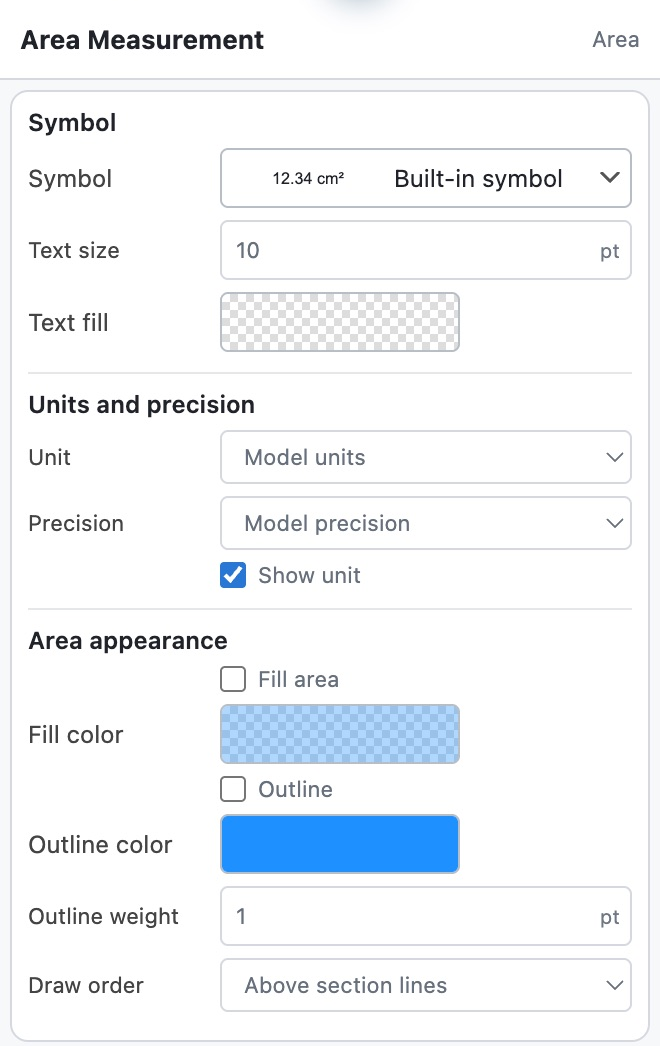
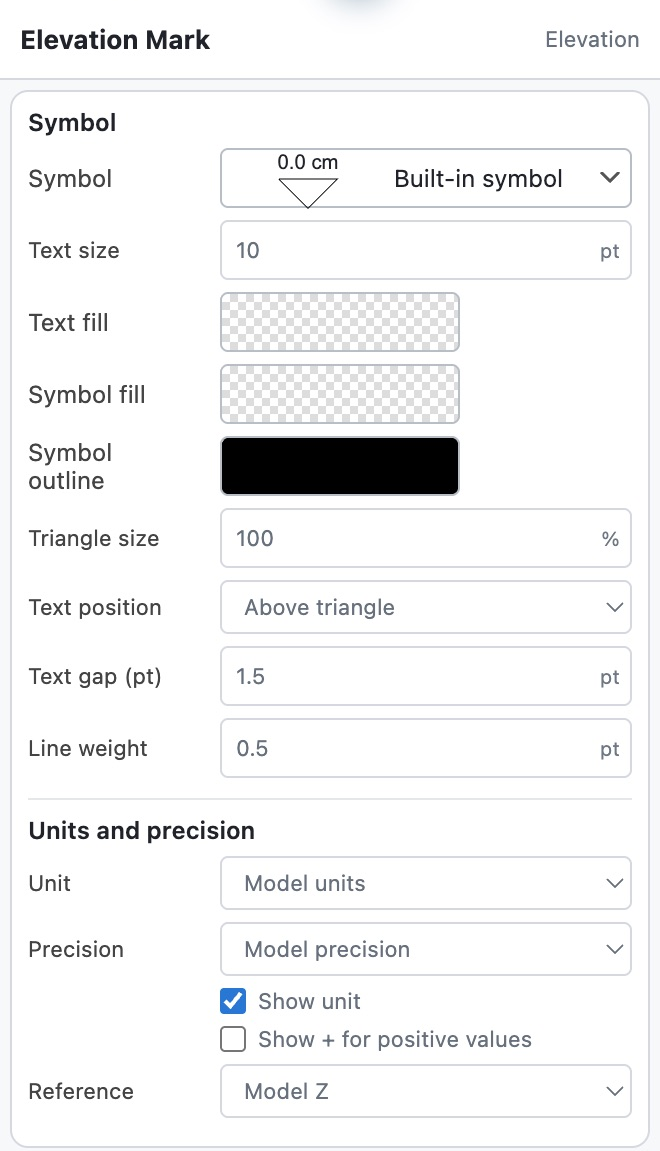
By default, both elevation-mark tools use SketchUp's current length unit and precision; both area-measurement tools use the model's area unit and precision. Drawing Properties can instead set an explicit metric or imperial unit, 0–6 decimal places and whether the unit suffix is visible for each tool. While a tool is active, these settings apply to new measurements. Select one existing measurement to load and edit the settings stored on that object without changing the placement default.
When every selected measurement is the same kind, Drawing Properties opens that measurement's own inspector instead of Shape Style. It shows the settings of the first selected measurement and applies each saved change to every selected measurement while retaining each object's own anchor and linked geometry. A mixed selection of different measurement kinds continues to use the general selection properties.
For Elevation Mark and Plan Elevation Mark, enable Show + for positive values to
prefix displayed positive non-zero values with +; zero remains unsigned and negative
values retain -. Model Z measures from the model origin. Project zero is one
stored reference elevation for the whole model; Scene zero is stored independently
with the drawing scene. Choose the elevation reference in Drawing Properties or from
either tool's right-click menu.
For Project zero or Scene zero, click Set… in Drawing Properties and then click the required level directly in the active 2D drawing. Changing a zero updates marks that use it. A minute negative floating-point remainder that rounds to zero is displayed as an unsigned zero; values that remain negative at the chosen precision keep their minus sign. If a Plan Elevation Mark no longer finds a surface below its stored plan point, it displays Surface not found until geometry is restored below that point.
Linked-face versus drawn-area measurements
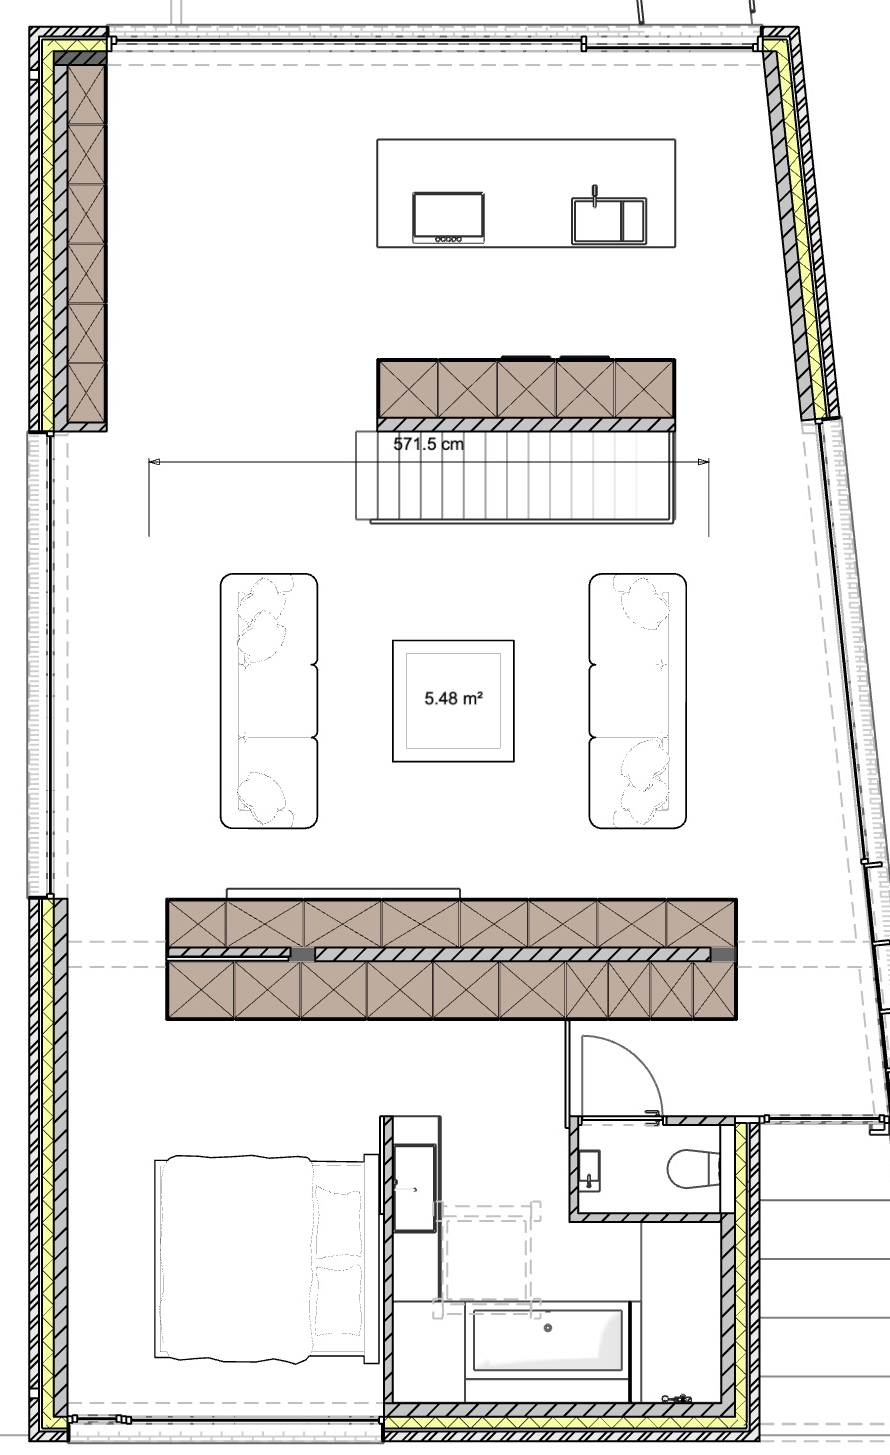
Under Units and precision in Drawing Properties, choose the unit and precision used by either area tool and whether its value includes the unit. Drawn Area Measurement calculates the closed 2D boundary projected onto the section plane and keeps that boundary with the measurement; it has no model-face link and therefore does not change when model faces are added, edited or removed. Its area text is placed at the polygon centroid and updates when a boundary point is moved, inserted or removed.
Area Measurement uses its selected unit and precision and measures the transformed 3D area of the linked face. Hovering performs the frontmost-face search; placement stores the exact face identity and complete group/component instance path. A face added in front later cannot silently take over the measurement. Editing the linked face updates the value. If topology replacement or deletion removes that identity, the annotation shows Face not found until it is explicitly relinked.
Show an area fill or outline
In the separate Area appearance section below those value settings, enable Fill area and choose its color and opacity, enable Outline and choose its color, opacity and paper-space Outline weight, or enable only one of the two. Both are disabled by default, preserving the previous text-only appearance. Draw order places the area polygon Below section lines or Above section lines; the value text remains an annotation above the polygon. The linked Area Measurement derives its displayed fill and every boundary loop from the currently linked face, while Drawn Area Measurement derives them from its stored editable boundary. These display paths use the ordinary authored-drawing pipeline and are included in LayOut and CAD output.
Inspect or relink a measured face
Hover an existing area measurement to highlight its linked face. Its context menu provides Face Information…, Highlight Measured Face and Relink Measured Face…. Face information includes the current area, material, tag, object path, persistent identity and link status. Moving the authored symbol or its text does not change the face link.
Custom measurement symbols
To make a custom symbol, draw or import its paths and exactly one text object, select those objects, and open Save as Symbol in the drawing context menu. Choose Save as Elevation Symbol…, Save as Plan Elevation Symbol… or Save as Area Symbol…. Click the required measurement hotspot/insertion point and enter a name. Skalp stores the symbol in paper space inside the model and initially uses the newly saved symbol for subsequent placements.
Activate either measurement tool and use Drawing Properties to switch that type back to the built-in symbol or to another saved symbol. The last choice is stored with the model and restored in later sessions. The sole text object becomes the live measurement value. A LayOut scrapbook object can therefore be used as the visual source after importing it, while Skalp retains the measurement hotspot and model association.
While Elevation Mark, Plan Elevation Mark, Area Measurement or Drawn Area Measurement is active, right-click and open Measurement symbols to choose the built-in symbol or any saved symbol of that type for subsequent placements. This shortcut updates the same model default as Drawing Properties and does not alter previously placed measurements.
Fillet and Chamfer limits
Fillet and Chamfer join two separate paths into one path using the first path’s identity, layer and style. Pick the side to retain on straight lines. Separated end segments may extend to their intersection. Parallel segments, closed paths selected as separate elements, and interior segments of separate polylines are not supported. Excessive sizes are rejected without changing the drawing.
Select and edit drawing objects
Selection boxes use a solid blue outline for left-to-right window selection and a dashed green outline for right-to-left crossing selection. During dragging, eligible elements preview the resulting selection, including add/remove/toggle modifiers. Selected paths and text boxes have a solid blue outline with a white halo drawn above model geometry; grouped children are highlighted together. The selection is committed when the mouse button is released.
Hovering the Select cursor over an element temporarily shows the same blue outline and white halo as the settings picker; grouped children highlight together. Moving away or leaving the viewport clears hover feedback. Hovering does not select, modify content or activate Drawing Properties. Groups are selected as whole elements; window selection must enclose all their children. A plain click on empty space clears selection. Selecting does not move drawing elements; using a grip does. Groups remain selected as whole elements; use Ungroup to edit children.
Align and distribute drawing elements
| Icon | Arrange command |
|---|---|
 |
Align Left |
 |
Align Right |
 |
Align Top |
 |
Align Bottom |
 |
Align Horizontal Centers |
 |
Align Vertical Centers |
 |
Distribute Horizontally |
 |
Distribute Vertically |

Select drawing elements with Shift-click or a selection window, then use the eight arrangement buttons on Skalp Studio - Drawing - Arrange: Align Left, Align Right, Align Top, Align Bottom, Align Horizontal Centers, Align Vertical Centers, Distribute Horizontally and Distribute Vertically.
Alignment requires at least two selected elements. It uses the combined selection bounds; horizontal centers share the same left-to-right center coordinate, and vertical centers share the same bottom-to-top center coordinate. Distribution requires at least three selected elements and makes the gaps between their bounds equal along the chosen axis. The first and last elements along that axis remain fixed. Overlapping selections can have negative gaps. Each group counts as one element and moves with all its children. Text bounds include the text box, drawing scale and rotation.
Only visible, selected authored 2D elements participate. The buttons are unavailable with too few selected elements, during an unfinished gesture or while another tool suspends the drawing tool. The selection stays active after each operation. Each completed change supports one SketchUp Undo/Redo step; a command that would move nothing adds no undo step. These controls operate within the current drawing plane and have automated source-level coverage; live macOS and Windows toolbar and Undo/Redo acceptance remain to be verified.
Change the stacking order of drawing objects
Select one or more authored 2D objects, then use the separate Skalp Studio - Drawing - Order toolbar. From left to right:

| Icon | Command | Result |
|---|---|---|
 |
Bring to Front | Places the selection above the other objects. |
 |
Bring Forward | Moves the selection one position forward. |
 |
Send to Back | Places the selection below the other objects. |
 |
Send Backward | Moves the selection one position backward. |
These commands reorder objects with the same layer assignments. LayOut layer priority still determines the order between different layers. Groups stay intact; a group spanning several layers moves among groups with the same layer assignments. Selected objects retain their relative order, geometry, style and layer assignments. The selection remains active, so you can repeat a step command.
The buttons require a visible authored selection in 2D Drawing Mode. Finish the current drawing or drag gesture before using them. Each change supports one SketchUp Undo/Redo step; a command at the end of the stack adds no undo step. Toolbar placement and visibility are saved independently of the other Drawing toolbars. Source behavior has automated coverage; live macOS/Windows toolbar, rendering and LayOut round-trip acceptance remain unverified.
Drawing context menus
In 2D Drawing Mode, right-click a drawing object to select it and open the Skalp drawing context menu. Its commands operate on authored drawing records, not on SketchUp model entities. A drawing element receives only the Skalp commands that apply to that element and selection; Skalp does not add SketchUp entity commands to this menu.
With Skalp 2D Select active, one right-click targets the drawing object and opens its menu; a separate left-click selection is not required. A dimension offers Continue Dimension Chain from Start, Continue Dimension Chain from End and Insert Dimension Point…. SketchUp's Edit Group/Explode menu is not the drawing-element editor.
The application-level fallback is deliberately not used, because SketchUp prepopulates that global menu with commands for underlying model entities and its public menu API cannot remove them. Select Drawing Objects is reserved for context clicks without a drawing- object target. Underlying SketchUp geometry is not added to the model selection by Skalp. Right-clicking an object already in a multiple selection keeps that selection. The menu separates object-specific actions, general Delete/Duplicate/Properties actions and geometric transformations.
A single text object or label offers Edit Text; ordinary text additionally offers Make Unbounded or Make Bounded. Area measurements keep their face, relink or boundary-point actions together above the first separator. An authored group offers Ungroup, but Group is hidden when the single selected object is already a group. Internally grouped dimensions, measurements and labels do not expose Ungroup. For eligible ordinary drawing geometry, the three custom-symbol commands are collected under Save as Symbol.
Dimensions use the compact semantic variant: their dimension and chain actions are available directly, followed by a separator and the general Delete, duplicate and properties actions. They do not expose symbol capture, internal grouping, Flip, Group or general Move/Scale/Rotate commands. Switching text modes retains the explicit box dimensions. These drawing changes support SketchUp Undo.
Edit with grips
An individual path shows vertex and, for short paths, segment-midpoint grips. Drag a vertex to stretch it, or a midpoint to move that segment's two endpoints. Axis-aligned rectangles retain the opposite corner and right angles when a corner grip moves; type width and height during that edit. Recognized regular circles and polygons show a center grip for moving and four radius grips for resizing; type a radius while editing one. Detailed imported paths show at most 128 sampled vertex grips.
Text shows an origin grip and, in Bounded mode, an opposite-corner grip to resize its box. Text-box measurements use paper units. Selection and text grips follow the displayed box, including automatic text size, rotation and reflected section frames. The SketchUp text preview can show pixels at strong zoom. Stored annotations remain semantic text, and LayOut/CAD output retains text/vector content.
Numeric input and Undo
Esc cancels a pending gesture. Cancelling a Move, Scale, Rotate or grip edit keeps the
selection so you can retry; Esc again clears it. Completed edits participate in SketchUp
Undo; Polyline saves each completed segment separately. During a gesture, Measurements
shows the applicable length, width/height, radius, angle or scale. Enter values before
the final click; length inputs use SketchUp model units and accept explicit units such
as 2m. Type while the viewport is active, or use SketchUp Measurements, then press
Enter.
Native SketchUp length parsing handles units and locale; with decimal commas, use a semicolon to separate rectangle dimensions. Immediately after placement or transformation, repeated numeric input revises the same result rather than creating more elements or accumulating transformations. Corrections join the previous Undo operation. Starting a new gesture, changing tools or an intervening model transaction ends that correction window. Invalid dimensions leave the saved result intact.
Right-click a selection and choose Flip > Top to Bottom or Flip > Left to Right to reflect it around its combined bounds. Text stays readable and dimension measurement anchors move with the geometry.
Recover from an invalid point or value
If a drawing click or Measurements value cannot produce valid geometry, Skalp leaves the drawing unchanged, sounds the standard alert and explains the problem in SketchUp's status bar. No modal message interrupts the active tool. Correct the point or value and continue; valid earlier points remain available when the gesture supports retrying them.
Which numeric value each tool accepts
The native SketchUp Measurements field shows the active measurement; no separate
measurement field appears beside the cursor. Start typing while the viewport is active
and press Enter to submit through Measurements. Unit parsing remains native. Move/Copy
also accept signed distances and distance;angle; Scale accepts a factor and Rotate
accepts signed degrees. Rectangle uses width/height, Arc switches from radius to sweep,
and Offset, Fillet, Chamfer, Label and Dimension use their current length/offset
parameter. Selection-only tools such as Group and Erase have no numeric parameter.
Snapping, inference and shortcuts
Existing native and authored endpoints, midpoints, edges and intersections supply snap references. Native edges inside transformed groups/components are projected onto the active section plane before their proximity is tested. The projected edge index excludes hidden elements and hidden tags. When section cuts are displayed, native edges are clipped against active section planes in their root and nested group/component contexts; the removed portions do not supply snaps. Native InputPoint inference follows SketchUp's visibility settings.
Recognized circles/polygons supply center and quadrant references; native arc/circle curves supply their projected center. Text-box corners and midpoints can also be used as references. Geometry being moved or edited is excluded as a destination snap source. When a native SketchUp snap is active, drawing, placement, movement and grip editing use SketchUp's own inference indicators, including its colors, shapes and sizes for endpoints, midpoints, intersections, edges, faces and other available native inferences. This also applies to native snaps inside groups and components. Skalp-only authored and projected snaps retain their section-plane markers and guides. The stored drawing point remains on the section plane even when its native reference is at another depth. Linear dimensions retain bindings to projected native edges when the chosen reference belongs to one edge.
Lock directions and use SketchUp shortcuts
Move the cursor along an edge to acquire its direction; subsequent drawing can infer parallel and perpendicular directions. Hovered reference points also supply horizontal/vertical alignment guides drawn from the acquired reference. Direction inference remains available near an edge; exact endpoint, midpoint and intersection snaps take priority. Rectangles offer square inference while choosing the second corner. Horizontal and vertical inference has a small screen-space tolerance. Hold Shift to retain the current direction and release it to unlock.
Right/Left/Up lock the projected red/green/blue model axes; an axis perpendicular to the 2D plane is unavailable. Down locks the current inferred direction. Press the same arrow again to unlock; Escape clears the gesture and locks. Supported native Line, Rectangle, Circle, Polygon, Move, Rotate, Scale, Erase and Select tool shortcuts are routed to their 2D equivalents while 2D Drawing Mode is active. This uses the selected native tool, so configured SketchUp shortcuts can be used.
Unsupported standalone tools return to 2D Select; temporary Pan/Zoom preserves the current gesture.
Live acceptance is still required on supported platforms and keyboard layouts. Skalp combines SketchUp InputPoint inference with projected drawing references; it does not reproduce every private native-tool interaction. Authored paths remain independent drawing records: snapping at an intersection does not merge paths or create SketchUp faces.
Drawing tool buttons return input focus to the model. Explicit text editing focuses its content field instead. Live keyboard-layout and focus acceptance remains pending.
Properties and dimensions
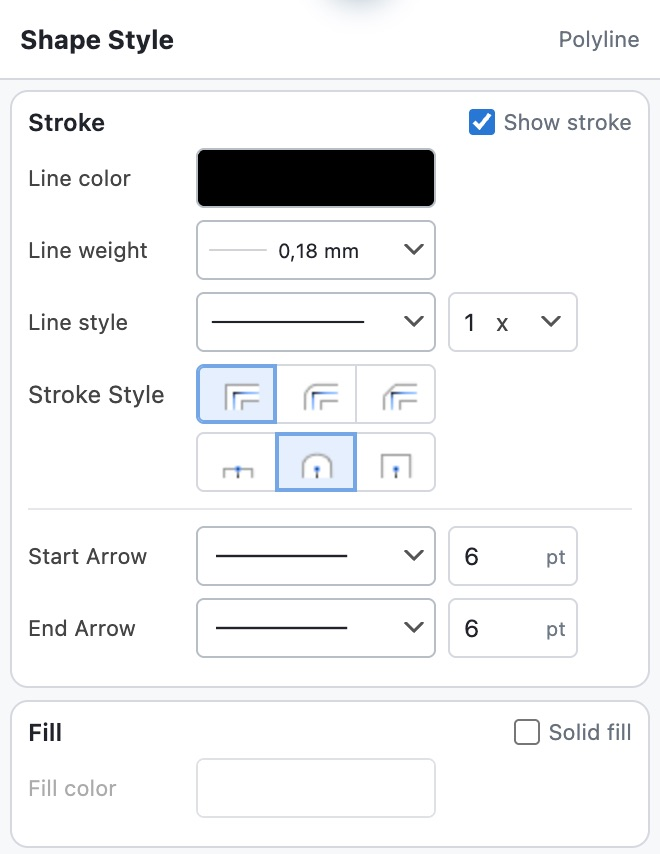
Line-pattern and line-weight samples use shared paper-space rendering. Manager, Material Editor, drawing properties, section-indication settings and the legacy Drawing dialog reuse shared dropdowns and color swatches. Some dialogs also provide hex fields; Drawing Properties uses only color swatches. Use arrow keys, Home/End and Enter inside dropdowns; Escape dismisses them. Numeric units remain appropriate to each setting (paper points, mm or inches). Opacity controls remain available where the underlying setting supports alpha.
Page-specific 2D LayOut layers
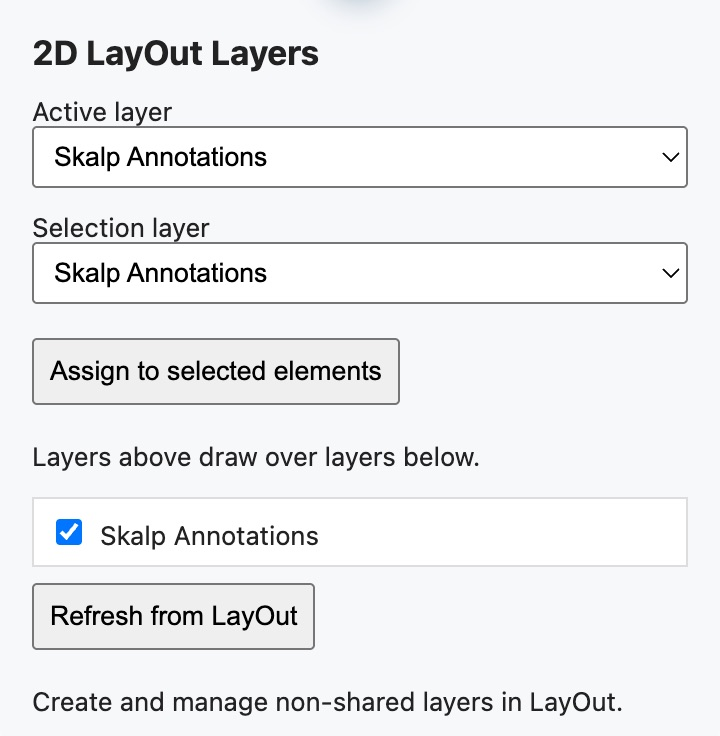
New drawing elements use the built-in Skalp Annotations layer when no other active layer has been configured. This managed, non-shared layer is created in LayOut automatically when the drawing is published, so Drawing Mode and its measurement tools work without prior layer setup.
Load page-specific drawing layers
To organize annotations on additional layers, create layers in LayOut and save its document. On the Skalp Studio - Drawing - Basic toolbar, open 2D LayOut Layers. Only non-shared LayOut layers are offered alongside Skalp Annotations. Shared drawing placements cannot synchronize page-specific 2D layers. Reading the layer list does not require placing the scene first. SketchUp does not create or rename user drawing layers.
Each plan scene owns one 2D drawing. Every LayOut placement of that scene receives the same grouped drawing content and layer assignments. To present the same plan differently, assign elements to separate non-shared LayOut layers and control their visibility. Create a separate SketchUp scene/plan when the drawing content itself must differ.
- Choose Active layer for new lines, shapes, text, labels, dimensions and scrapbook insertions. If no choice was stored, Skalp Annotations is used. An explicitly selected user layer must remain listed and visible.
- Select one or more elements in SketchUp, choose Selection layer, then click Assign to selected elements. Groups and dimensions move together with their components. Changing the active layer alone does not move existing elements.
- Use the layer checkboxes to show or hide their content in SketchUp. Hidden elements are excluded from picking, snapping and existing selections. These per-scene visibility choices do not change LayOut visibility or published data.
- Layers higher in the list draw over layers below, following LayOut's order. Change that order in LayOut, then click Refresh from LayOut. Refresh also retrieves renamed, added or deleted layers; missing layer names are reported and their elements must be reassigned before synchronization/publication.
Refresh missing or changed LayOut layers
If the document is unsaved or unavailable, the layers dialog reports the problem and stays open; save or activate the destination document, then click Refresh from LayOut. Synchronization still requires the scene's drawing placed on a non-shared layer in that document. The general Show 2D LayOut info toggle controls annotation visibility while preserving the individual layer choices. Supplemental section lineweights and rearview strokes also follow their layer order and individual visibility.
Display switches and output layers
| Icon | Display control | What it affects |
|---|---|---|
 |
Show all section planes | Show or hide section-plane guides. |
 |
Show lineweights | Display weighted section outlines. |
 |
Show rearview lines | Display calculated rear lines. |
 |
Inspect rearview source | Find the object behind a rear line. |
 |
Show Surface Hatches | Display Surface Material pattern lines. |
 |
Show Surface Fills | Display Surface Material fills. |
 |
Show plan clipping | Show the stored plan clipping mask. |
 |
Show 2D LayOut info | Display authored 2D annotations. |
The independent Skalp Studio - Display tool palette starts with the section-plane display switch, followed by Show lineweights, Show rearview lines and Inspect rearview source, then a separator; Show Surface Hatches and Show Surface Fills, then a second separator; and Show plan clipping and Show 2D LayOut info. The groups distinguish linework, Surface Material presentation, and crop/authored 2D display options. The Rearview inspector uses its magnifier-and-crosshair pointer while active. Turning Show 2D LayOut info on also activates the active section's drawing view; a separate Align Section View action is not required first.
These switches are on the Display palette. Show or hide the palette through SketchUp's native toolbar controls; it is available with the Manager closed and outside 2D Drawing Mode. Buttons display their checked on/off state. Show 2D LayOut info remains visibly checked while 2D Drawing Mode is active because its authored elements are the content being edited; it cannot be switched off until the mode ends. The palette icons use compact artwork inset from the button edge.
Show Surface Hatches uses a brick-pattern panel, while Show Surface Fills uses the same filled panel with subdued pattern lines so the two switches read as one pair while their emphasis remains distinct; SketchUp may add its own platform-specific highlight around a button to show that the switch is on.
The live lineweight and rearview display switches both default to on and are saved as user preferences, independently of each scene's output settings. Surface Hatches and Surface Fills also default to on and retain separate user preferences. Both buttons remain usable in Drawing Mode. New drawings also enable Skalp section lines (line width & color) by default; existing drawings retain their saved setting.
With a scene or explicitly applied Manager item, the display buttons are greyed out when the corresponding feature is disabled for the active drawing: Skalp section lines (line width & color), Rearview, Surface Materials Hatching or Fill. Show plan clipping is greyed out when the active scene has no clipping mask. A disabled button cannot change its saved display preference. Enabling the drawing feature again, or switching to a drawing that uses it, restores the button's previous on/off state. The drawing's own settings continue to determine LayOut and DXF/DWG output.
Turning lineweights off hides Skalp's thick section outlines, retaining native SketchUp section lines and hatch/fill representations; visible rearview strokes use a one-pixel width. Turning rearview lines off hides generated rear lines and excludes them from drawing-tool snapping. These switches affect only the SketchUp live preview, including Skalp 2D mode: they do not change LayOut publication or DXF/DWG export, and do not enable output disabled by the scene's own settings. Live visual acceptance remains pending.
Layers created by publication
Automatic annotation/output layers are limited to Skalp Annotations (the default 2D drawing layer), Skalp Section Indicators, Skalp Rearview Lines and one Skalp Lineweights layer for all printed stroke widths. The line objects retain their individual widths on that shared layer.
Skalp retains its internal Skalp Model and Skalp Geometry placement layers; shared legacy placements use the corresponding (Shared) variants. No Dimensions, Notes, Symbols or Details layers are created automatically. Update the publication and refresh the list to retrieve newly created output layers. Layer locks are managed in LayOut and must be released before writing content to those layers.
On Windows, the companion can currently report the active document and host the page/drawing-session Ruby surface, but update and authored-synchronization commands remain capability-gated until their live acceptance tests pass.
Drawing Properties and styles
The inspector shows defaults before drawing and element properties after selection. Changes apply immediately to the selected elements; without a selection, they update the per-scene defaults used by new objects. Colors use color pickers, stroke/fill visibility uses checkboxes, and line weights, patterns, Stroke Style stacks the graphical join and cap controls under one title, with both groups matching the width and height of the other settings. Line and fill colors use rectangular swatches without separate hex fields.
The transparency grid shows through the color itself, without an exposed grid border. The compact line-weight dropdown shows a sample and printed width in mm, with the same metric presets as the material controls; Custom inside the menu accepts any positive width in paper points. Line style uses graphical samples and an open chevron, with names available as tooltips and accessible labels. The dash-scale multiplier sits directly beside the line-style dropdown in a compact field matching the arrow-size field width.
The x field accepts any positive value; its dropdown offers 0.75, 1, 1.5, 2, 2.5, 3, 4, 5, 6, 7, 8, 9 and 10 x. Click a color swatch to open its color popup: choose from Standard colors (32 fixed colors in four rows of eight), or choose saturation/brightness, hue or RGB values, and set Opacity with the slider or percentage field in the same popup. The pipette button samples a screen color while preserving opacity.
On hosts without screen-sampling support, it opens the native RGB picker with its own pipette. Escape cancels sampling without applying a color. The first palette row runs from black to white. The second contains pure RGB red, orange (#FF8000), yellow, green, cyan, blue, purple (#8000FF) and magenta. The third and fourth rows keep that column order with dark and light variants: dark colors halve the RGB channels; light colors mix equally with white, rounded to the nearest integer channel value.
Standard-color choices preserve the current opacity. The same palette is available in the Manager, Material Editor and Drawing Reference Editor color controls; Custom color… opens their native color chooser. Standard-color selection applies through each dialog's existing editing workflow. Palette logic has been checked in isolation; visual and live SketchUp acceptance remain pending. Color and opacity edits apply immediately. Escape, the popup close button or clicking outside dismisses the popup. There are no separate opacity rows.
The floating inspector stays above SketchUp and has a fixed size for each property type. Native macOS window acceptance remains pending.
Sample appearance with Picker
The inspector has no Exit button; use 2D Drawing Mode in the main toolbar to leave the mode. The toolbar eyedropper can sample an authored drawing element for current drawing defaults and return to the previous tool. This 2D picker does not snap or show inference markers.
Hovering highlights the eligible object that a click will sample, with a blue outline and white halo; For ordinary paths and text inside groups, including nested groups, only the eligible child under the cursor is highlighted and its own style is sampled. The group is kept intact. Empty space and incompatible object types have no highlight and cannot be sampled.
Picking any eligible child of a dimension copies its full dimension settings, line/text appearance and saved style reference into dimension defaults, then immediately activates the Dimension tool. Shape and ordinary-text defaults stay unchanged. New dimensions use the current Skalp scale. This also works for dimensions inside nested groups.
Picking any component of an Elevation Mark, Plan Elevation Mark, Area Measurement or Drawn Area Measurement copies its complete symbol, appearance, units, precision and, for elevation marks, reference into the matching placement defaults, then activates that measurement tool. Imported custom symbols without a saved library identity are captured from their existing artwork. Picking a label copies its leader appearance, arrow settings, text appearance and text-box size, then activates Label.
Object-specific text, measured geometry and model attachments are retained on the source; they are not placement settings. The blue hover outline highlights the complete special object, including inside nested groups. Live SketchUp 2027 acceptance remains pending. Picking an Area Measurement or Drawn Area Measurement with the Style tool and painting another area copies its symbol, text and number formatting, fill, outline, outline weight and draw order together.
The target retains its own editable polygon or exact face link, anchor and identity.
Customize one dimension label
Select an individual dimension to edit Dimension Text in Drawing Properties.
Display > Measured value keeps the calculated length and accepts Prefix and
Suffix, including any spaces you want around the value. For example, Length: and
clear display Length: 254.0 cm clear. The value continues to update when
measurement geometry changes. Display > Custom text replaces the entire displayed
label with Text; line breaks are supported. It does not change measurement points,
units or geometry bindings.
Return to Measured value to restore the calculated length and retained prefix/suffix. Each field accepts up to 1024 characters; custom text cannot be empty. Dimension Text uses aligned label and full-width input columns. Measured value shows Prefix and Suffix; Custom text shows Text and hides Prefix and Suffix. Switching modes retains the entered field values. Repeated prefix/suffix edits retain native geometry-link status without treating each keystroke as a changed selection. If the object really changes externally, select it again to refresh properties.
Text customization belongs to the individual dimension, rather than its named style or the defaults for future dimensions. It survives grip edits and style changes. These remain authored drawing groups, rather than editable native LayOut Dimension entities.
Sample dimension appearance
Hovering Picker over any dimension component highlights its complete owning dimension, including text, arrows, dimension and extension lines, even inside nested groups. Ordinary grouped paths and text retain individual-leaf feedback. This matches dimension sampling, which picks the owning dimension's settings. Picker and Drawing Properties use the dimension's base stroke, independently of dotted or hidden extension lines. Applying the sampled style preserves the main line's pattern and the extension circles and their sizes.
Centered labels split the main line correctly even when one or both extension lines are hidden.
Apply drawing defaults with Paint
Paint, immediately beside Picker in the 2D toolbar, applies current drawing defaults without first sampling a source. Its LayOut paint cursor and blue hover outline identify the target. Like Picker, it does not snap and targets individual children inside nested groups. Click text to apply text defaults, or a path to apply shape defaults. Clicking dimension content applies the complete current dimension style and saved style reference using the current Skalp scale, retaining measurement points and bindings.
Ordinary text content and explicit box dimensions, path geometry and group structure are retained. Each click supports Undo. Paint remains active for more targets; Escape returns to 2D Select. It does not modify underlying SketchUp entities. There is no separate Apply step. Shape, text and label inspectors have no appearance preview; changes are visible in the drawing. The Dimension inspector previews its chosen style. Clicking an Elevation Mark or Plan Elevation Mark applies all matching measurement defaults, including its symbol, appearance, units, precision and reference.
Clicking a label applies its current leader, arrow and text appearance settings. Each target keeps its own content, measured geometry and model attachment. Clicking either kind of area measurement applies the complete current Area Measurement defaults, including symbol, text and number formatting, fill, outline, outline weight and draw order, while preserving the target's measured polygon or linked face.
Text fonts, alignment and box modes
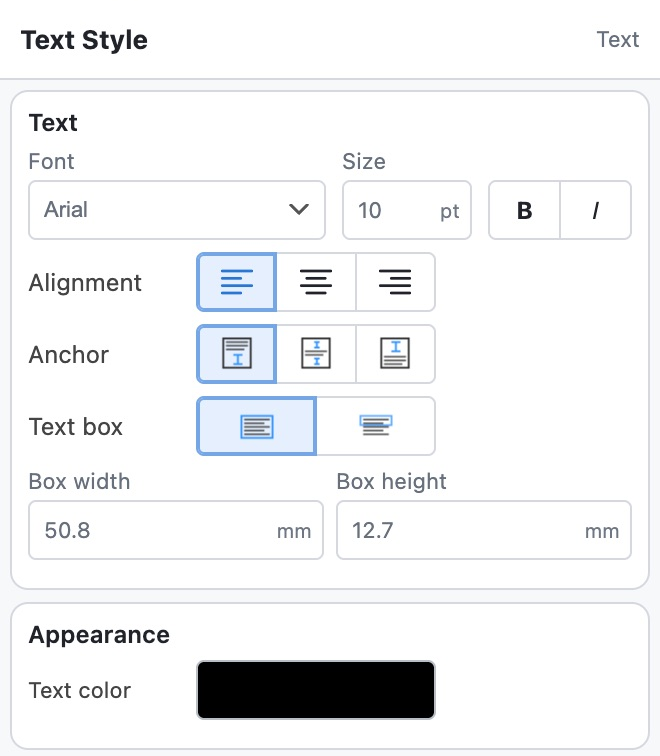
Shape, text and label inspectors use the same compact fields, white property panels, graphic menus and color popup. Labels show Label Style in the header. The Font dropdown previews each family name in its own typeface and includes the current font. On macOS it lists installed font families; other hosts use the standard suggested families. You can also enter a family name directly. Missing fonts are displayed using a system fallback. Font changes apply immediately.
Ordinary text also has graphical Alignment buttons for left, center and right alignment within its text box. Anchor selects Top, Center or Bottom. Text box selects Bounded (explicit width and height, wrapping and clipping; full rectangular icon) or Unbounded (automatic size, no wrapping; shallow rectangular icon; explicit line breaks remain). Hover over either box-mode button for a description. Box dimensions are disabled in Unbounded mode and retained when switching back to Bounded.
The graphical anchor and box-mode buttons use the LayOut icons, as do Stroke Style joins and caps. These settings are stored with text and passed to LayOut export/import; the SketchUp fallback estimates automatic text height. Label alignment follows the leader direction automatically; dimensions keep their centered text and their saved position and rotation. Text settings align Font, Size and emphasis in one row.
Place and edit text at its anchor
When placing ordinary text, the click locates its selected alignment and anchor: Left/Top places the upper-left box corner, Center/Center places the box center, and Right/Bottom places the lower-right corner. The box origin is adjusted before saving, so centered or right-aligned text does not start an entire box away from the click. Snapping and inference still determine the placement reference.
With the Select tool, double-click ordinary text or a label to edit its content in Drawing Properties. The content field receives focus and selects the existing text. Edits update the same object, preserve its position and appearance, and can be undone in SketchUp. Live SketchUp acceptance testing remains pending.
Path arrowheads
For ordinary open paths, Start Arrow and End Arrow each have a graphical menu and a size in points. Both initially use None and 6 pt. Closed paths show no endpoint arrows. Choose filled/open triangles, skinny triangles, open arrows (90°/120°), circles, squares, diamonds, Star, T, slashes, Underrun or Overrun. Underrun shortens the visible line at its endpoint; Overrun extends it. Size 0 hides the arrow. Changing defaults affects newly drawn paths; selecting a path changes its saved style.
Arrow geometry follows the endpoint directions and paper scale, including CAD export. LayOut publication writes and reads native path arrows. LayOut requires a minimum native arrow size of 0.25 pt; smaller positive source sizes are clamped to 0.25 pt there. Live SketchUp/LayOut acceptance remains pending. SketchUp/CAD arrow shapes are polygonal representations of the native catalogue, rather than a pixel-identical rendering of LayOut.
Label arrows and grips
For the Label tool or a selected label, Arrows contains Start Arrow (the attachment tip) and End Arrow (the text end), each with a size in points. Both use the same graphical catalogue as path arrows. New labels initially use a 6 pt open start arrow and no end arrow. A selected label also exposes its text content and font. Drag the attachment-tip grip to point to another location while keeping the text in place.
Drag the text-anchor grip to move the text; the elbow follows its height. The elbow grip changes the bend and the horizontal leader height. Text placed to the left of the elbow is right-aligned; text to the right is left-aligned. Both are vertically centered with a small gap from the leader.
Labels retain geometric attachment points; moving model geometry does not automatically move an ordinary custom label's attachment.
Automatic model-information labels
When the first Label click infers native SketchUp geometry, the label instead stores that entity's persistent identity, its containing component/group path and the attachment point in local coordinates. Automatic text in Drawing Properties then offers every applicable LayOut model-label family that SketchUp exposes: scene name and description, scale and ratio, section name and symbol, group/component names and description, solid volume, face area, edge length, coordinates, and scalar instance, definition, dynamic-component or classifier attributes. The default is face area for a face, edge length for an edge, solid volume for a solid object, otherwise its object name or coordinates. Choosing Custom text disconnects automatic text but keeps the drawn label.
Automatic values use the model's length, area and volume formatting. They are recalculated from the linked object when Skalp reads or synchronizes the drawing; nested instance transformations are included in face area, edge length and the attachment coordinates. If the object is deleted or can no longer be resolved, the last displayed text is retained until the label is reconnected or changed to custom text.
The selector and its field names are localized in all 13 catalogs.
Dimension styles and measurement links
The Dimension Style inspector is deliberately limited to a graphical style selector and a Manage dimension style menu with Rename and Delete. It has no font, stroke, arrow, units, precision or scale fields.
Save a style from a LayOut dimension
To create a style, open a saved LayOut document, select exactly one native linear dimension, and click Save Dimension Style… in the Skalp Studio palette. The naming dialog uses the Skalp Manager logo. Enter a unique style name and click Save. A scrapbook opened as a LayOut document works as a source too. The source dimension is copied without changing its geometry, selection or document. In SketchUp, choose the named style in the Dimension inspector.
For the Dimension tool this sets the defaults for new dimensions in the current section scene. When every selected object is a dimension, Drawing Properties remains in the compact Dimension Style inspector and applies the chosen style to all selected dimensions at once. A normal click selects only one segment of a placed dimension chain. Drawing Properties then exposes that segment's own prefix, suffix and custom Dimension Text as well as its style.
To edit the style of the complete chain, right-click one segment and choose Select Entire Dimension Chain first. A chain or multi-dimension selection does not expose the per-segment Dimension Text fields, so each segment retains its own text. Dimension defaults are separate from ordinary line defaults. Refresh the style list by opening the selector.
Dimension text backgrounds
Dimension labels reserve enough text space for LayOut while retaining their paper font size and label center.
Solid dimension-text backgrounds retain their enabled state, color and alpha when importing a LayOut style, in the Dimension Style preview and when displaying it in SketchUp. The preview shows the dimension value at its saved paper text size and places the solid background behind that value. Supported text boxes also retain these properties during synchronization and drawing-session reconstruction. Pattern-filled text boxes remain unsupported.
Choosing a named dimension style replaces the active appearance completely; missing fields in an older saved record use neutral defaults instead of inheriting the fill last used in Drawing Properties.
Style-library storage and removal
Styles are shared between the macOS LayOut extension and SketchUp in
~/Library/Application Support/Skalp Studio/Dimension Styles/styles.json. The original
LayOut document is not needed after saving. Rename and Delete affect the library only;
dimensions and scene defaults retain independent copies of their settings. A removed
style remains usable by existing dimensions and defaults, but cannot be newly selected
from the library. The displayed name falls back to its saved name when its library entry
is unavailable.
Measurement scale and supported style formats
Measurements always use the scale set in Skalp. The source dimension's LayOut measurement scale is never imported. Font size, stroke width, arrow sizes and gaps keep their paper-space sizes. Initial dimensions without a library style retain centimeters with one decimal, horizontal text and open arrows. Rounded values use Skalp's tilde convention: when the rounded-value indicator is enabled, ~ appears only when the displayed value differs from the measurement by at least 0.01 mm, regardless of the selected unit or precision. Smaller differences do not show ~; measurement geometry is unchanged. The LayOut rounded-value indicator toggle is not imported.
The current importer supports decimal linear dimensions in mm, cm, m, inches, feet and points with precision from 1 to 0.000001; Above/Center/Below text, horizontal/vertical/parallel/perpendicular rotation, plain font/emphasis/color, independent stroke appearance for the dimension line and each extension line, independent extension gaps at the two measured points, and independent endpoint arrows on the dimension line and each extension line, including filled-circle extension markers and their independent sizes.
Filled and open circle markers use LayOut's circle geometry: the path radius is the arrow size plus the stroke width, both in paper points. Generated endpoint markers render above coplanar model geometry in the SketchUp viewport. Extension lengths beyond the dimension line must still match at both ends. Each extension gap retains its paper-space size when the style is applied in Skalp.
Sparse dotted extension lines (including the legacy Dot pattern with dash scale 100) render as round dots in SketchUp rather than long dashes. This viewport minimum does not change exported paper-space stroke or marker sizes.
Their pattern starts at the dimension-line end, so the endpoint dot stays there when the measurement offset changes. Existing LayOut source dimensions and saved library styles retain their source settings.
Check the imported appearance against the source LayOut dimension.
When a dimension style cannot be saved
A rejected save displays Dimension style was not saved with the reason; no library entry is created. Correct the source dimension and save again, then open the SketchUp style selector to refresh the list. Fractional or architectural units, angular dimensions, custom measurement text, manually offset text and visible text leaders are rejected with an explanation before saving. Text and extension gaps are derived from the source's paper geometry; tiny floating-point differences and SketchUp's font metrics can affect spacing. Arrow geometry uses Skalp's existing polygonal catalogue.
Use the matching SketchUp extension and LayOut companion. Restart LayOut after installation; reopening its palette alone does not reload the integration.
Edit measured points and dimension offsets
Select a dimension to show three blue square handles: the two measured points and the midpoint of the dimension line. Drag either measured-point handle to change or reattach that point. The placed dimension line keeps its position and direction; only its projected length and extension line at the changed point are updated. Drag the middle handle to reposition the dimension line while keeping both measured points. A preview follows the drag; release to apply, or Esc to cancel.
Continue, insert, merge or remove chain points
Adjacent dimensions created as a chain share a chain identity while remaining individually selectable. Right-click a dimension to directly continue the chain from its start or end, insert a measured point, select the entire chain, or delete the entire chain in one undoable operation. This semantic dimension menu also remains available on already placed dimensions while Auto Dimension is still the active tool; right-clicking empty drawing space keeps Auto Dimension's line-source menu.
Right-click the corresponding shared endpoint on the visible dimension line and choose Remove Dimension Point to merge its adjacent dimensions. The target zone follows the dimension line rather than the measured point in the model drawing, which may be hidden by drawing geometry. Select two compatible dimensions with a shared endpoint and choose Merge Dimensions to combine them. SketchUp closes the native context menu before Skalp starts any of these actions.
This brief handoff prevents the menu, tool switch, drawing operation and Drawing Properties refresh from re-entering one another. After the handoff, Skalp restores keyboard focus to the drawing viewport even if Drawing Properties refreshes asynchronously. Ordinary Delete or Backspace removes the current selection; after Select Entire Dimension Chain, it therefore removes the complete chain. A normal click edits only that segment's style and Dimension Text; choose Select Entire Dimension Chain before changing a style that must apply to every segment.
Inserting a point preserves the dimension line, direction, style and layer and records a model association when the new point snaps to eligible model geometry.
Keep or repair model-geometry links
New measured points snapped to SketchUp vertices or edges retain an association to that edge and its group/component instance path. Moving the edge endpoints or the containing instances recalculates the projected measurement and its label. Points on an edge retain their fractional position along that edge. Measurements are projected into the section drawing plane, not full 3D distances. The same resolved geometry is read by drawing export and synchronization.
Free points and snaps to authored/section-overlay strokes are not model associations. Existing dimensions remain unassociated until their measured-point handles are snapped to model geometry. Restyling a dimension preserves its links; moving, rotating, scaling, flipping or duplicating the entire dimension detaches them. Source edges deleted or replaced by topology edits cannot be automatically reattached: the stored coordinates remain, and unresolved measured points are marked red when selected. Drag those handles onto the intended geometry again. Collapsed measurements also keep their stored drawing until the points become valid again.
Circles and arcs are segmented editable paths. Labels and dimensions created with Skalp’s SketchUp tools are groups of paths and text with saved editing definitions. Native LayOut dimensions imported by sync or a scrapbook retain a separate native definition for their return to LayOut. Ungroup before using vertex tools on grouped paths. Offset rejects invalid results.
Scrapbook symbols
Choose Insert Scrapbook to open Skalp Scrapbooks, then select one of LayOut's built-in or user scrapbooks from the Scrapbook list, then select its Page. Every saved LayOut page is a separate subsection of that library, with its original name and page order. Only the selected page's supported symbols appear in the preview grid. Click a preview; the browser closes, then click the object's position on the section. Esc cancels placement. The scrapbook and page selectors and placement hint remain visible while the preview grid scrolls. Switching pages reuses the loaded library. Preview cards have no visible name or action caption because LayOut scrapbooks do not provide a useful per-item name. Skalp retains an accessible action name for assistive technology.
The browser uses automatic sizing, leaving more room for symbol previews.
Multiline text previews use the source paper size and line spacing, so their lines
remain separate and fit the saved LayOut text box instead of overlapping in the card.
Rotated and non-uniformly scaled rectangle symbols retain their assembled positions.
Dotted paths use round dots at the source line weight, including when their straight
segments use flat ends.
Skalp reads LayOut's ordered scrapbook-folder settings, including its localized built-in
folder, per-user LayOut/Scrapbooks folder and any custom folders added in LayOut
Preferences. On first opening, the list selects LayOut's last-used scrapbook when it
remains available.
This is the current click-to-place workflow. Native LayOut paths retain straight, circular-arc and cubic Bézier segments; normal, rounded, lozenge and bulged rectangles remain native rectangles; circles and ellipses remain native ellipses. Formatted text retains its original RTF when its content is not changed. These objects can be nested in ordinary, unclipped groups. Their SketchUp display uses editable sampled points, but rigid moves, rotations, scale changes and style changes transform the retained native definition too. Dense paths use a zoom-dependent approximation for viewport strokes with a maximum deviation of one quarter of a logical screen pixel. Stored geometry, picking and LayOut synchronization retain the complete paths.
Syncing the unchanged construction back to LayOut therefore recreates the same native entity family instead of permanently replacing it with a polyline. A structural path edit deliberately invalidates that retained definition and writes the edited result as a normal path.
Stretched arc segments in scrapbook paths retain their cubic Bézier geometry when sent back to LayOut. The macOS SDK round-trip regression covers this correction; live acceptance with the original scrapbook item remains pending.
Choose native or Skalp scrapbook placement in LayOut
For an ordinary unscaled group, use LayOut's own Scrapbooks panel and native placement tools. You do not need to convert a scrapbook just because you use it in an unscaled group.
For a scaled Skalp drawing, use Skalp's scrapbook import for scaled scrapbook items. Skalp reads the existing LayOut library and converts the inserted copy to the Skalp plan's scale; you do not need a second set of source libraries. The original scrapbook remains unchanged. Skalp automatically follows the source: a model-sized item keeps its real-world dimensions: for example, an item authored at 1:100 occupies twice as much paper space in a 1:50 plan. Text and text-box sizes retain their paper-size behavior. Explicitly paper-sized items keep their printed size instead of being forced to model size. See Automatic scrapbook sizing.
The native restriction concerns nested scaled drawings, rather than every scrapbook object: LayOut refuses to insert a scaled drawing or SketchUp model from its Scrapbooks panel into another scaled drawing. Ordinary unscaled scrapbook geometry is not subject to that particular restriction. For scaled scrapbook content in a scaled Skalp plan, use the Skalp conversion route instead of trying to nest the original scaled group.
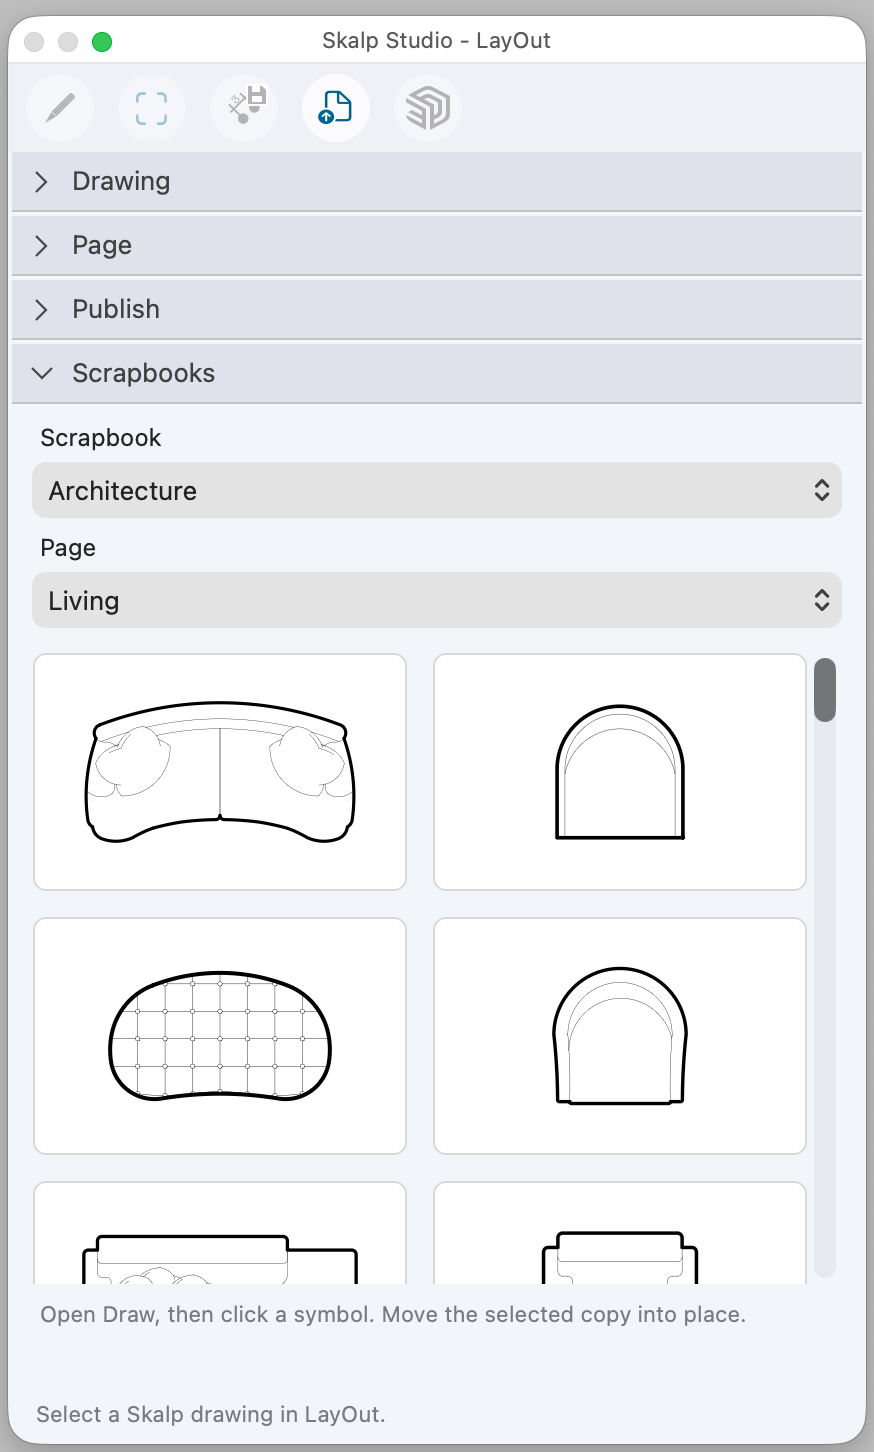
On macOS, the Skalp LayOut palette also includes a collapsible Scrapbooks panel. Choose a library under Scrapbook, then select its Page directly. The panel presents supported, visible, unlocked source items as separate cards in a scrollable two-column grid. Each preview is rendered from that item's own elements, including its grouped children, text and styles. Neighbouring or overlapping items do not appear in its card. Each preview fits the item's bounds without the source sheet's headings and empty margins. Supported source objects outside the paper also receive previews; a position outside the paper does not make an object empty or remove it from the list. Preview fitting includes native dimension and label text. This correction is covered by macOS automated rendering tests; acceptance in the running LayOut palette remains pending. To edit a library, use Edit… in LayOut's ordinary Scrapbooks panel. The Skalp panel has no Edit button. Save source changes in LayOut, then return to the Skalp palette; it compares the source file checksum and refreshes the selected page automatically when the content has changed. No separate Sync command is needed. Already inserted symbols remain independent copies and are not updated by editing their source library.
Open Draw, then click a card to insert a converted copy into the active scaled Skalp group. The copy is selected; use LayOut's native Move tool to position it. Automatic attachment to the cursor is not implemented. Esc during Move leaves the inserted copy, and insertion and movement can require separate Undo steps. The original library remains unchanged. This panel is implemented for macOS; Windows panel parity and complete live placement acceptance remain pending. Insert Scrapbook in SketchUp remains another route: place the symbol there, then send or synchronize the drawing to LayOut.
Scrapbook compatibility and omitted content
On Windows, the current development source uses the bundled LayOut Ruby API to read saved scrapbooks without saving or changing the source. It follows LayOut's configured scrapbook folders and uses Windows resource paths. This path still requires Windows SketchUp 2027 host acceptance; an unavailable or uninitialized LayOut API is reported rather than treated as an empty library.
Native stroke, arrow, solid-fill and pattern-fill settings are retained for the LayOut round trip. Pattern fills and mixed RTF runs are not yet rendered with full fidelity in the SketchUp preview. Clipped groups and native labels remain unavailable to scrapbook insertion. Images, tables and embedded SketchUp viewports are not imported as authored drawing elements. Consecutive identical display vertices are removed during scrapbook import without altering the source file. Unsupported or invalid entities are omitted completely. When an otherwise supported group contains unsupported children, Skalp keeps the supported children instead of rejecting the complete group. Verified native zero-length line paths are retained, including inside groups. Round caps display a dot at the source stroke width; flat caps have no visible stroke. Arbitrary single-point paths remain unsupported.
Locked objects and objects on locked or hidden layers are excluded from the insertable symbols. This keeps page headings, size labels and background strips on the built-in Architecture library's locked layer out of the symbol grid. Visible, unlocked shared objects appear once on each page where their layer is visible. To make an intended symbol available, unlock its object/layer and show its layer in the source LayOut document, save it, then refresh the browser. Pages with no supported, unlocked visible symbols remain selectable with an empty grid.
Refresh scrapbook previews and understand copies
Previews include nested paths, fills, opacity, dash patterns and rotated text boxes, fitted to a consistently padded frame. Overlapping imported objects keep LayOut's layer and within-layer drawing order in both the preview and the placed copy. When the open scrapbook browser regains focus, it checks its selected source file and rebuilds previews if the saved file changed. A failed refresh keeps the previous usable cards. Save changes in LayOut, then return to the scrapbook browser to refresh them. Unsupported items remain omitted.
On macOS, Skalp starts a separate background process after startup to prepare the libraries in LayOut's configured scrapbook folders. It checks each original file's SHA-256 content hash and reuses already prepared libraries when the content and converter version match. New or changed libraries are prepared with all supported pages and their previews. The browser reads these prepared previews; the complete object data is loaded when you choose a symbol for placement.
If a library is not ready, the browser shows Preparing scrapbook in the background…. The selected library receives priority after the library currently being prepared. SketchUp remains available while the separate process works; you can choose another library or close the browser. First preparation can take longer for large libraries. Only completed cache versions become available. Saving source changes, a converter update or missing/damaged cache data triggers preparation again. A metadata-only change with identical source content reuses the prepared result after the background hash check.
The local cache is disposable; keep the original .layout file. Opening a library
leaves its source content and permissions unchanged. If persistent cache storage
cannot be written, preparation uses temporary local storage and may be repeated
in a later session. A failed library switch retains the previous usable library.
The cache does not change inserted copies or drawing-publication storage.
Windows retains its existing page cache; automatic background preparation is not
enabled there in this build.
While the browser is open, recently visited pages retain their previews and page contents, so returning to a page or library avoids rebuilding the preview grid. These memory caches are bounded: an older page may need to load again after browsing many large pages. Source changes still replace the cached contents. Opening and page navigation have been tested live with built-in libraries in macOS SketchUp 2027. Initial window creation and reading/decoding a complex preview page can still take time; Windows performance acceptance remains pending.
Automatic scrapbook sizing
Inserted objects are independent copies. No size selector is needed: Skalp follows an explicit source scale automatically; an ordinary symbol without a saved setting starts at its paper size. Model-sized furniture and details follow the drawing scale. Paper-sized symbols keep their printed size while their insertion anchor follows the drawing. Each copy saves its size behavior; changing Draw mode or synchronizing does not overwrite it. Ungrouping a paper-sized symbol retains the size behavior on its children. Editing the library does not update inserted copies.
For native dimensions, measured anchors automatically use model coordinates; text, arrows and extension gaps use paper sizes. Native dimensions appear as grouped annotations in SketchUp and return as native linear/angular dimensions in LayOut. Move, rotate and copy them as whole annotations in SketchUp; edit their measured geometry, rich text and native style in LayOut. Resizing, flipping, ungrouping and generic properties editing of those imported annotations in SketchUp are blocked rather than discarding the native definition. Skalp-created SketchUp dimensions keep their existing measurement and style tools.
Scrapbook arcs appear as oversized circles
Curved scrapbook symbols should retain their short or long arc shapes when published to LayOut, including rotated or mirrored copies. A correction in the current development source also handles copies inserted before the correction; you do not need to redraw or reinsert the symbol in SketchUp.
If an older publication shows oversized circular outlines, keep the correct SketchUp drawing. After installing a matching Skalp and LayOut integration that includes the scrapbook arc correction, restart both applications and use Send Drawing to LayOut to publish a fresh placement. Check it before removing the earlier placement. Automated geometry and save/reopen tests cover this correction; displayed host acceptance and availability in a distributed beta remain separate.
Publishing to LayOut
Goal Add a drawing to a saved LayOut document.
Before you begin: Save the source model and LayOut document. Open the matching LayOut bridge, activate the destination page and choose a visible, unlocked, non-shared layer. Direct insertion is implemented for macOS; Windows live insertion and save/reopen acceptance remain pending.
- Activate the saved SketchUp scene you want to publish.
- Choose Send to LayOut for a viewport-based placement, or Send Drawing to LayOut for native drawing geometry.
- If asked, choose whether to update the scene or send its saved state.
- Review the inserted placement and save both documents.
Check The new placement is centered and selected at its configured scale. Sending adds a placement; use synchronization to update existing placements.
Find a task: Choose output · Place the drawing · Keep supporting files
Choose a LayOut publication type
Send to LayOut places the active saved SketchUp scene directly on the active page and active non-shared layer of the active saved LayOut document. LayOut and its matching Skalp bridge must be open. The command chooses the output by scene:
- an ordinary scene creates a viewport linked to the editable source SKP;
- a plan creates a managed group containing its viewport, generated plan geometry and the scene's authored 2D drawing;
- a clipping-box scene creates a viewport linked to a dedicated derived SKP. Its line widths and extra hatch strokes are baked as monochrome native SketchUp geometry for the chosen scale, so the viewport may be orbited in LayOut. Colored clipping-box linework is not supported.
Native drawing output and its limits
Send Drawing to LayOut, shown with the red LO document-and-arrow icon between
Export Section and Send to LayOut, provides a third output for a saved
parallel-projection scene. It places a managed native LayOut drawing on the active page
and active non-shared layer. The managed group retains a SketchUp model viewport
under its native drawing geometry, so Get SKP Model can select that viewport.
The drawing uses
the same composed section, frontview, rearview, Surface Material and vector-shadow data
as CAD export, but writes LayOut paths and fills instead of DWG entities. Stored CAD
export choices determine which of those generated parts are included; open Export
Section to review those choices before sending the drawing.
Native section hatches use Skalp's calculated hatch strokes. Every logical hatch region is a managed LayOut subgroup, even when it contains many technical paths. Translucent Surface Materials and shadows are native RGBA fills. Generated paths also include the visible fill color and hatch strokes of painted Surface Materials. Each Surface hatch path retains its authored line color and paper line weight.
Generated geometry uses Skalp Geometry, above the model viewport's layer; authored 2D elements retain their assigned page-specific LayOut layers and the existing two-way synchronization workflow. Earlier native drawings that contain only a placement frame need a drawing synchronization with the corrected matching integration to gain their model viewport. Finish or recover any pending drawing session before synchronizing.
Generated section cut lines are drawn above section fills and hatch strokes. Thicker cut lines are drawn above thinner cut lines, regardless of color, in both SketchUp and LayOut. Color does not give a thinner black line priority over a thicker colored line. At equal widths, darker pens are drawn above lighter pens; identical brightness retains material order. After changing section materials, use Sync Drawing with LayOut to refresh an existing drawing. Automated depth, rendered-pixel and publication tests cover this ordering. The corrected SketchUp display has also been checked on macOS in perspective at multiple zoom levels and in a parallel view. Live LayOut and Windows visual acceptance remain pending.
Native drawing output supports parallel orthographic scenes; perspective and clipping-box scenes are rejected. Per-placement internal-layer and style overrides are not yet exposed in the Skalp LayOut panel. A managed refresh currently replaces generated paths. A native LayOut dimension connected to one of those paths can therefore become non-associative after an update; LayOut displays its normal non-associative-dimension warning. Skalp never silently reattaches that dimension to a different path. Use Skalp-authored dimensions in SketchUp when the association must survive generated-path replacement.
Place a drawing on the active page
Save the source SKP and destination LayOut document first. Activate the saved SketchUp scene, destination page and a visible, unlocked, non-shared layer, then choose the required LayOut sending command. Skalp centers and selects the new placement. If the current SketchUp view differs from the saved scene, choose whether to update the scene or send its stored state; Cancel makes no change. The complete inserted placement remains unlocked, so it can be moved freely on the sheet without changing its configured drawing scale.
If the active LayOut document has never been saved, Skalp stops the command before opening the progress window or preparing export files. Save the document in LayOut, then deliberately choose Send to LayOut again. Saving does not resume or restart the stopped command automatically; the same applies to Send Drawing to LayOut. Sync Active LayOut uses the same preflight rule.
Publication progress and cancellation
A modal progress window shows the completed percentage, elapsed time and current export phase while the scene and any derived SKP are prepared. Cancel requests stopping at the next safe export boundary; a model copy or save already in progress is allowed to finish first. The final insertion into LayOut cannot be cancelled. After a successful operation the window closes automatically. Cancellation and error details remain visible until Close is chosen.
Either sending command adds a placement; it does not update existing placements. Multiple placements use the same source or derived SKP path, allowing LayOut to reuse that linked resource instead of Skalp producing duplicate model files.
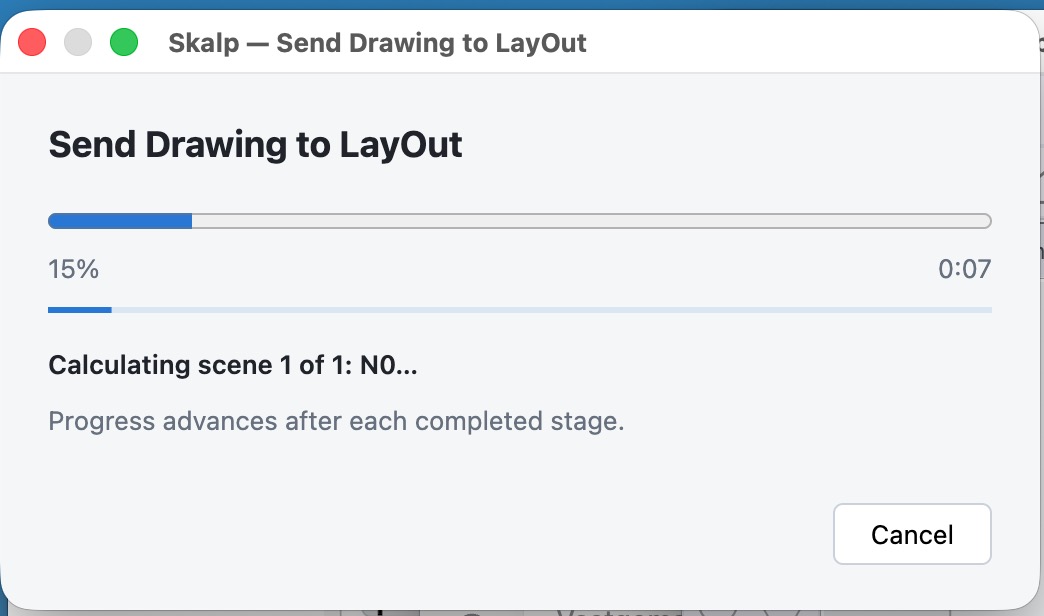
The progress window identifies the current stage and elapsed time. Cancel is available while cancellation is safe.
Drawing storage and project files
Send to LayOut, Send Drawing to LayOut and Sync Active LayOut routes prepare working files in Skalp's local publication cache, outside the project folder. Plan and clipbox viewports embed their generated scale models in the saved LayOut document. Each managed placement also stores its synchronization data there; ordinary annotation synchronization uses that embedded data. No project-side Scene JSON file is required or supported. Use matching SketchUp and LayOut components; incompatible companions are rejected before working files are prepared.
On macOS, the cache is under ~/Library/Caches/SkalpStudio/Publication/. It is
disposable working storage, not a project backup. If cached scale models are absent,
LayOut uses the models embedded in its document. Saving, Save As, and moving or
renaming that document retain those models and Skalp data in the tested macOS 2027
workflow. Use Skalp's Sync Active LayOut to prepare current scale models again from
the source; manually locating or updating a missing generated reference in LayOut is
not required for viewing the saved drawing. LayOut's reference manager can still show
an unavailable external cache path. Windows native/live acceptance remains pending.
Skalp-managed references shown as Out of Date
In LayOut, Document Setup > References can show Out of Date for generated
Model.skp references under Caches/SkalpStudio/Publication/models/. This is
normal for these Skalp-managed working references: the saved document contains
the embedded drawing models, and Skalp manages their generation and updates.
The red status alone does not mean the embedded drawing is missing or that
conversion failed.
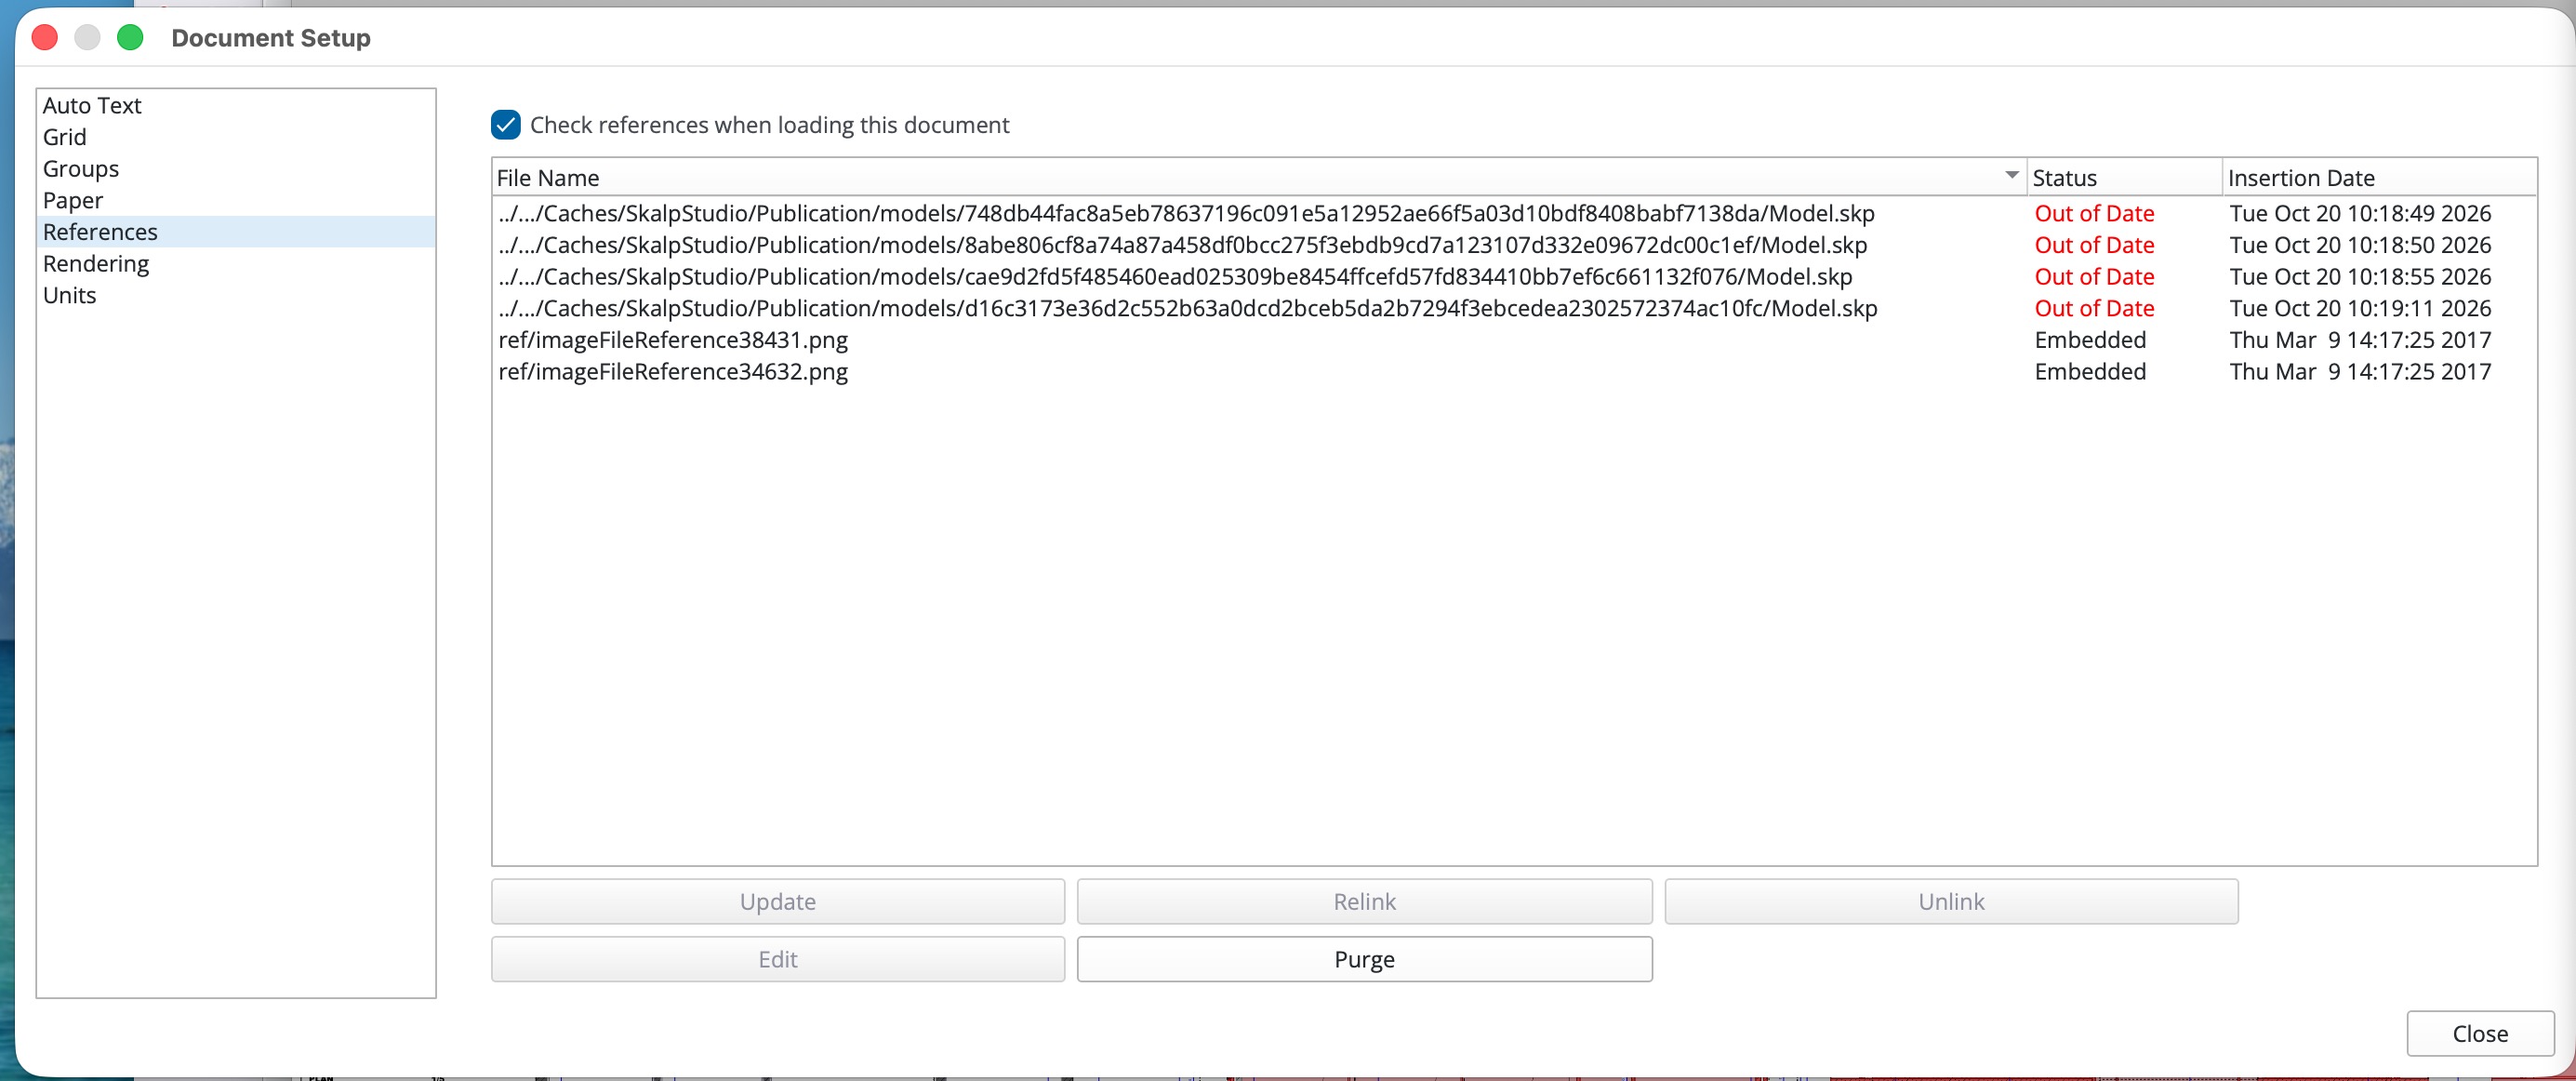
Leave these generated references under Skalp's control. Do not manually Update, Relink, Unlink or Purge them to resolve this status. To apply changes from the source model, use Skalp's Sync Active LayOut. In particular, do not relink a generated scale model to the original editable SKP: they serve different purposes and can use different scales.
This explanation applies specifically to Skalp's publication-cache references. For ordinary viewports linked directly to editable SKP files, investigate missing or outdated source references and use LayOut's normal reference update as needed.
Keep the original editable SKP files. Ordinary model views still link to them, and Skalp needs the sources to calculate changes. Moving an original SKP or using Save As on that source is a separate, still incomplete reconnection workflow; moving the LayOut file alone does not repair source identities. If the LayOut sync destination path changes, select the new destination before synchronizing.
Explicit scrapbook publication still creates a <model>_Skalp export folder beside
the source. It contains user-requested exports and is separate from the disposable
working cache used for direct placement. Keep these requested exports when you use
them. For these explicit exports, Skalp automatically
replaces files that the folder's valid publication manifest identifies as belonging to
this source model; it does not ask for confirmation because these are generated
artifacts. Unknown files, symbolic links and folders are never silently replaced.
Within an explicit export folder, scale and clipbox SKP reference paths are stable across exports. Previously published SKP files and export data not regenerated by a partial export are retained, so other documents do not lose those references. Retained models are not refreshed unless their scenes are included in the new publication. Different LayOut documents can reference the same published SKP. Use Sync Active LayOut in each open destination to refresh its managed placements.
Direct insertion is implemented and built for the macOS LayOut 2027 bridge. Windows live insertion and save/reopen acceptance remain pending; do not treat the Windows path as production-ready yet.
Keep managed placement groups intact
For a plan, Send to LayOut creates a SketchUp viewport with managed Skalp geometry. An ordinary scene creates a source-model viewport. Generated geometry uses Skalp Geometry, or Skalp Geometry (Shared) for shared placements. Hiding that layer exposes the underlying viewport for selection. Add supported annotations inside the outer managed group or authored subgroup, not inside the generated geometry subgroup.
To adjust the model display in a viewport-based placement, select that Skalp drawing (or one of its elements) and use Get SKP Model in the Skalp LayOut toolbar. The button selects the underlying viewport directly; then use LayOut's SketchUp Model panel to change its rendering and other display settings. It is unavailable for drawings whose model viewport is missing, ambiguous selections and active drawing or conversion sessions. Locked content must be unlocked first. This command is implemented in the development source; live nested-viewport selection and Windows acceptance are still pending.
For new placements, choose Preferences > LayOut defaults > Render mode in Skalp Studio. Existing drawings retain their saved settings. For an existing viewport, choose Raster in LayOut when checking SketchUp fog/depth fade. Rendering cannot add SketchUp fog to separate native Drawing geometry.
A Send Drawing to LayOut placement instead contains an invisible native placement frame, generated Drawing geometry and its authored 2D content. It has no SketchUp viewport. Keep its outer group intact; exploding it removes the managed update and synchronization boundary.
Synchronizing with LayOut
Goal Update placed drawings and reconcile their authored annotations.
| Your task | Command |
|---|---|
| Refresh all existing Skalp placements from this model in the active saved LayOut document | Sync Active LayOut |
| Reconcile the active plan's authored 2D drawing in both applications | Sync Drawing with LayOut |
| Add a placement that is missing | Send to LayOut or Send Drawing to LayOut |
- Activate the source model and intended saved LayOut document.
- Run the command matching your task; review any conflict before choosing a result.
- Inspect the drawings and save both documents.
Check Repeated placements share one scene-owned drawing. Different drawing content requires a separate SketchUp scene/plan.
Find a task: Sync scope · Conflicts · Draw in LayOut · Page formats/PDF
Choose the synchronization scope
Sync Active LayOut on the main toolbar updates every existing Skalp placement from the current source model in the active saved LayOut document, across all pages and layers. It does not add missing placements; use Send to LayOut for that. Viewport and native-Drawing placements retain their respective presentation types when both are present for the same scene. Generated geometry and viewport sources flow from SketchUp to LayOut while placement position, rotation and supported LayOut display settings are retained. Full-document sync uses the same progress window. Its phases include finding linked views, synchronizing plan-owned 2D drawings, rebuilding derived resources and updating the existing LayOut placements. The final LayOut update cannot be cancelled once it begins.
Sync Drawing with LayOut on the Skalp Studio - Drawing - Basic toolbar is the focused two-way command for the active plan's authored 2D drawing. Edits made in any managed LayOut instance are reconciled with the one drawing owned by that SketchUp scene, then propagated to every matching placement.
One scene never owns placement-specific or document-specific drawing variants. Repeated placements and different LayOut documents therefore converge on the same authored geometry. If you place the same SketchUp scene in a second LayOut document, its Skalp 2D elements are available there too. Synchronization updates the active saved LayOut document only; activate and synchronize each other document to receive the changes. Synchronization is explicit; Skalp does not poll for authored drawing changes or synchronize them in the background.
Choose how to handle differences between sheets or documents:
- Different 2D content: Create a separate saved SketchUp scene/plan. Each scene owns its own 2D drawing, so its lines, notes and dimensions can differ independently.
- The same 2D content with different visibility: Assign the relevant 2D elements to separate LayOut layers and switch those layers on or off in LayOut as needed. Hiding a layer changes the presentation; the elements remain part of the shared scene drawing.
For example, a permit document and a construction document can use the same ground-floor scene and share its dimensions. Use separate LayOut layers to show additional notes only where needed. If their dimensions or other drawing content must be edited independently, use separate SketchUp scenes instead.
Save the SketchUp model and the affected LayOut documents after synchronization; Skalp does not save either application automatically.
Resolve conflicts during synchronization
Independent annotation changes can merge. Conflicting edits require a choice; nested groups are conflict units. Unsupported native content or additions inside managed generated geometry can block replacement to prevent losing that content.
Use Sync Drawing with LayOut when you are ready to exchange authored changes. Adding dimensions does not enable automatic synchronization. Native LayOut dimensions transferred into the managed drawing do not retain automatic connections to SketchUp geometry. Skalp-authored dimensions with valid model links update their measured points. Save both documents after synchronizing.
LayOut updates may require multiple native Undo steps. Do not assume one Undo reverts a whole update or that Undo spans both applications. After an uncertain timeout, inspect both applications and retry synchronization to reconcile state.
In 27.0.020, Sync Drawing with LayOut also offers local recovery when an interrupted sync blocks drawing properties. Choose Yes to keep the already merged recovery drawing in SketchUp and unlock editing. This preserves annotations captured by that sync and leaves LayOut unchanged. It also works after the last LayOut placement was deleted or while the bridge is unavailable. Choose No to retry the normal sync, or Cancel to leave recovery pending. Local recovery has its own SketchUp Undo step; undoing it restores the pending state. Reopen drawing properties after recovery. Review any remaining LayOut placements and synchronize them later; use Send to LayOut to recreate a removed placement. Save both documents after checking the result.
Recovery refuses newer local edits, changed section-reference settings or a changed destination to avoid replacing unreviewed drawing data. This recovery path has automated interaction coverage; affected-document macOS and Windows acceptance remain pending. It is not included in the immutable 27.0.019 download.
LayOut drawing palette
The compact Skalp Studio palette starts with LayOut and floats above its ordinary windows while the last active host is LayOut. Switching to SketchUp temporarily hides it, including its Publish panel. Select a Skalp drawing or one of its elements in LayOut, then click Draw. Selection and scale update automatically; elements from different drawings cannot be edited together.
When the palette does not recognize a drawing
A drawing needs its saved Skalp identity and intact managed group. Appearance alone does not identify it. For an unconverted pre-2027 viewport, use Convert document…. If a managed group was ungrouped, keep a backup and publish a fresh placement; check it before removing the damaged placement.
Read the toolbar and panels
The Skalp Studio inspector is one resizable floating window, styled to follow the LayOut 2027 tray. Its fixed toolbar starts with Draw, Draw Scale and Get SKP Model, followed by Save Dimension Style…, Export PDF… and Open in SketchUp (macOS). Hover over an icon to read its command. Ineligible daily commands stay visible but are disabled. Draw uses the same pencil artwork as SketchUp’s 2D Drawing Mode: red when available and neutral grey when unavailable. Save Dimension Style… uses the SketchUp dimension icon with a small floppy-disk save badge; it is neutral grey when unavailable. Draw Scale adds a ruler badge to distinguish it from ordinary paper-unit drawing.
On macOS, select a published Skalp drawing, or an element nested inside it, and choose the SketchUp logo Open in SketchUp to open its original editable SKP. The icon is grey and disabled without a valid selection, and uses its original blue color when a Skalp view is selected. Nested elements of that view are also supported. Selecting several elements is supported when they resolve to the same source model. Skalp checks the models already open in SketchUp; if the source is open, it only brings SketchUp to the front. Otherwise it opens the saved original. The embedded publication model is never used as a substitute. If the original has moved or is missing, restore it at the saved source location before retrying. Both applications need the matching Skalp integration. SketchUp 2027 starts if needed; the extension then handles the request. An unavailable extension or a failed open reports an error; a request that receives no reply expires after 90 seconds. This command is implemented for the macOS palette; live host acceptance is pending. It is not available in the Windows palette.
Conversion has no permanent toolbar icon. Selecting an eligible unconverted viewport shows Unconverted drawing selected and Convert document… in Drawing. Drawing opens for a new eligible selection; ordinary polling respects a manual collapse. Page and Publish keep their own states. The button disappears for an empty selection or an existing managed drawing. It opens the independent saved-file converter for the entire document. Close SketchUp and LayOut before starting there. The independent window retains progress after the palette closes.
The Windows companion follows the same inspector content layout: six circular buttons in the shared toolbar order, compact Page settings with Portrait and Landscape icon segments, and the same Drawing, Page and Publish header spacing. Available drawing actions retain the red pencil artwork; unavailable actions use gray artwork, as on macOS. Windows retains its system window frame and font rendering; the macOS screenshots remain the shared reference. Automated Windows control tests cover this layout; full live document workflows remain under acceptance.
The three panels are independently collapsible:
- Drawing shows the current selected drawing and scale, or explains what to select. The drawing and scale follow the actual LayOut selection; they are not drawing or scale selectors.
- Page edits the active LayOut page's paper format and orientation.
- Publish contains the export page list, filename patterns and PDF export controls. The toolbar's Export PDF… icon opens this panel; the button inside it starts export. No second Pages & PDF window is opened.
Panel states and the window frame are remembered on macOS. Selection changes and ordinary status refreshes do not close another panel or switch tasks. The panel area scrolls when necessary; the toolbar and status stay outside that scrolling area.
The window title is Skalp Studio - LayOut.
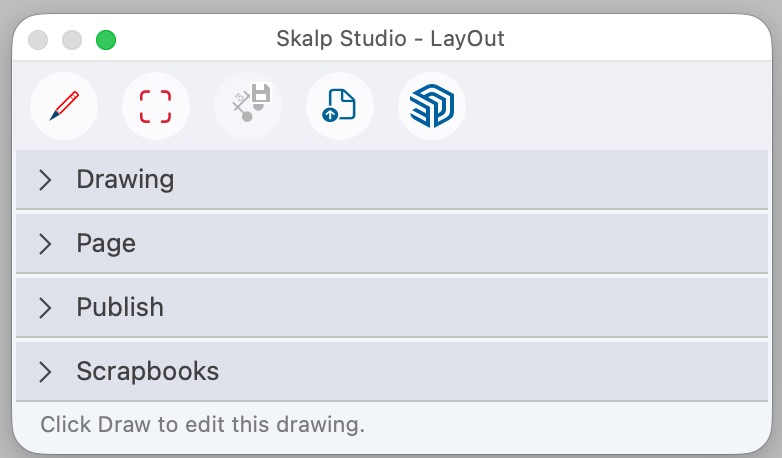
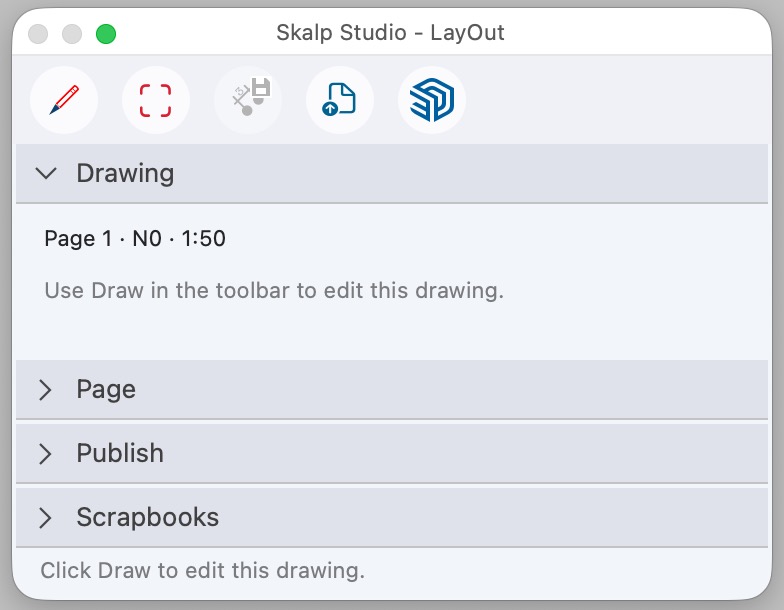
Select an eligible Skalp drawing, then click Draw in the toolbar. For a supported native dimension, use Save Dimension Style…. Drawing and dimension-style actions require a saved document. Publish also supports ordinary and never-saved LayOut documents when the host provides the current-page API.
While a drawing session is pending, Done and Cancel remain in a fixed row below the toolbar even when Drawing is collapsed. Finish or cancel before changing paper formats, converting another drawing, saving a dimension style or exporting PDFs. Publishing also blocks conflicting drawing and page-format actions while it is busy.
Selection status refreshes about once per second without scanning the whole document. Actions validate the current document and selection again when clicked. Publish loads its page list when opened or when the active document changes; use Refresh after adding, removing or renaming pages. Changing documents invalidates the old export list before it can be reused. A successful refresh clears previous refresh errors.
On macOS, the inspector recovers onto a connected display after monitor changes, reopening or returning to LayOut. Valid positions are retained. Automated native UI and display-transition tests cover these boundaries. Full restarted-host drawing, PDF-export and physical monitor-disconnection acceptance remain separate checks.
The macOS palette grows or shrinks vertically when you expand or collapse Drawing, Page, Publish or More options. Its width stays unchanged. You can also resize it manually; ordinary status refreshes retain that size while the visible content stays the same. If the expanded content exceeds the available screen height, scroll inside the palette to reach the remaining controls.
If the palette never appears, install the complete matching Skalp package and restart LayOut. Replacing only the palette app can fail package validation. Restart LayOut after installing or updating the bridge.
The palette has no close button and cannot be dismissed with Close Window or Quit while LayOut is running. Its Publish panel is part of the same window. The palette closes automatically when the LayOut application quits or stops unexpectedly. Closing only a document keeps the palette open while LayOut is running. A connection error alone does not close it. Automatic palette closure does not save or cancel a drawing session; recovery data already saved in the document remains available when you reopen it.
Failed Draw, Done, Cancel or Length requests show an error dialog with the returned reason. If the selection changed before Draw was processed, reselect the Skalp drawing and retry. Actual editing still requires an eligible drawing and the native editing step below.
Draw in paper units or model units
On macOS, select the Skalp drawing and choose Draw. This opens one scaled group for supported 2D geometry, dimensions, text and converted scrapbook copies. There is no separate Draw Scale button in the macOS palette. Object-specific paper, model and annotation size behavior is preserved within that group. Get SKP Model selects the underlying model viewport for the SketchUp Model inspector; it does not start a drawing session or open the source SKP.
The Windows palette currently retains separate Draw (paper units) and Draw Scale (model units) actions; the integrated scrapbook cards described above are not yet available there.
In SketchUp, the normal geometry tools default to model size, text uses paper size, and the dimension tool combines model measurement points with paper-sized text, arrows and offsets. The scrapbook browser follows the source size behavior automatically. For the distinction between native scrapbook placement in unscaled groups and Skalp conversion for scaled plans, see Choose native or Skalp scrapbook placement in LayOut.
A dimension’s measured points stay in model coordinates while its text, arrows, extension gaps and distance from the measured geometry remain readable on paper. For native LayOut dimensions, Draw Scale gives the host a model-unit context while you place them. Done assigns the drawing’s measurement scale to newly created native dimensions that still use automatic scale; an explicitly chosen measurement scale is retained. Dimensions are annotations regardless of the mode that created them. Review the result after changing a crop or moving/deleting measured geometry: imported native dimensions are disconnected from their original native connection points and are not automatically attached to SketchUp edges.
On macOS, automatic native group entry is attempted and checked. If entry is unavailable, double-click the selected ordinary group for Draw, or click Edit Drawing in LayOut’s Scaled Drawing panel for Draw Scale. Skalp does not automate that inspector button or require Accessibility permission. Two small fully transparent dots keep an empty editing group accessible and are removed from the result. LayOut’s own selection or editing outline is separate from those invisible guides.
Use Done to keep the result or Cancel to restore the original annotations and locks. In the macOS 27.0.020 package, leaving native Draw Mode, including clicking outside the drawing or choosing Exit Draw Mode, also completes the Skalp session as Done. The next palette refresh restores the background locks and hides Done/Cancel after successful completion. If completion fails, the session and both buttons remain available with the reason; review it and retry Done or use Cancel. Released builds through 27.0.019 and Windows still require explicit Done or Cancel. Do not ungroup the temporary context or change its scale. In Draw, supported scrapbook objects created as page roots on the session’s page are adopted into its ordinary group without moving their paper geometry. A scrapbook group with an explicit source scale is converted to the drawing scale while keeping paper font and text-box sizes; its model-size policy is saved per object. Nested model and paper objects keep separate policies. Existing background objects are locked and retain their ownership. If Done reports that protected background content has moved, Cancel can still discard the session's drawing edits and restore their original annotations and locks. It keeps the protected background objects at their current positions. If Cancel is interrupted, keep the recovery session and retry Cancel; it can resume after saving and reopening the document without removing the protected background. This does not restore objects already missing before the retry. If a protected object is missing or duplicated, restore that object first; Skalp keeps the recovery session until it can identify every protected object. In 27.0.020, Done also adopts native linear and angular dimensions created as page roots during Draw into the same drawing as its other annotations. Their paper position is retained; linear dimensions are disconnected from external native attachments before joining the group. On the next Draw, these dimensions are directly inside the editable drawing context. Existing sheet annotations from before the session are not adopted. This correction is not included in released 27.0.019; native document tests pass, while the affected-document mouse workflow and Windows acceptance remain pending.
Draw Scale still rejects ordinary objects left outside its scaled context; a label or linear dimension that snaps to the background can be disconnected and adopted separately. Objects on another page or shared layer block completion. Save the document yourself after reviewing it.
For background visibility in Draw Scale, set Fade rest of document to Less and leave Hide unchecked. Native document and scale-transition fixtures cover paper/model symbols, dimensions, nested groups, Done/Cancel and readback. The complete restarted-host mouse workflow, scrapbook dragging and Windows native UI acceptance remain separate.
Existing curved annotations
Existing active arrow styles below LayOut's current API minimum follow the native-retention rule. Those objects (or complete user groups containing them) remain in the locked background during Draw, Done and Cancel. Skalp does not enlarge their arrows. Supported annotations outside them remain editable; finish or cancel the session before editing retained objects with LayOut's tools.
In the current development implementation, ordinary scrapbook groups containing Bézier paths, circular arcs or circles are selectable during Draw. Move, rotate or scale the whole group with LayOut's tools. The item remains grouped; you do not need to edit its internal paths. Done commits the transformed native curves. Cancel restores their original geometry and placement, including after saving and reopening an unfinished session.
Scrapbook groups containing compound paths (multiple separate contours) or pattern-filled paths, rectangles and ellipses can also be moved, rotated and scaled as whole items. Keep the item grouped. Skalp retains the native contour structure and pattern pixels; these operations do not redraw or flatten the internal geometry. Done keeps the result. Cancel restores the previous placement and styles, including after saving and reopening a pending session. A saved LayOut document retains its pattern image even if the original external image is no longer available.
Explicitly locked curved, compound or pattern-filled objects and groups containing unsupported legacy arrow sizes remain protected. Clipped annotation groups retain their existing editing limit. Finish or cancel the session before editing protected content with LayOut's native tools. Supported siblings remain editable.
Native recovery data is embedded in the LayOut document. The existing 8 MB session limit includes this geometry and image data; Skalp refuses an oversized recovery capture while retaining the original drawing. Keep the matching or newer companion while a session is unfinished: older companions cannot recover the new native-item journal. Automated macOS native tests cover movement, rotation, scaling, copies, Done/Cancel and fresh-process reopen without temporary files or the original pattern image. Live mouse, complete Undo/Redo and Windows acceptance remain pending; this does not establish beta release availability.
Text, labels and native dimensions
Bounded and automatically growing text retain rich text, rotation and paper bounds. Native Label objects retain their text, straight/two-segment/Bézier leaders, style and connection side. Labels and complete groups containing them remain LayOut-only; they are preserved during synchronization. Reconstructed labels are disconnected from original native connection points. A label created outside the scaled context by snapping to the locked background is disconnected and adopted without moving it.
Native Linear Dimension and Angular Dimension objects can synchronize to SketchUp as grouped annotation previews, including when they come from a scrapbook. The saved definition retains measurement scale, units, precision, extension gaps, arrow/stroke styles, rich custom text and native text placement. Returning the unchanged annotation to LayOut recreates a native dimension rather than a collection of paths. Copies receive independent identities. A scene or placement scale change retains model measurement anchors and paper-sized presentation instead of treating every symbol as model geometry. Skalp-created SketchUp dimensions retain their existing editable measurement definition and grouped path/text publication.
Move, rotate or copy imported native dimensions as complete annotations in SketchUp. Edit their measured geometry, native style and rich text in LayOut, then synchronize again. This does not add a SketchUp angular-dimension drawing tool or automatic binding of imported native dimensions to SketchUp edges. Pattern-filled dimension styles and groups containing native labels remain outside this dimension-transfer path. The standalone SDK and actual bundled Ruby fixtures cover native linear/angular readback, custom mixed text, manually shifted linear text, copied identities and scale transitions. The current SDK changes the orientation of manually shifted angular text when rebuilt; Skalp stops that transfer before replacing the original. Keep angular text in its automatic placement for transfer, or leave that annotation in LayOut. Complete live mouse, Undo/Redo, save/reopen and Windows host acceptance remain pending.
There is no separate Skalp model-length field. Choose Draw or Draw Scale for the required unit context. After successful Done, use Sync Drawing with LayOut in SketchUp to exchange changes with the active linked source drawing.
Per-page paper formats and PDF export
Open a LayOut document and open Publish, or click the Export PDF… toolbar icon. This feature works with ordinary LayOut pages; a Skalp placement is not required. Finish or cancel any Skalp drawing session before changing formats or preparing an export.
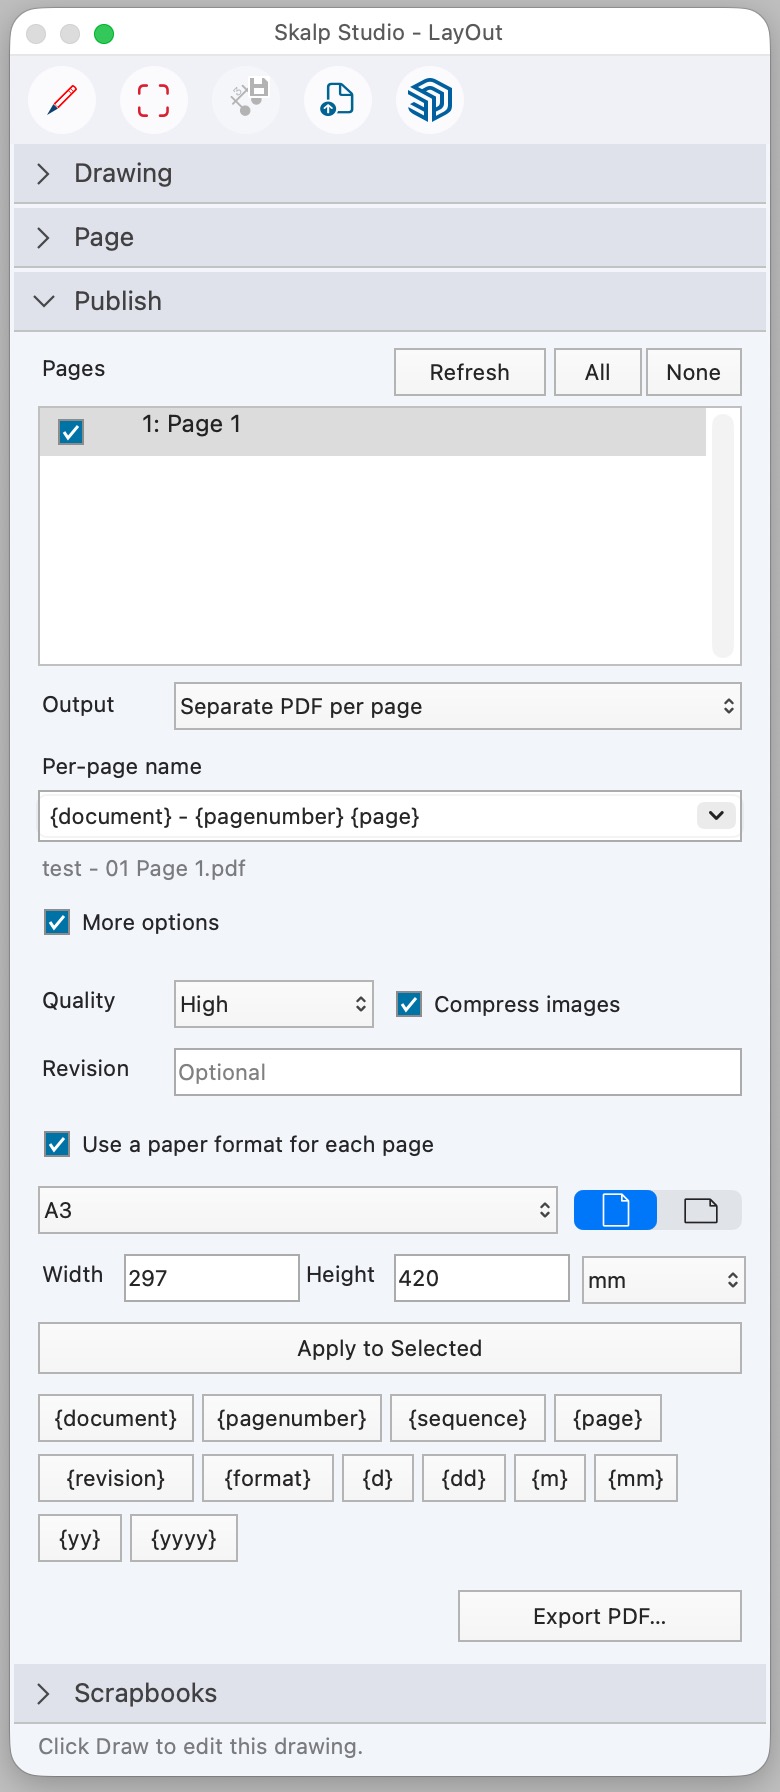
Read the PDF naming preview
The Publish panel keeps the page list and filename preview in the inspector. The naming field switches with Output; each mode retains its own pattern. A single filename below the naming field updates while typing, choosing a suggested pattern, inserting tokens or editing Revision. One PDF shows the combined filename; Separate PDF per page shows the filename for the selected row, if that page is included. Select another row to see its filename. Invalid settings show an error in that same line.
More options starts unchecked when the palette opens. Enable it to reach Quality, Compress images, Revision, batch paper formats and filename-token buttons. Each date-token tooltip describes only that token. There is no permanent save reminder in the footer. These compact controls reuse the existing export implementation; complete host export acceptance remains pending.
Set paper sizes for selected pages
In Publish > More options, enable Use a paper format for each page. Skalp captures the document's current paper size as the default for pages without an explicit size, including newly added pages. Select one or more table rows, choose an A0-A4 or US paper preset or enter Width and Height in the selected units, and click Apply to Selected. Use the Portrait and Landscape icon buttons to choose orientation; choosing the same orientation again leaves the dimensions unchanged. Paper presets retain the selected orientation. Applying formats also enables the feature.
Use the mm / inches selector next to the dimensions in Page or Publish > More options to choose the units for both panels. Skalp remembers this choice on this Mac; the initial choice is mm. All presets remain available in both modes; the unit choice does not filter A-series or US formats. Switching units converts the displayed values and any valid unapplied dimensions; it does not change the paper size or apply an edit. The page-size summary and paper-format table use the selected units too. Finish or correct invalid dimensions before switching units; unit changes are unavailable during a drawing session or a conflicting operation.
Enter decimal dimensions, for example 8.5 × 11 in inches for Letter.
A decimal point or comma is accepted. In inches mode, you can also enter mixed
fractions such as 8 1/2 or integer fractions such as 17/2; both mean 8.5 inches.
Use a space between the whole number and fraction. The display remains decimal
after conversion or reloading the page. A zero denominator, incomplete fractions,
feet-and-inches notation and unit suffixes such as 8.5" are not accepted;
choose the unit in the selector. Millimetre input remains decimal.
The Windows companion currently accepts decimal dimensions; enter 8.5 rather
than 8 1/2. Its Page and Publish unit selectors share and remember the same
choice on that computer.
The US presets are Letter (8.5 × 11 inches),
Legal (8.5 × 14 inches) and Tabloid (11 × 17 inches), with either orientation.
Custom dimensions must be between 25.4 and 5080 mm, or 1 and 200 inches, in each direction. Use Refresh after adding or removing pages, or to load another active document; it reloads stored settings and discards unapplied changes in this window.
Change the active page format
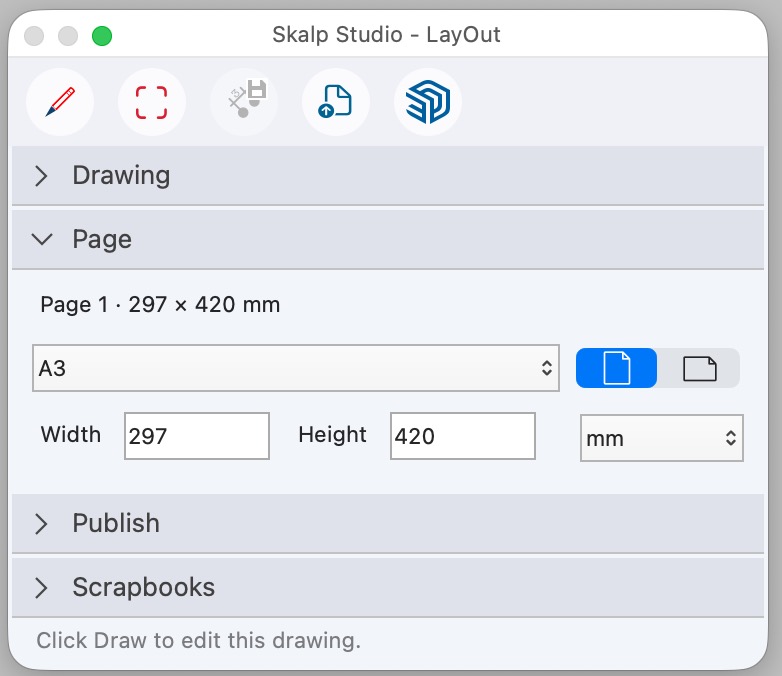
For the active-page workflow, expand the Page panel in Skalp Studio. The palette shows a preset, Portrait/Landscape icons, Width/Height and an mm / inches selector. Standard dimensions retain their preset name in either unit. Choosing a preset or changing orientation immediately updates the active page. Custom dimensions are applied when you press Enter or Tab, or leave the edited field; invalid or incomplete numbers are not applied. There is no Apply button. Changes enable per-page formats and use the same page attributes as Publish. Switching pages in LayOut reloads the fields in the selected units; stale requests are rejected, including when two pages have identical names. Pending drawing sessions disable Page editing without closing the panel.
Skalp applies each page's stored size while the palette is running. Object positions and drawing scales are unchanged. Size changes pause during a pending drawing session. Turning per-page formats off keeps the current document-wide size, which is then used for every exported page.
Choose export pages and filenames
Check the Export boxes for the desired pages. All and None change those boxes; selecting table rows is independently used for editing formats. Export always follows document order, including non-contiguous selections.
- One PDF produces one file with each selected page at its configured size. Set Combined name with document, revision and date tokens. The PDF filename underneath shows the actual filename.
- Separate PDF per page produces one file per selected page. Type a custom Per-page name, choose a suggested pattern or use the token buttons.
| Token | Value |
|---|---|
{document} |
LayOut filename without .layout |
{pagenumber} |
Original document page number, padded to at least two digits |
{sequence} |
Position within the selected export set in document order, padded to at least two digits |
{page} |
LayOut page name, preserved in the document |
{revision} |
Optional text from Revision |
{d} / {dd} |
Export day without / with a leading zero (1 / 01) |
{m} / {mm} |
Export month without / with a leading zero (2 / 02) |
{yy} / {yyyy} |
Export year in two / four digits (26 / 2026) |
{format} |
Paper width and height in millimetres (independent of the display-unit choice) |
For example, {document} - {pagenumber} {page} - {revision} can produce House - 02
Overview - B.pdf. Use {dd}-{mm}-{yyyy} for 01-02-2026, {d}-{m}-{yy} for 1-2-26,
or {yyyy}.{mm}.{dd} for 2026.02.01. Token order and separators are your choice; no
separate date-format menus are needed. These choices are stored in the filename pattern.
The .pdf extension is added automatically.
Characters unsuitable for filenames are replaced with underscores. Unknown tokens, empty
filenames and duplicate names are rejected before export; add {pagenumber} or
{sequence} to distinguish pages with the same name. When exporting document pages 2
and 5, {pagenumber} produces 02 and 05, whereas {sequence} produces 01 and
02. The filename line shows the combined name or the selected export page’s name.
Export quality and replacement
In Publish > More options, choose Quality (Low, Medium or High) for both image and viewport output. Compress images controls PDF JPEG compression; the initial compression quality is 0.9. Click Export PDF… and choose a folder. Existing matching PDFs require an explicit Replace choice. Every PDF is prepared and its page count and paper dimensions verified before previous files are replaced; installation failures attempt to restore the previous set. If restoration fails, the error identifies a staging folder containing recovery PDFs.
Unsaved changes, persistence and printing limits
Export includes current changes: The export includes drawing edits, new pages
and renamed pages even before you save the active document.
Documents that have never been saved can also be exported; {document} uses Untitled
until they have a filename. Skalp temporarily applies the required paper size and output
quality for each page, and restores the original paper dimensions and both
output-quality settings after rendering, including on export failure.
It does not activate pages, change selection, save the document, rescale contents or infer size from geometry or a frame layer. The exported pages are checked before the output files replace existing PDFs.
Page formats, their default size, export inclusion, mode, both naming patterns, revision and quality/compression settings are stored in page/document attributes. After changing formats or starting an export, save the LayOut document yourself to persist them. Saving it as a LayOut template carries those settings into new documents. Export destinations are chosen separately.
Standard LayOut printing still uses one document-wide paper size: print each format separately or print the exported PDF using suitable printer settings. There is no Skalp print command in this version. Native acceptance tests verify page navigation, unchanged object positions, save/reopen persistence, mixed-size and separate PDFs, inclusion of unsaved drawing content, never-saved documents, restoration of paper and quality settings, source-file preservation and failure before replacement. Full live LayOut UI and Undo/Redo acceptance remain to be verified.
DXF and DWG export
Goal Export one or more saved parallel drawings for CAD.
- Choose Export Section and select DXF or DWG plus an export location.
- Expand Scenes to export and check the required drawings.
- Choose Export… and confirm replacement when prompted.
- Review the resulting files in the receiving CAD application.
Check At least one eligible scene is checked. Perspective, clipbox and unsupported nested section scenes cannot be exported.
Find a task: Choose scenes/files · Export settings · Transparency · Formats/converter
Choose CAD scenes and destinations
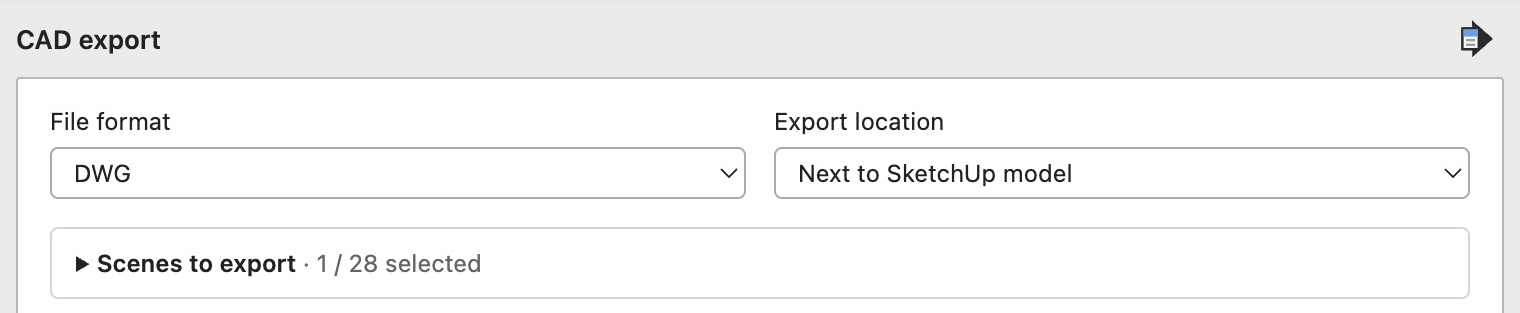
Choose Export Section. The compact Skalp Studio - CAD Export dialog opens first. Choose only the file format and export location, then review or change the selected drawings. The collapsed Scenes to export group shows the selected count; expanding it provides the Export / Scene / Status list, search and All / Plans / None controls. The list keeps the folder hierarchy and order chosen in the Manager, including nested folders; search also matches those folder names.
The compact export task shows only these controls, without separate explanatory paragraphs below the scene list or at the bottom of the window. Technical defaults, profiles, project/drawing scope and an Apply step are not part of the export task. Use the standard Skalp flyout-menu icon in the window header to open Preferences directly on its CAD export page. The export dialog remains available behind Preferences and refreshes after the defaults are saved.
File format, location and naming
New settings default to DWG and Next to SketchUp model. The latter writes beside
a saved .skp file without a save panel. For an unsaved model it is unavailable and the
dialog uses Choose file…, which opens a save panel. Later choices are remembered for the current user.
A single selected scene uses <model name>-<scene name>.dwg by default, or the chosen
.dxf format; a multi-scene export uses the model name plus each scene's name,
without internal scene identifiers. Only conflicting filenames receive a sequence
suffix (-2, -3, and so on), in export order. Characters that cannot be used in
filenames are replaced with underscores and scene names are limited to 100 characters;
conflicts after this conversion, letter-case differences or equivalent Unicode forms
also receive a suffix. An existing scene name such as Plan-2 keeps its name when
another scene needs numbering. Save an unsaved model before using this location. Existing
files still require replacement confirmation. Export… remembers the format and
location choice together with the user-wide CAD defaults and then selects or derives the
destination. Export lists the available Skalp publication scenes and reads their saved
visibility without activating them.
Select eligible scenes
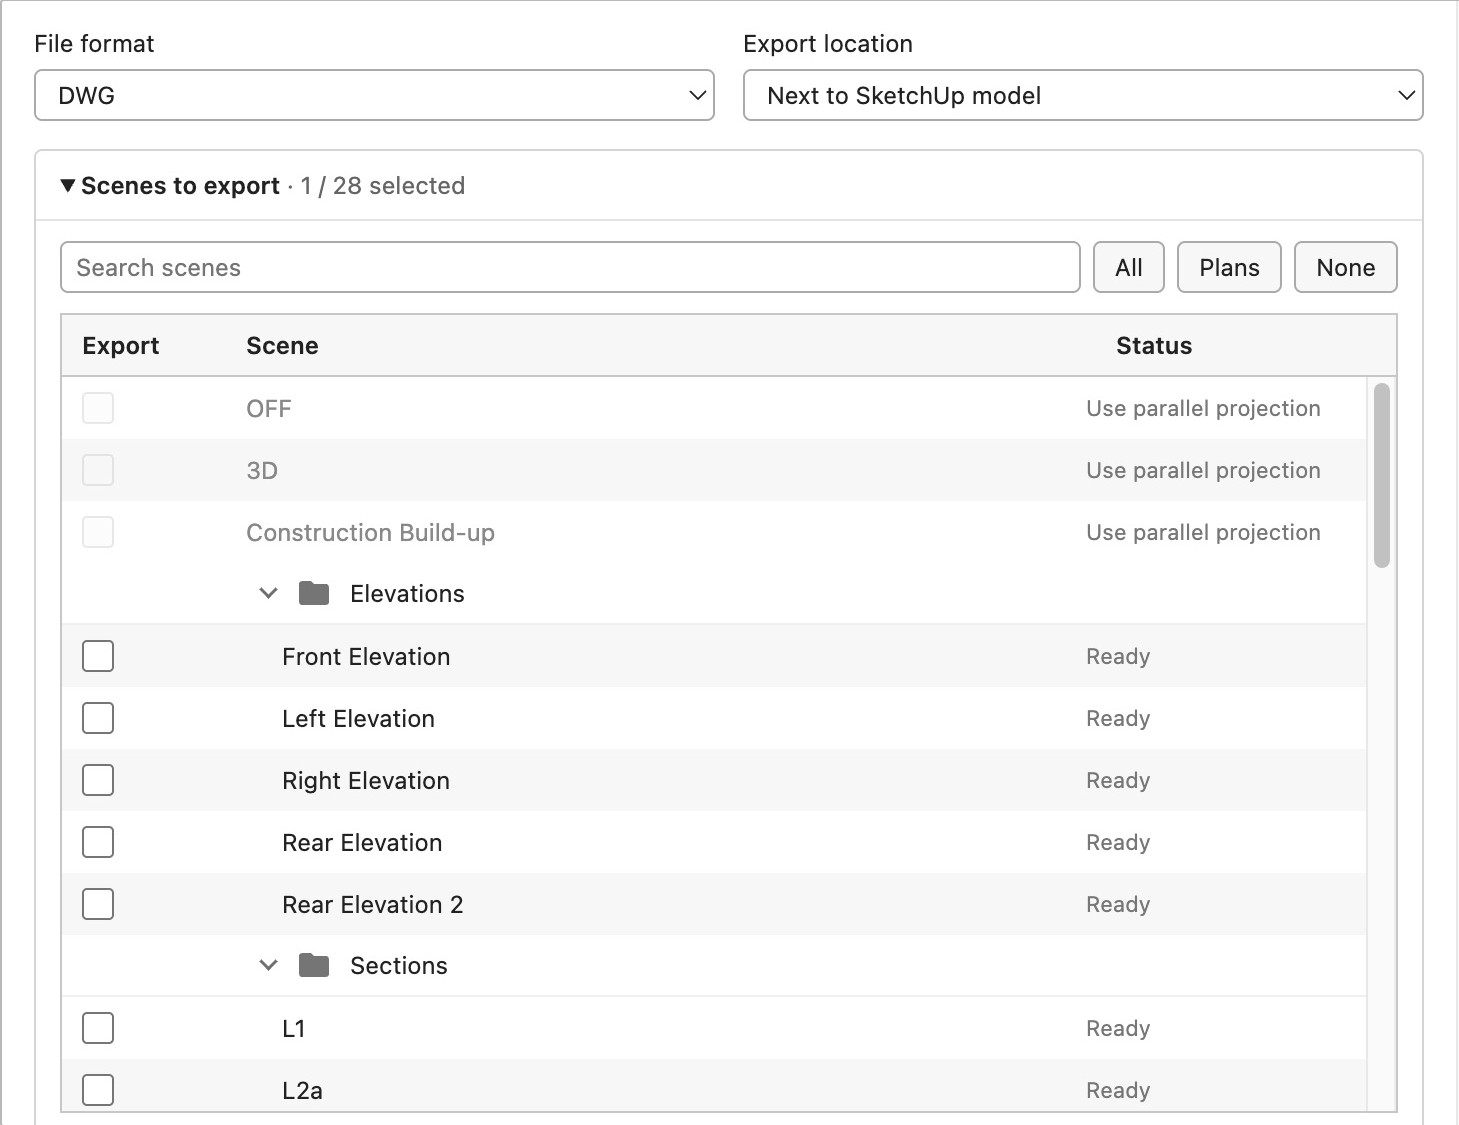
The initial CAD selection is the active SketchUp scene, or the first available CAD drawing when the active scene is not eligible. Scene export order follows the Manager tree order. To change the selection, expand Scenes to export. Plans selects every eligible scene with a saved plan clipping mask, All selects every available scene and None clears the selection. Search filters the list without changing checked scenes. Clipbox, perspective and scenes with unsupported group/component-scoped section planes are disabled with an explanation. A model-level section plane temporarily held inside Skalp's active clipbox model wrapper remains eligible for an ordinary saved scene. Selection applies only to this export. At least one scene must be checked.
CAD progress, cancellation and replacement
After choosing the destination, a modal CAD Export window shows overall progress, the current drawing and processing phase, completed drawing count and elapsed time. Geometry capture, section/frontview/rearview, transparency/shadows, DXF writing, DWG conversion/readback and final file installation are identified. Percentages represent completed stages, not measured remaining time. The activity indicator stays animated during long stages. Cancel export stops at the next safe boundary; native geometry calls cannot be interrupted halfway through. During DWG conversion, cancellation stops the owned converter process.
Previous files remain untouched until the complete batch is ready. Cancellation is disabled for the final batch installation, which runs without another dialog paint acknowledgement and retains rollback on file errors. The window reports completion, cancellation or the error and remains open until Close. An error already shown in this window is not repeated in a second message box. If the page has not started yet, the native window close button cancels without starting export.
No other model edits can be made through SketchUp while it is open.
If the chosen filename has no CAD suffix, export appends the selected .dxf or .dwg
extension automatically. An explicit DXF/DWG suffix determines the file format,
regardless of the dialog default.
One scene uses the chosen filename; multiple scenes append their names and persistent
IDs. The temporary staging folder includes manifest.json with the scene and
destination name for each numbered CAD file, allowing recovery if SketchUp stops before
final installation. All files are prepared before replacing previous exports. A
generation/conversion error preserves previous files; existing files require replacement
confirmation. Cancelling preserves them. Linked destinations are rejected. Saved
visibility is read without activating scenes.
Export settings
Open Preferences > CAD export to change these technical values in the embedded settings editor. They are saved once for the current user and apply to every model. Leave them unchanged to use the supported Skalp defaults. CAD Export has no separate Glass recognition, material override, grey or transparent-tag settings. Surface Material fill opacity is the single source of transparent surface behavior.
CAD layer naming
related settings are grouped into separate Frontview, Rearview and Section cards and
output suffixes. Choose By SketchUp tag or Single layer independently in each
view card. By SketchUp tag uses the source SketchUp tag name with that view's suffix
and the applicable fill/hatch suffix. It produces, for example, Walls_FRONT,
Walls_REAR, Walls_SECTION and Windows_FRONT_FILL.
Single layer shows the complete layer name instead and sends all output for the view to it; fill or hatch output uses that same layer, and a single Frontview layer also includes its vector shadows. The output-suffix group disappears when all three views use a single layer; the shared shadow suffix is shown only when Frontview is split by tag. The three view names must remain distinct.
In By SketchUp tag mode, all frontview vector shadows share one layer,
FRONT_SHADOW by default; its name follows the frontview name and shared shadow suffix.
There is no separate general layer-name pattern or prefix. CAD export uses the source
SketchUp tag names and authored 2D drawing layer names directly; rename those tags or
drawing layers at their source when different CAD layer names are required. Layer-name
collisions block Apply/Export. CAD-invalid characters receive a stable suffix.
Native SketchUp edges whose Hidden property is currently on are omitted from both frontview and rearview linework, including when a saved scene still contains an older hidden-geometry state. Hidden faces can still close solids for visibility and section calculations; they do not create facade strokes.
Surface presentation in CAD
Ordinary unpainted frontview geometry exports as visible lines without face fills. When Surface Materials is enabled for the saved scene, DXF and DWG frontview output includes the authored fill color and cached hatch lines from the visible side of painted faces. Both are clipped by the facade visibility solver without rescanning the live model.
Fills use the Frontview fill layer (_FRONT_FILL in the default by-tag setup), while
strokes use the Frontview hatch layer (_FRONT_HATCH) and retain the Surface Material's
authored line color and paper line weight as native CAD entity properties. A Surface
Material fill below 100% opacity is also transparent to the hidden-line solver: geometry
behind that painted face remains calculated and is drawn through its translucent fill.
At 100% the face remains a normal occluder.
This decision follows the resolved face-side, object, SketchUp material or tag Surface assignment and does not inspect the SketchUp material name or native material opacity. Rearview output never includes Surface fills or Hatch lines.
After replacing a Surface Material throughout the model, export the drawing again so the CAD file uses the replacement pattern and colors. Existing DWG and DXF files are not updated automatically.
CAD depth clipping and pen bands
Choose drawing depth settings, no clipping, or an explicit unit-aware maximum depth. Section drawings measure depth from their section plane in each view direction; camera-only drawings place the near plane before the visible model. Drawing settings here means the scene's saved depth settings. Edges, Surface fills and shadow polygons are clipped geometrically. The controls change with the selected pen mode. Off shows no pen details.
Depth bands shows the chosen number of bands; every band has a pen-width picker from Skalp's standard paper-pen series and a 0–100 grey value. Nearer bands are listed first. Lines crossing a band boundary are subdivided and receive that band's absolute printed width and grey RGB value. The four-band default uses 0.50, 0.35, 0.25 and 0.18 mm pens. Section-cut pens remain independent.
Frontview lines retain supported SketchUp tag line styles (including dash and dot patterns) as CAD linetypes. A tag with no supported style exports solid.
Vector shadows and transparency display
Enable Vector shadows in the drawing's Appearance settings for saved scenes
that store SketchUp shadow properties with Display Shadows enabled. The vector
export uses each scene's saved SketchUp sun position and SunDirection. Shadow grey
value and Shadow transparency (%) are per-drawing 0–100 sliders in Appearance;
the same settings apply to live white-plan display, LayOut and CAD. Scenes
without saved enabled shadows export without vector shadows, even in a mixed batch. A cast
shadow may consist of several adjacent selectable filled regions; they share the same
shadow layer, grey value and transparency. Complex shadow outlines and openings are
preserved. Export again to regenerate an existing CAD file after updating Skalp.
Opaque model faces cast onto visible opaque receiver faces; virtual faces used to close a section for visibility do not cast shadows. Faces lying on the same facade plane do not cast shadows onto one another; this prevents false shadow wedges from numerical differences in their coordinates. Opaque Surface Material faces receive and cast shadows normally.
A face whose Surface Material fill is translucent transmits sunlight and also
receives a vector presentation shadow. Opaque geometry behind it can still receive
one; the translucent pane's fill and shadow are layered above that geometry. Retained
interior lines are placed above the translucent fill with opacity derived from the
nearest transparent Surface Material. If the DXF/DWG contains a translucent Surface fill
but the CAD viewer shows it as opaque, enable object-transparency display in that
viewer. In AutoCAD, enter TRANSPARENCYDISPLAY, press Enter, then enter 1 and press
Enter again. Do not enter TRANSPARENCYDISPLAY=1 as one command.
Plotting has a separate transparency setting. Vector shadows in Appearance enables the shared calculation for both orthographic LayOut publication and CAD; there is no separate shadow appearance or LayOut-shadow switch in CAD export defaults.
CAD inclusion and insertion units
Frontview and Section are always exported. Rearview is calculated only when enabled in
the scene's drawing settings and when the scene has an active section plane. Select the
scene in the Manager and enable Rearview there before exporting it if rear lines are
required. Choose whether to include 2D drawing objects globally. Every exported
drawing starts at its local origin (0,0) and retains the saved view orientation.
The DXF/DWG unit header uses the SketchUp model's length unit by default (inches, feet, millimetres, centimetres, metres or yards). Expand Units in CAD export defaults to override the model unit for every export. Set DXF/DWG format in the export dialog. There is no coordinate-placement preference or additional rotation/translation step; paper text/pattern sizes and measurement units remain consistent.
CAD export defaults are stored in SketchUp's user preferences, not in the model. There is one active standard instead of reusable profiles or project/drawing scope. Saving therefore creates no model operation and requires no Undo step.
Include annotations and clipping
The scene's authored paths, shapes, fills, text, leaders/labels, dimensions, section indications, nested groups and supported scrapbook objects accompany model geometry. Their drawing layers/styles and stacking are retained separately from model object layers. Model depth clipping does not remove authored objects. A saved model crop clips model lines, Surface fills, shadows and section geometry; authored content outside the model crop remains included. Resolve pending sync before exporting. A linked scene exports the selected LayOut document's edits; an unlinked scene exports the shared source annotations.
Transparent Surface Materials in CAD drawings
Set Fill opacity in the Surface Material Editor. A value below 100% stores an RGBA fill and makes every face side using that resolved Surface Material transparent to CAD and LayOut hidden-line and shadow calculations. The fill is written on the normal Frontview fill layer rather than a special glass layer. Lines behind it remain CAD entities on their original tag/view layers; other opaque occluders still hide geometry. Those retained lines are drawn above the Surface fill with opacity based on the nearest transparent face.
Re-export after changing Surface Material opacity so the fill, hidden-line result and line presentation remain in sync. Editing only HATCH transparency in CAD does not recalculate occlusion. A transparent Surface fill can lighten against the CAD background while a viewer still hides earlier line entities underneath it. If this occurs in Open CAD Studio, use a fresh export from the current Skalp build: its retained interior lines are placed after the translucent fill with opacity based on the nearest face.
This viewer compatibility presentation has not yet been visually accepted in AutoCAD; changing HATCH transparency alone in CAD still requires separate line-opacity edits. Foreground contours are drawn above transparent Surface fills. Section-cut fills, hatches and outlines are drawn above all model views; authored annotations remain above the cut. Opaque cuts also participate in solver visibility as described below. Explicit CAD sort tables retain the ordering through conversion. Multiple panes can overlap. Enable AutoCAD's Plot Transparency when printing transparent fills.
CAD representation and conversion
Orientation, units and editable CAD dimensions
CAD output follows the saved scene camera's horizontal and vertical orientation, including section scenes whose editing frame has the opposite horizontal axis. Authored positions and dimension anchors are rebased into the same output frame; their stored editing coordinates remain unchanged. Text stays readable rather than exporting mirrored glyphs. That common frame is written at local origin without an additional project rotation or translation.
The DXF uses AutoCAD 2010 format with the selected insertion units. Authored colors, alpha, paper line patterns/scales, solid fills, rotated/multiline MTEXT and nested blocks are retained. Native linear DIMENSION entities carry measurement anchors, rotation and DIMSTYLE precision/measurement-unit conversion. Their anonymous blocks retain the existing graphics, including uncommon markers. CAD dimensions are editable; they are not associative to the original SketchUp model after export.
CAD colors and viewer regeneration
Opaque white and near-white solid fills in authored drawings and sections export as fixed AutoCAD color index 255. This prevents CAD viewers from treating them as background-adaptive color index 7 and turning a white terrain cut black on a light background. Ordinary frontview faces have no fills. Other solid-fill colors, including black, retain their RGB values. Pure black strokes export as AutoCAD color index 7 (white/black). CAD applications can display them as black on a light background and white on a dark one.
Nonblack strokes retain RGB color. This distinction applies to generated and authored drawing content in the DXF source used for DWG conversion. Plot styles may override output colors; check the recipient's plot preview when a white masking fill must remain white on paper. Visual acceptance in Autodesk AutoCAD is still pending.
If Open CAD Studio still shows objects after their layers are turned off, run REGEN to
refresh its viewport. The exported objects retain their named layers; the viewer can
continue showing its previous frame until regeneration.
Curves, opaque cut regions and hatches
New authored circle/arc tools retain curve intent and export native CIRCLE/ARC when the canonical geometry remains circular. Model ArcCurves are restored from source curve provenance when surviving solver chords are complete; oblique or nonuniform projections use ELLIPSE where valid. Partly clipped/hidden curves and curves crossing a saved crop retain solver paths; edited noncircular authored paths also fall back to paths. Legacy authored paths without curve intent remain paths rather than guessing whether a regular polygon was meant as a circle.
The existing section fill and hatch regions are exported once. Before calculating CAD view visibility, those closed opaque section regions also become virtual occlusion triangles, preserving their openings. A section object whose captured face occurrences all use translucent Surface Materials receives no opaque closure cap, so it cannot block hidden lines behind the cut. Painting only one face of an otherwise opaque object does not remove that object's cap. Forward geometry is clipped to the retained side of the active planes.
These closure triangles enter both projected line splitting and ray visibility, so covered lines are hidden by the solver rather than merely covered by a CAD fill. Virtual triangles are not exported as extra objects and do not modify the model. CAD draw order additionally keeps the displayed cut above model views.
Section fills retain material colors/holes on object-tag section layers. Native PAT HATCH entities contain full inline pattern families, origins, offsets and scaled dashes. Skalp marks these inline definitions as predefined HATCH data for compatibility with CAD viewers such as Open CAD Studio. Separate background fills and outline/hatch strokes remain alongside the native hatches. Procedural and boundary-following hatches retain generated geometry. Export stops if that geometry reaches engine limits instead of publishing a partial hatch.
Projected paths that collapse entirely to one location are omitted from CAD output. This prevents some CAD viewers from drawing a tiny square marker for a zero-length line fragment.
CAD exports save a centered model-space opening view with a small margin around all exported geometry and annotations, including grouped objects. Re-export to apply this to an existing drawing. This changes the saved view only: drawing coordinates, units and scale remain unchanged. Automated DXF/DWG round-trip checks cover the saved view; visual acceptance in AutoCAD remains pending.
Supported CAD views and converter
Section drawings require model-level section planes and parallel projection. When Skalp's clipbox is active, CAD recognizes the wrapped source model as its logical root for ordinary saved scenes. This does not make clipbox drawings eligible for CAD export. Camera-only scenes export orthographically. Perspective, nested scoped cuts and clipboxes are rejected. This workflow does not establish parity with every LayOut setting/font. Vector LayOut shadows are supplemental paths over the viewport; straight-edge decomposition preserves receiver holes without white patches. They are generated during explicit publication, not continuously in Drawing Mode.
DWG uses Skalp's bundled acadrust converter. No converter download, ODA setup, backend-selection option or fallback is supplied. The converter strictly reads DXF, writes/reopens DWG, checks completeness, entity-type counts and insertion units, and restores sort-table dictionary ownership. Conversion preserves the source version (currently DWG 2010). Missing converter/new native symbols require reinstalling the matching updated package and restarting the host.
Verification limits: Inspect CAD fonts, transparency, shadows and XREF attach/reload before release. AutoCAD visual acceptance, Windows native/live checks and complete LayOut-port readiness remain pending.
Existing Skalp models
Goal Continue working in Skalp 2027 with a model set up in an older Skalp version, while retaining the original project and checking the converted drawings.
You do not need to rebuild the project from scratch. Skalp converts recognizable legacy materials, tag and object assignments, section settings and scene links to the 2027 data model. The following workflow describes the current implementation; it does not guarantee an identical result for every older model. Check the result before replacing your working project.
- Save the model first if its backup must include your latest edits.
- Accept the conversion prompt, or choose Convert Legacy Skalp Model.
- Check scene names, scales, cut directions, Rearview, nested sections and materials.
- Save the converted model after review. Keep the backup.
Check The backup contains the last saved SKP, not unsaved edits. If conversion reports invalid saved Manager data, retain both files for investigation.
Find a task: Preparation · Model conversion · Continue working · Cleanup · Old LayOut plans
Prepare an older project
- Keep an untouched copy of the original
.skpfile and any associated.layoutdocument. If you still need to work in the older Skalp version, use those original files; this guide does not establish backward compatibility for the converted project. - Open a working copy in SketchUp 2027 with the matching Skalp 2027 package installed. See installation and supported platforms.
- If conversion is offered immediately, choose No when you first need to save edits or prepare your working copy. Save the model, then start conversion manually as described below. Declining the prompt does not convert the model.
- Make sure the model has been saved to a location where Skalp can create a backup beside it. A new, unsaved model must be saved before conversion.
Convert and review a legacy model
Opening a legacy model prompts for conversion after SketchUp has finished opening it, including when the model is opened as part of SketchUp startup. If SketchUp temporarily reports that the model is not ready or startup publication work still holds it, Skalp leaves the check pending and retries at three bounded delays after startup. A repeated activation does not repeat a declined prompt during the same open-model session. You can also use Convert Legacy Skalp Model from the Extensions menu.
The conversion confirmation uses SketchUp's own message box. Conversion creates
a .skp backup before modifying legacy data; review the conversion outcome and save the
converted file. The backup copies the last saved model file; unsaved edits remain in the
live model and are converted, but are not part of that backup. Save before conversion
when the backup must include them. The final result appears in a message after the model
operation has completed.
The backup is saved beside the source model with a name such as
Project_pre-Skalp-2027_20261005-143000.skp. Check the backup path and the converted
counts in the completion message. Read any warnings before continuing; a completed
conversion is not a substitute for checking the drawings.
Continue working with the converted model
- Open the Manager and activate each scene you use for documentation. Check its section position and direction, drawing scale, Rearview and nested sections against the original project or an existing published sheet.
- Check the converted Section Materials and their assignments. Review hatches, fills and linework at the scales you actually publish. Use the material workflow to adjust the converted definitions when needed.
- Correct and save the affected scene settings, then save the converted
.skpfile. Keep the original and the pre-conversion backup until you have reviewed the project outputs. - Continue editing through the current Manager and material tools. For a new sheet, follow publishing to LayOut; for an existing legacy LayOut plan, follow its conversion workflow before using synchronization.
Check Your documentation scenes show the intended cut, materials and scale, and the saved converted model reopens with those settings. Old generated section groups are removed during conversion; their removal is expected and does not mean that the original model geometry has been deleted.
What conversion removes and preserves
Conversion removes the legacy material-storage components (skalp_materials and its
numbered duplicates, plus definitions marked as Skalp material-import containers),
including their instances and definitions. These hidden helpers previously kept stored
materials from being purged. The conversion report shows how many storage instances and
definitions were removed. Conversion also merges duplicate legacy Skalp materials
created by those storage imports. Copies with the same old Skalp ID use the shortest
material name; numbered copies with separate IDs are merged only when their saved
pattern settings match, ignoring the stored name and thumbnail. Native front/back
materials, tag/object assignments and recognized scene style-rule references are
redirected to the retained material before the copies are removed. Different pattern
settings and unrelated materials are preserved. This repair has automated conversion
coverage; live SketchUp Undo/save/reopen acceptance remains pending. Conversion preserves the remaining materials and does not run a purge. Afterwards, use SketchUp's standard Purge Unused when you want to remove
unused SketchUp appearance materials. Section Material definitions are retained in
Skalp's own model data after migration, including materials assigned only through
tags or objects. If a definition is missing from the original project, its assignment name alone
cannot reconstruct it. Import it from a saved library or recover it from a model
backup. Keep the pre-conversion backup. Purge, native-hatch recovery, Undo/Redo and saved-model persistence have
passed a disposable-model check in macOS SketchUp 2027 / Ruby 3.4.9; Windows
acceptance remains pending.
Conversion also removes generated section geometry carried by recognizable legacy output tags, including Skalp Live Section, Skalp Pattern Layer, legacy line-style and rearview tags, Skalp Scene Sections, and the legacy normal/reverse section tags. The tag and its generated entities are removed together so old cuts cannot be moved to Untagged and become visible after conversion.
Legacy Skalp Scene View groups with a stored Skalp ID and the identified Skalp Active View live-section group are also removed, including when they are on Untagged. A tag recognized only by an old Skalp ID is removed without deleting its geometry, because that ID alone does not prove that user model content is disposable.
Check converted scenes and settings
Scenes retain distinct Manager items even when they share a main plane or have no main plane. Scene-specific settings take precedence over inherited legacy plane defaults. Unrepresented main planes become standalone items. Legacy material/settings behavior is mapped to the new model; it is not a promise that every old selector workflow remains available.
After conversion, check scene names, scale, rearview, cut direction, nested sections and materials. Save the corrected scene settings; select the intended old viewport in LayOut and use Convert document… when you are ready to prepare a new document copy. If conversion reports invalid saved Manager data, retain the model and backup for investigation rather than recreating settings blindly.
Convert an existing LayOut plan
The current macOS and Windows sources provide Convert document… in the Drawing panel of the Skalp Studio LayOut palette. Opening a saved document containing unconverted model viewports opens the independent Convert for Skalp Studio 2027 window directly, without an extra confirmation alert or viewport selection. Detection includes other pages and nested groups, and ignores viewports already inside Skalp drawing groups. The window opens only while LayOut is in the foreground and no drawing session is pending. Ordinary status polls and selection changes do not reopen it. Close the conversion window to continue working; the command remains available in Drawing without a selection. Unsaved or fully converted documents do not open it.
The window uses the document already open in LayOut. You do not select another file or a result folder. Conversion processes supported viewports throughout the saved document, including several source SKPs and repeated or nested placements. Install the complete matching companion. The Windows implementation follows the same document-wide workflow and independent progress window. Its native Windows build and installed-host acceptance remain pending; do not treat source implementation or macOS SDK tests as Windows release approval.
- Update any stale model references in LayOut and save the document and its source SKPs. Source models may contain legacy or already converted Skalp data; they do not need a separate live conversion first.
- On macOS, clicking Convert document… starts conversion in the independent window immediately. If the window opened automatically when you opened the document, click Convert with Skalp there once. A repeated command brings the same window forward instead of opening another converter. Skalp requests normal application shutdown for all running SketchUp and LayOut versions, including older versions such as SketchUp 2025. Answer any native save questions. Skalp never forces an application to quit or discards unsaved work.
- Leave the independent window open. It waits until both applications are closed and continues automatically. You do not need to click again. Cancel stops waiting; applications already closed remain closed. If you cancel a native quit request, close the remaining application or cancel the conversion.
- Skalp automatically creates a uniquely named Skalp-backup folder beside the original LayOut document. It copies and verifies the original LayOut and linked SKP files before conversion. The report records each original path and its backup. Existing generated files that need replacement are backed up too.
- On macOS, follow Check files, Convert models, Update LayOut and Verify & save in the compact progress window. The document filename and folder are separate from the active operation and elapsed time. Model preparation identifies the current source and scene. The bar and completed-work counter advance after prepared plans, replaced viewports or updated annotation links; they do not animate back and forth or estimate remaining time. Each operation has its own count, so a new operation starts a new bar. Saving or reading a large file can leave the count unchanged while elapsed time continues. Detached copies are converted and reopened for checking before any originals are replaced.
- On success, the original LayOut and SKP paths contain the converted files.
Show result locates the original LayOut document; open it and review the
drawing, especially connected dimensions and labels. Show report opens a
readable overview inside the same Skalp window: file status, next steps, document
and model references, backup location, recovered models and skipped viewports.
Technical details reveals the diagnostics for support; Hide details
hides them again. Back returns to the conversion view. The technical JSON
remains a support artifact; Use the in-window report to review the result. Keep the backup until you have reviewed the result.
Replaced viewports embed their scale models and store their Skalp synchronization
data in the LayOut document. Scale files used during preparation live in the local
cache; conversion creates no new project-side scale SKPs or
_Skalpfolders. Original editable SKPs and the conversion backup remain separate. Skalp checks the embedded model versions after reopening and removes unused old SKP references. Rotated orthographic viewports retain their paper orientation and position; saved-file verification compares projected model points with the original placement as well as checking the scene and scale. Explicitly skipped viewports retain their original references and are listed in the report. On opening, LayOut renders the converted viewports itself. Allow that native rendering to finish before assessing faces and hatches; conversion does not treat the standalone SDK's cached images as final display output.
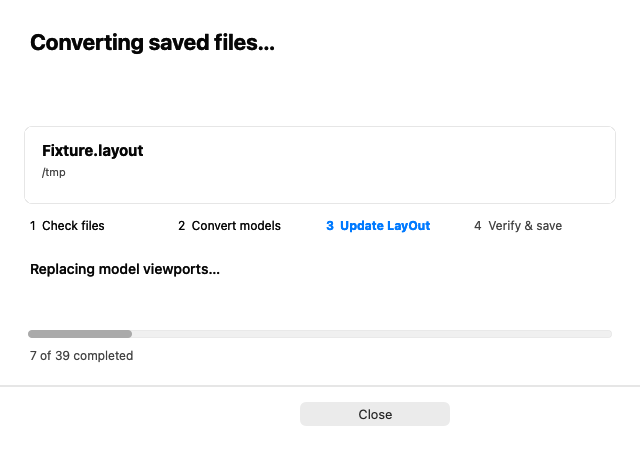
Conversion updates the original SKPs with converted material definitions, native hatches and scene settings, and adds supplemental Skalp lineweights and rearview lines to the original LayOut document. Verified backups retain the pre-conversion files. Source paths follow the saved external references, including references into subfolders. If the referenced SKP exists, Skalp always uses its current saved contents and updates the converted LayOut viewports from that model, even when LayOut still embeds an older revision. A renamed scene is matched by its persistent identity. A selected scene that has been deleted stops conversion rather than selecting a different scene. Skalp does not substitute a nearby file merely because its name matches. If the saved absolute path is missing after a move, a same-name SKP beside LayOut is used only when its saved model revision or every selected scene's persistent identity matches the reference. Its current contents then take precedence over the embedded copy; it is backed up before conversion. A file that fails this check is not overwritten by recovery. The saved LayOut reference also takes precedence over an older source path recorded inside Skalp scene metadata, including after moving or copying a project.
If an external SKP is missing, Skalp takes the exact model embedded in that viewport from the LayOut document. It copies the embedded SKP bytes without re-saving the source, preserving its saved revision and scene identities. The converted SKP is stored beside the LayOut document with its original filename, and the converted viewports are linked to that file. Multiple placements of the same source reuse one recovered model. The original LayOut backup retains its embedded files; the extracted source is backed up separately before conversion. There is no file chooser or routine requirement to repair a missing external reference manually. An unreadable embedded model or inconsistent source identities stop the job rather than silently choosing another model or scene.
The report distinguishes unchanged files, originals restored from backups, completed replacement and recovery that needs attention. If the final state cannot be confirmed, it says so. In the latter cases, keep the backups and share the technical details with Skalp Support before retrying.
On Windows, a source model that already contains authored Skalp 2D content currently stops conversion with an explicit diagnostic. Keep the backup and original files; this safeguard prevents those elements from being silently omitted. Native LayOut annotations are retained by the conversion described below.
Matching and retained annotations
Only model viewports are replaced. Existing LayOut text, dimensions, labels, ordinary groups and scaled drawing groups remain in their native hierarchy, position and size, except that connected dimension endpoints and label leaders follow updated model geometry when the external SKP is newer than LayOut's copy. A group at another scale is not adopted into a model's authored drawing. There is no initial annotation import or two-way Sync during this conversion, so those sheet annotations do not automatically appear in SketchUp. Native objects can remain outside the managed drawing. Normal authored Sync is available for content deliberately placed in the managed authored drawing; it does not infer ownership of unrelated sheet annotations.
On macOS, conversion transfers native linear-dimension, label and ordinary path connections to the replacement viewports, including dimensions with only one connected endpoint. It retains their model-space anchors and persistent geometry paths, including nested instances. Dimensions may connect two referenced models, or a model and ordinary sheet geometry. These annotations remain native LayOut objects; restoring their connections does not import them into SketchUp. Saved-file verification checks the original annotation targets and model IDs as well as appearance. When updating an older embedded model, persistent geometry attachments follow the current external geometry and connected measurements are recalculated. Unconnected sheet objects retain their placement. Existing custom AutoText definitions retain their line breaks and tabs.
After editing a converted SKP, refresh its model reference in LayOut and review the connected annotations. Persistent vertex attachments can follow geometry changes without being reconnected manually. Deleting or recreating the target geometry can invalidate its persistent ID; an apparently similar replacement is not automatically the same target. Refreshing a model reference is separate from regenerating supplemental Skalp lineweights and rearview geometry.
LayOut migration limits
If an affected connection cannot be reconstructed and verified safely, conversion stops and retains the original files. Inaccessible locked annotations or missing target geometry can require correction in the original document before retrying. Review the report rather than accepting a disconnected copy. Locked, shared or unsupported placements are reported explicitly. A result with skipped viewports says Some viewports were not converted. See the report for details. On macOS, saved tag and tag-folder visibility, tag pen colors, widths and dash patterns are retained per viewport. Polygon, ellipse and closed curve clipping masks are retained and also clip the supplemental Skalp geometry. These placement settings do not change other viewports of the same scene. Other style/effect overrides that cannot be transferred and nested section-plane calculations can still stop the job safely. The Windows backend currently refuses custom clipping masks, tag overrides and partially connected dimensions; native Windows acceptance is still pending. Originals remain available for correction and retry.
Automated macOS SDK tests cover multiple sources, mixed legacy/converted models, saved scene visibility, different scales, native annotation retention and file reopening. Association tests change saved geometry and reload it: a persistent vertex dimension changes from 20 to 40 inches and its label follows a translation, including another save/reopen. These are separate from live visual acceptance of customer documents and Windows acceptance. Opening a result in LayOut can require a fresh viewport render; elapsed conversion time measures the verified saved-file stage.
Scenes, scale and clipping masks
The saved viewport's scene, placed camera, paper position and crop are retained. On macOS this includes native polygon, ellipse and closed curve clipping masks. Tiny scale noise is cleaned: 1:50.000000225 becomes 1:50; deliberate custom decimal scales remain. Native hatch variants use separate SKP copies for distinct placed scales. The copied source keeps its original scene identities. Repeated placements reuse model preparation and calculated plans where their saved scene and scale agree.
The converted document references models at their original paths. Additional SKP variants for other placed scales are stored beside the original source. Later edits use these converted files and the normal Skalp publication and drawing synchronization commands. Do not convert an existing managed Skalp drawing again. Keep the backup folder separate from normal editing.
If conversion fails during replacement, Skalp restores files still belonging to that transaction from their backups. It does not overwrite a concurrent external edit during rollback: the manifest then records recovery_required and the affected paths. A machine or process interruption during multi-file replacement also requires checking the retained manifest and backups before reopening the project; replacement across several files is not one filesystem transaction. Do not retry blindly when recovery is required.
Skalp Support
Goal Get a documentation-based answer or send a reviewed problem report.
- Open Skalp Support… from Extensions or the question-mark toolbar button.
- Ask a specific question and read the answer with its source headings.
- If needed, choose Report a problem, add steps/expected/actual behavior and review the draft.
- Choose Send report to submit it and receive a reference number.
Check A report is sent only after your explicit submission. Model files, screenshots and diagnostic logs are not attached by this simple reporting workflow.
Find a task: Ask a question · Portal/guide · Report · Privacy/availability
Ask a documentation question
Choose the first red question-mark button on the Skalp Studio - Main toolbar, or choose Extensions > Skalp Studio > Skalp Support…, to ask a question without leaving SketchUp. The question mark is drawn over a subtle grey Skalp mark. Skalp Support uses this guide, the maintained known-problems document and a separate technical reference packaged with the support service. The technical reference supplies background for AI answers and is not part of the online user guide. It does not search the public web.
What is sent with a support question
The question, interface language, Skalp and SketchUp versions, platform and a random installation identifier are sent to the Skalp support service. The service uses OpenAI to interpret a multilingual question and formulate an answer from the passages it found. It does not send the open model, screenshots, file paths or diagnostic logs. Source headings are shown with the answer. Approved YouTube tutorials may accompany maintained help sources; matching answers show those videos as separate links. Only HTTPS links hosted by YouTube are opened.
Open the guide and client admin console
The question field is at the top of the support workspace, followed by the answer and its sources. Supporting links sit below this workspace as separate buttons, each with an icon before its label. Website opens skalpstudio.com in the default browser. The Product information section at the bottom is initially expanded; click its heading to collapse or reopen it. It shows the Skalp development version, SketchUp version, platform, locally verified licence status and expiry when available, and whether the support service is staging or production. It never shows the licence certificate, activation identifier or entitlement identifier. The update icon beside Check for Updates… runs the same signed manual update check as the command under Extensions > Skalp Studio. While this check runs, the button's update icon rotates and the button cannot be clicked again. It becomes available again when the check finishes, including if there is no update or the connection fails. Release notes expands the installed version’s bundled notes in the Support window; click it again to collapse them. Reading these notes works offline and does not require an available update. This button is implemented for the next build; earlier installed builds may not include it. The fixed [email protected] button opens the user's mail application.
Dragging the lower edge of the question field makes the support window follow the field's vertical size while preserving the current window width. Online user guide opens the rendered English manual, including its screenshots, in the default browser. It uses the same staging or production service as Skalp Support, so maintainers can update the manual without releasing a new RBZ.
Client admin console opens the passwordless licence portal on the same staging or production service as Skalp Support, where customers can view licences and manage computer activations. When this installed computer still has its Skalp device certificate and protected device key, the button signs a fresh request and opens a one-minute, single-use link directly into the portal; no email address or email code is required. This computer shortcut also works after the licence has expired, so the expired access remains visible.
It does not work after that computer has been manually deactivated. If device verification or the network request fails, Skalp opens the ordinary email-code login instead. The certificate, private key and resulting portal session are not put in the link. For an expired or non-renewing commercial licence, the portal shows Renew or buy a licence when the operator has configured the public FastSpring sales URL. This opens the external sales page.
It does not yet guarantee an in-place renewal of the same entitlement; that still requires production entitlement processing and verified webhook reconciliation for the complete subscription lifecycle.
Report a problem
If the answer does not solve the issue, choose Report a problem, review the draft, and enter the reproduction steps, expected behavior and actual behavior. The report is sent only when you explicitly choose Send report and returns a reference number. This simple report still does not attach a model, screenshot or diagnostic log.
Share a calculation error
From 27.0.016, a Calculation problem window appears when a section or rearview calculation fails. This window is not included in 27.0.015. It shows a stable error code and offers Copy details. Paste those details into your reviewed Support report or an email to [email protected], together with the action that failed. Copying does not send anything. The report includes the failure stage, available native process status and Skalp/SketchUp/runtime versions; it excludes model contents, model paths and licence credentials. Repeated occurrences of the same failure do not repeatedly open the window; a new failure after a successful calculation can be reported again.
SKALP-PREVIEW-AUTH identifies a worker authorization failure;
SKALP-PREVIEW-READ identifies saved-model preparation failure; and
SKALP-PREVIEW-CALC identifies another calculation failure. These codes do not
mean the model is damaged. Displayed-host acceptance of the new window is pending.
On affected macOS 27.0.015 installations, missing lineweights/rearview and a disappearing preview status light can accompany a protected worker authorization failure. That build may log only Could not read the saved SKP. Ask Support to diagnose the installed worker before repairing the model or reinstalling. The officially processed 27.0.016 packages include a correction for this authorization boundary; confirmation on the originally affected Mac remains pending. Do not delete licence data or change Keychain access permissions to bypass it.
Support privacy and availability
Internet access and a deployed Skalp Support service are required for formulated answers and report submission. Monthly and per-installation limits control operating cost. When the AI allowance or provider is unavailable, the service can return the best matching documentation passage directly. The support service is verified on the isolated Skalp staging API with the online knowledge sources and a formulated test answer. Its isolated production service, certificate validation and public readiness route are deployed, but live SketchUp 2027 acceptance and the complete production purchase, mail and activation chain remain pending. The extension sends an existing Skalp device certificate when one is available, and production support requires and validates it.
Troubleshooting and current limits
Goal Find the first useful check for the symptom you see.
Try the checks below and retry the affected action. If the problem persists, use Skalp Support… with reproduction steps, expected behavior and actual behavior. Do not recreate assignments or buy another licence to bypass an unexplained error.
Find a problem: Licensing · Scenes/preview · Materials · Drawing/crop · LayOut/CAD · Current limits
Licensing and installation problems
| Symptom | What to check |
|---|---|
| Renewal is offered after reinstalling | Skalp recognized an expired commercial licence. Choose Renew license; do not buy a second licence to repair this installation. |
| A protected command opens Skalp Studio - License | Accept the current Licence agreement, activate or request a trial, review What's new, choose Continue and retry the command. |
| Agreement acceptance cannot be confirmed | Check your internet connection and use the matching package. Initial agreement acceptance requires service access even when a device certificate is still valid. Closing the window or a failed request does not accept it. |
| A requested trial email does not arrive | Check the address and spam folder. The service sends no new trial code when the address or computer has already used a trial. Contact support after an identity or hardware change. |
| The licensing component is unavailable or package validation fails | Save work, reinstall the complete matching package and restart SketchUp. Contact support with the exact message if it persists; do not disable verification. |
Scene and preview problems
| Symptom | What to check |
|---|---|
| Clicking a Manager row does not change the view | Single-click inspects; double-click or Enter activates. Section and scene buttons perform their separate actions. |
| Rearview is enabled but no rear lines appear | Check the active drawing's Rearview setting, Tags > Rearview geometry, exclusions, the Display toolbar's Show rearview lines and SketchUp's section-cut display. Wait for calculation to finish. Ready means no calculation is running, not that every expected line must exist. |
| Depth Clipping appears inactive | Activate a main section and use Align Section View. Native fade requires a matching parallel view. |
| Preview stops after deleting a section or clipbox plane | Undo the deletion or activate another valid section/clipbox. A drawing cannot use a deleted required plane. |
| Clipbox creation takes time | Wait for the highlighted box and instruction to drag a face. Detailed models can take several seconds. Esc finishes bounds adjustment. |
See update display and editing inside a group for expected transitions. Persistent errors after model switching or deletion should be reported with their steps.
Material and hatch problems
| Symptom | What to check |
|---|---|
| Appearance differs at another scale | Check drawing scale, the representation range and Model/Paper pattern sizing. |
| Surface fills or hatches are missing | Check the face side and effective assignment, then the drawing's Appearance > Surface Materials switches and the independent Display toolbar switches. None is a fill-only pattern. |
| Editing a library does not change the model | Edit its independent copy under In Model; library edits do not update existing model copies. |
| A cut has no fill or hatch | Check the active section, material assignment and cut-face orientation. For procedural objects in the next development build, also keep the Skalp section preview active. Automatic repair supports only the documented closed-shell cases. |
| A material definition is missing | Recover its definition from a saved library or model backup. An assignment name alone cannot reconstruct it. |
See assignment precedence, Surface Hatch positioning and scrapbook compatibility for the supported workflows. Unexpected clipping, distorted insulation or a frozen positioning tool should be reported; these are not expected consequences of normal editing.
Drawing and crop problems
| Symptom | What to check |
|---|---|
| Crop or annotations disappear when orbiting | Return to the saved orthographic direction and up orientation. Pan and zoom preserve that orientation. Check the relevant Display switch. |
| Drawing tools are unavailable | Activate a supported saved scene with a model-level section, create its clipping mask and enter 2D Drawing Mode. Restore a moved section to its saved pose before continuing. |
| An indication is missing | Check the host's indication visibility, source checklist, eligible source plan, perpendicularity and intersection with the inner crop. |
| Clicking an indication does nothing | Activate Go to Section; ordinary Select does not navigate indications. |
| Auto Dimension creates no chain | Wait for drawing preparation, check Line source, cross the required visible lines, then move perpendicular to the crossing segment and click the offset position. |
| A dimension is outdated | Skalp-authored dimensions follow valid model-edge links. Free points and authored-stroke snaps have no model link. Select the dimension and reattach unresolved red handles to the intended geometry. Imported native LayOut dimensions are edited in LayOut; they do not bind automatically to SketchUp edges. |
See dimension links and editing dimension chains.
LayOut and CAD problems
| Symptom | What to check |
|---|---|
| A scene cannot publish | Save the source model and required scene properties; define a clipping mask for a plan. |
| Send to LayOut cannot find a destination | Open and save the destination, activate its page and an unlocked non-shared layer. Use matching components and restart LayOut after installation. |
| The LayOut palette is absent | Close LayOut, start SketchUp once to install its bundled companion, then reopen LayOut. On macOS, alpha/beta update groups can install 27.0.018; see missing palette after a working transfer. If Send to LayOut also fails, see macOS bridge startup. Reinstall the complete matching package if necessary. |
| Windows reports validation is pending | Install the complete matching Windows RBZ and restart SketchUp and LayOut so both integrations match. Current Send/Sync uses the supplied runtime by default; older or incomplete companions can still report this message. Unsupported legacy conversion remains unavailable. See supported platforms. |
| A drawing stays unchanged after another Send | Send adds a placement. Use Sync Active LayOut to refresh existing placements. |
| Sync reports a conflict or unsupported content | Review the reported objects and choose explicitly. Preserve unsupported content before restructuring a drawing. |
| Done cannot complete | Read the reported reason. Keep recoverable work and the saved session; finish or cancel the session before other publication actions. See Draw limits. |
| CAD rejects a scene | Use parallel projection and supported model-level section planes. Clipbox drawings and group/component-scoped cuts are unsupported. An ordinary scene's model-level plane can remain eligible inside Skalp's temporary clipbox wrapper. |
| Perspective scale and image size differ | Appearance > Scale controls hatch detail and line weights; Drawing area > Image width/height sets the published image. Perspective has no uniform paper scale. |
| Conversion cannot finish | Read Show report, retain the verified backups and inspect source/scene identities or unsupported relationships. Do not repeatedly convert an already edited result. See legacy LayOut conversion. |
| A source was moved or saved under another name | Source identities and section frames participate in synchronization. Moving the LayOut document retains its embedded data; moving the original SKP is a separate, incomplete reconnection workflow. |
Current platform and workflow limits
The first release is still in preparation. Source implementation and automated coverage do not establish installed-package or complete host acceptance. The following limits remain relevant:
- Windows: Send/Sync is enabled by default with the matching companion and the ordinary installed workflow has passed. Broader palette, scrapbook, annotation-variant and conversion checks remain separate. Legacy document conversion is disabled. This is not a fully verified Windows release.
- Interaction and rendering: Broader real-model checks remain for crop dragging, text/fonts, hatches, fog, snapping, complex line patterns, nested sections and multiple viewports. Large drawings and complex scrapbook pages can still pause; no uniform interaction or displayed-stage performance is guaranteed.
- Synchronization: LayOut updates may need several native Undo steps. Undo does not span both applications. Original-SKP relocation/reconnection is incomplete.
- Dimensions: Skalp model links do not survive as associative SketchUp links in exported CAD or imported native LayOut dimensions. Native drawing regeneration replaces paths and can disconnect dimensions attached to those paths. The Skalp style importer does not support architectural/fractional styles or visible native dimension text leaders.
- Content and formats: General scrapbook compatibility, retained-curve editing, native annotation transfer and CAD presentation have the limits stated in their chapters. AutoCAD visual/XREF acceptance and Windows native/live checks remain pending. Ordinary LayOut printing uses one document-wide paper size; mixed sizes use Skalp's PDF export.
About this manual
This is the canonical English guide, maintained alongside changes to Skalp. The manual change log records revisions.
This is one shared manual for Skalp. All supporting screenshots and videos are created on macOS with English controls. Windows keyboard mappings and relevant feature limits are documented in text within this guide. User-entered names in screenshots are examples. Translated editions reuse the same screenshots and videos; their demonstrated controls retain English labels. The guide documents the current development source, with live-check and platform limits stated where relevant. It is not a release-certification statement.
Full guides in SketchUp's twelve other languages are still pending. See translation status. English remains authoritative.